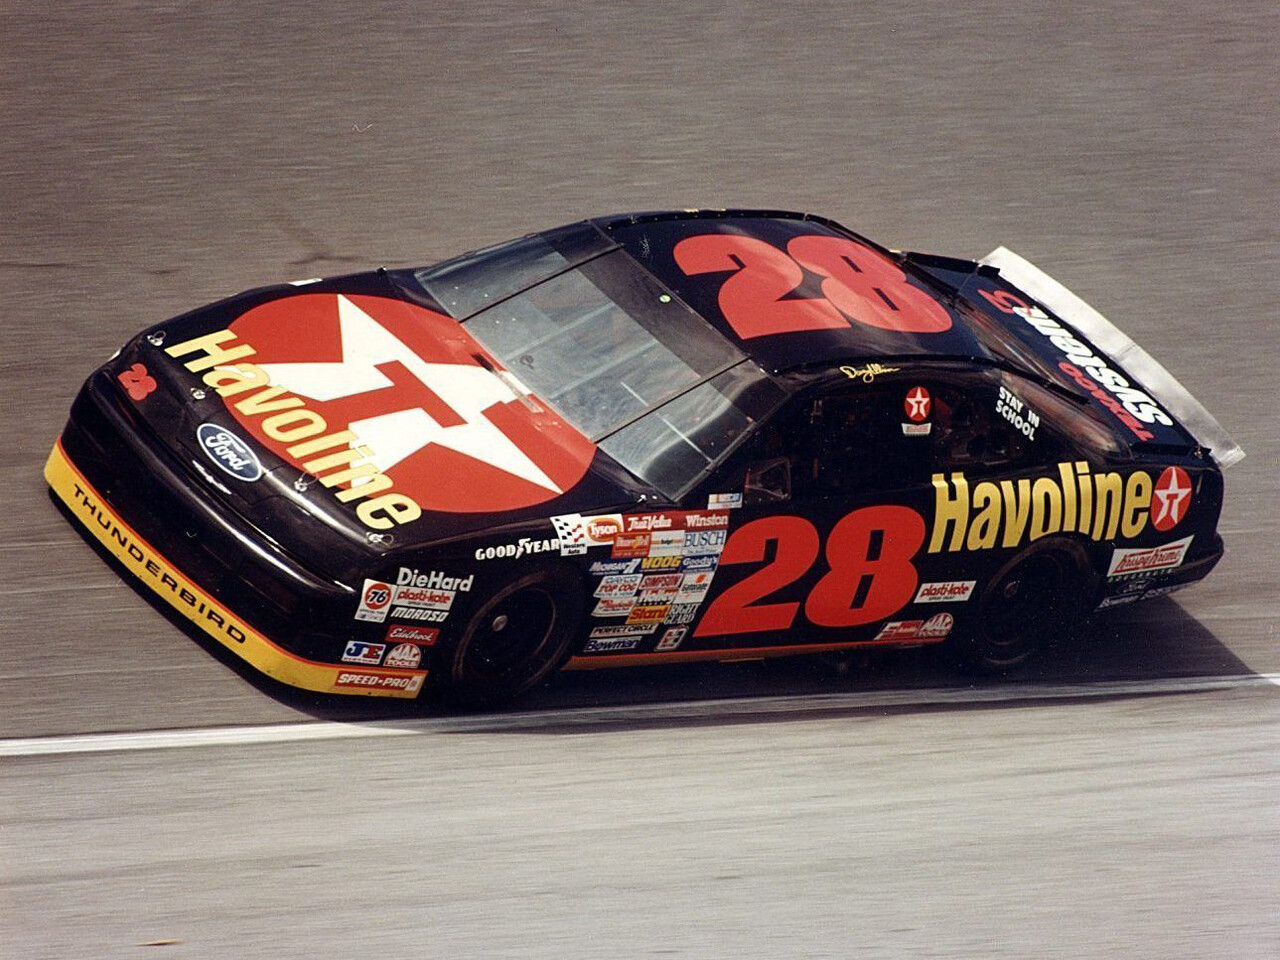
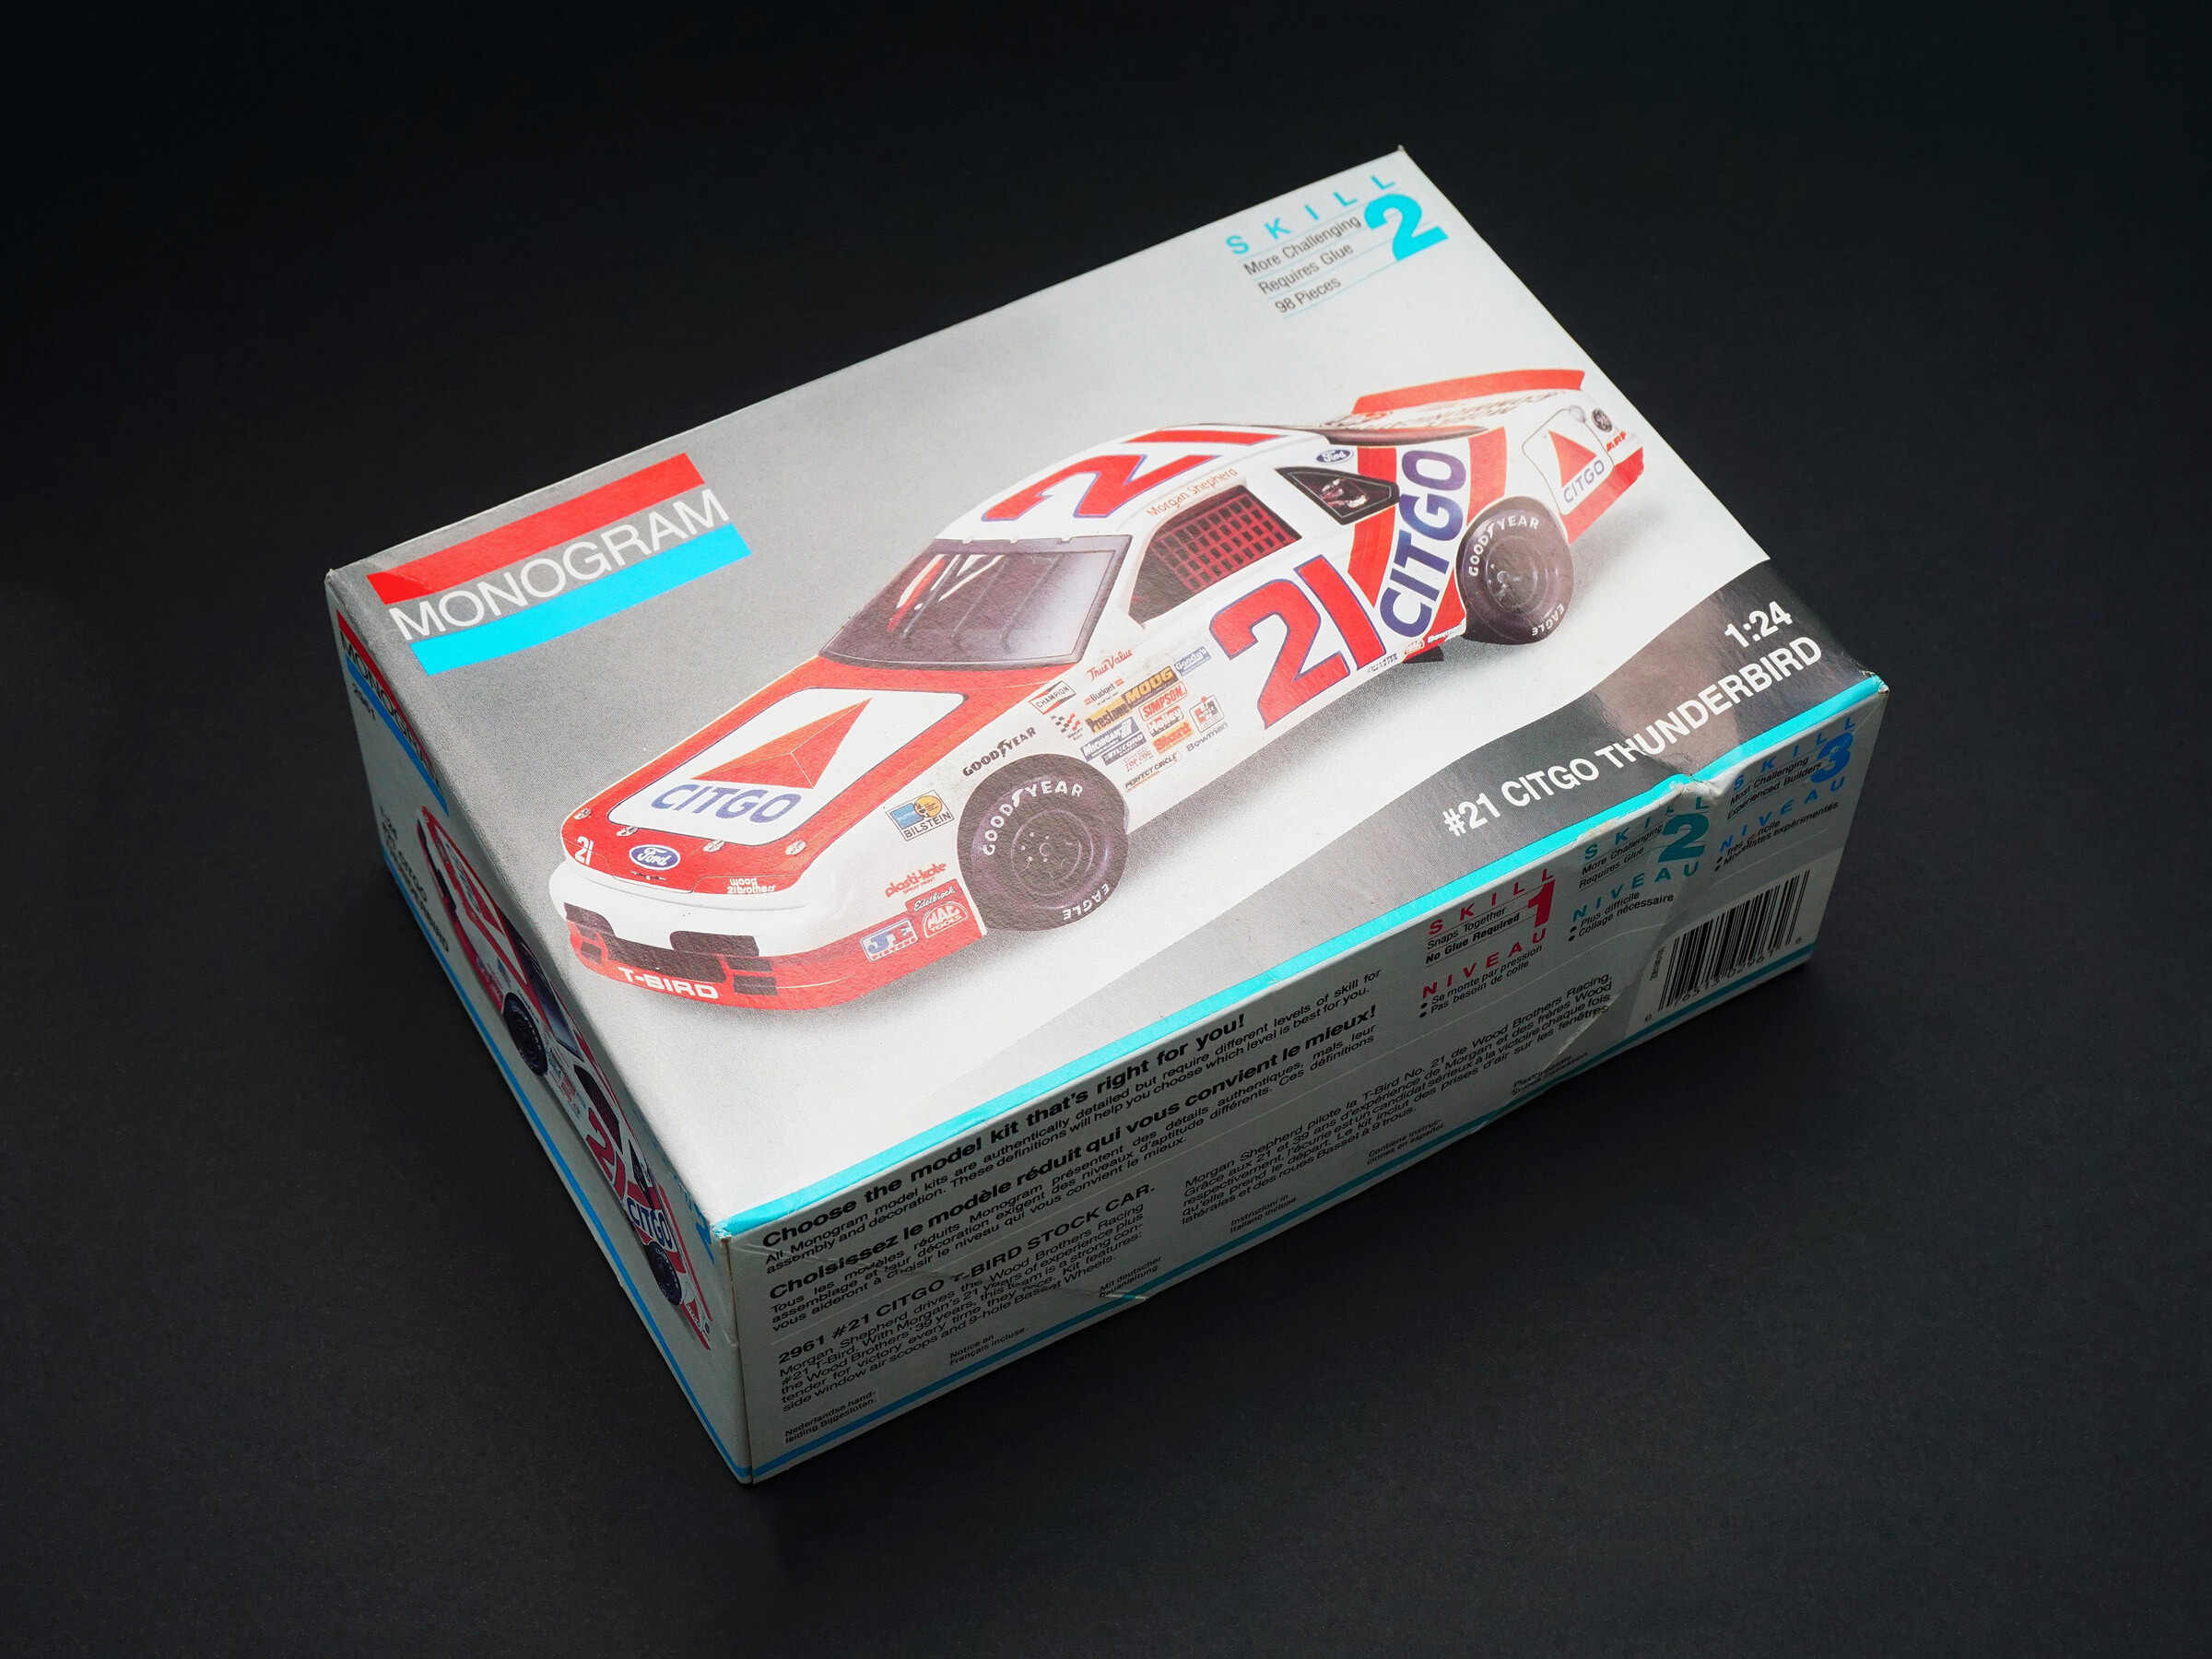
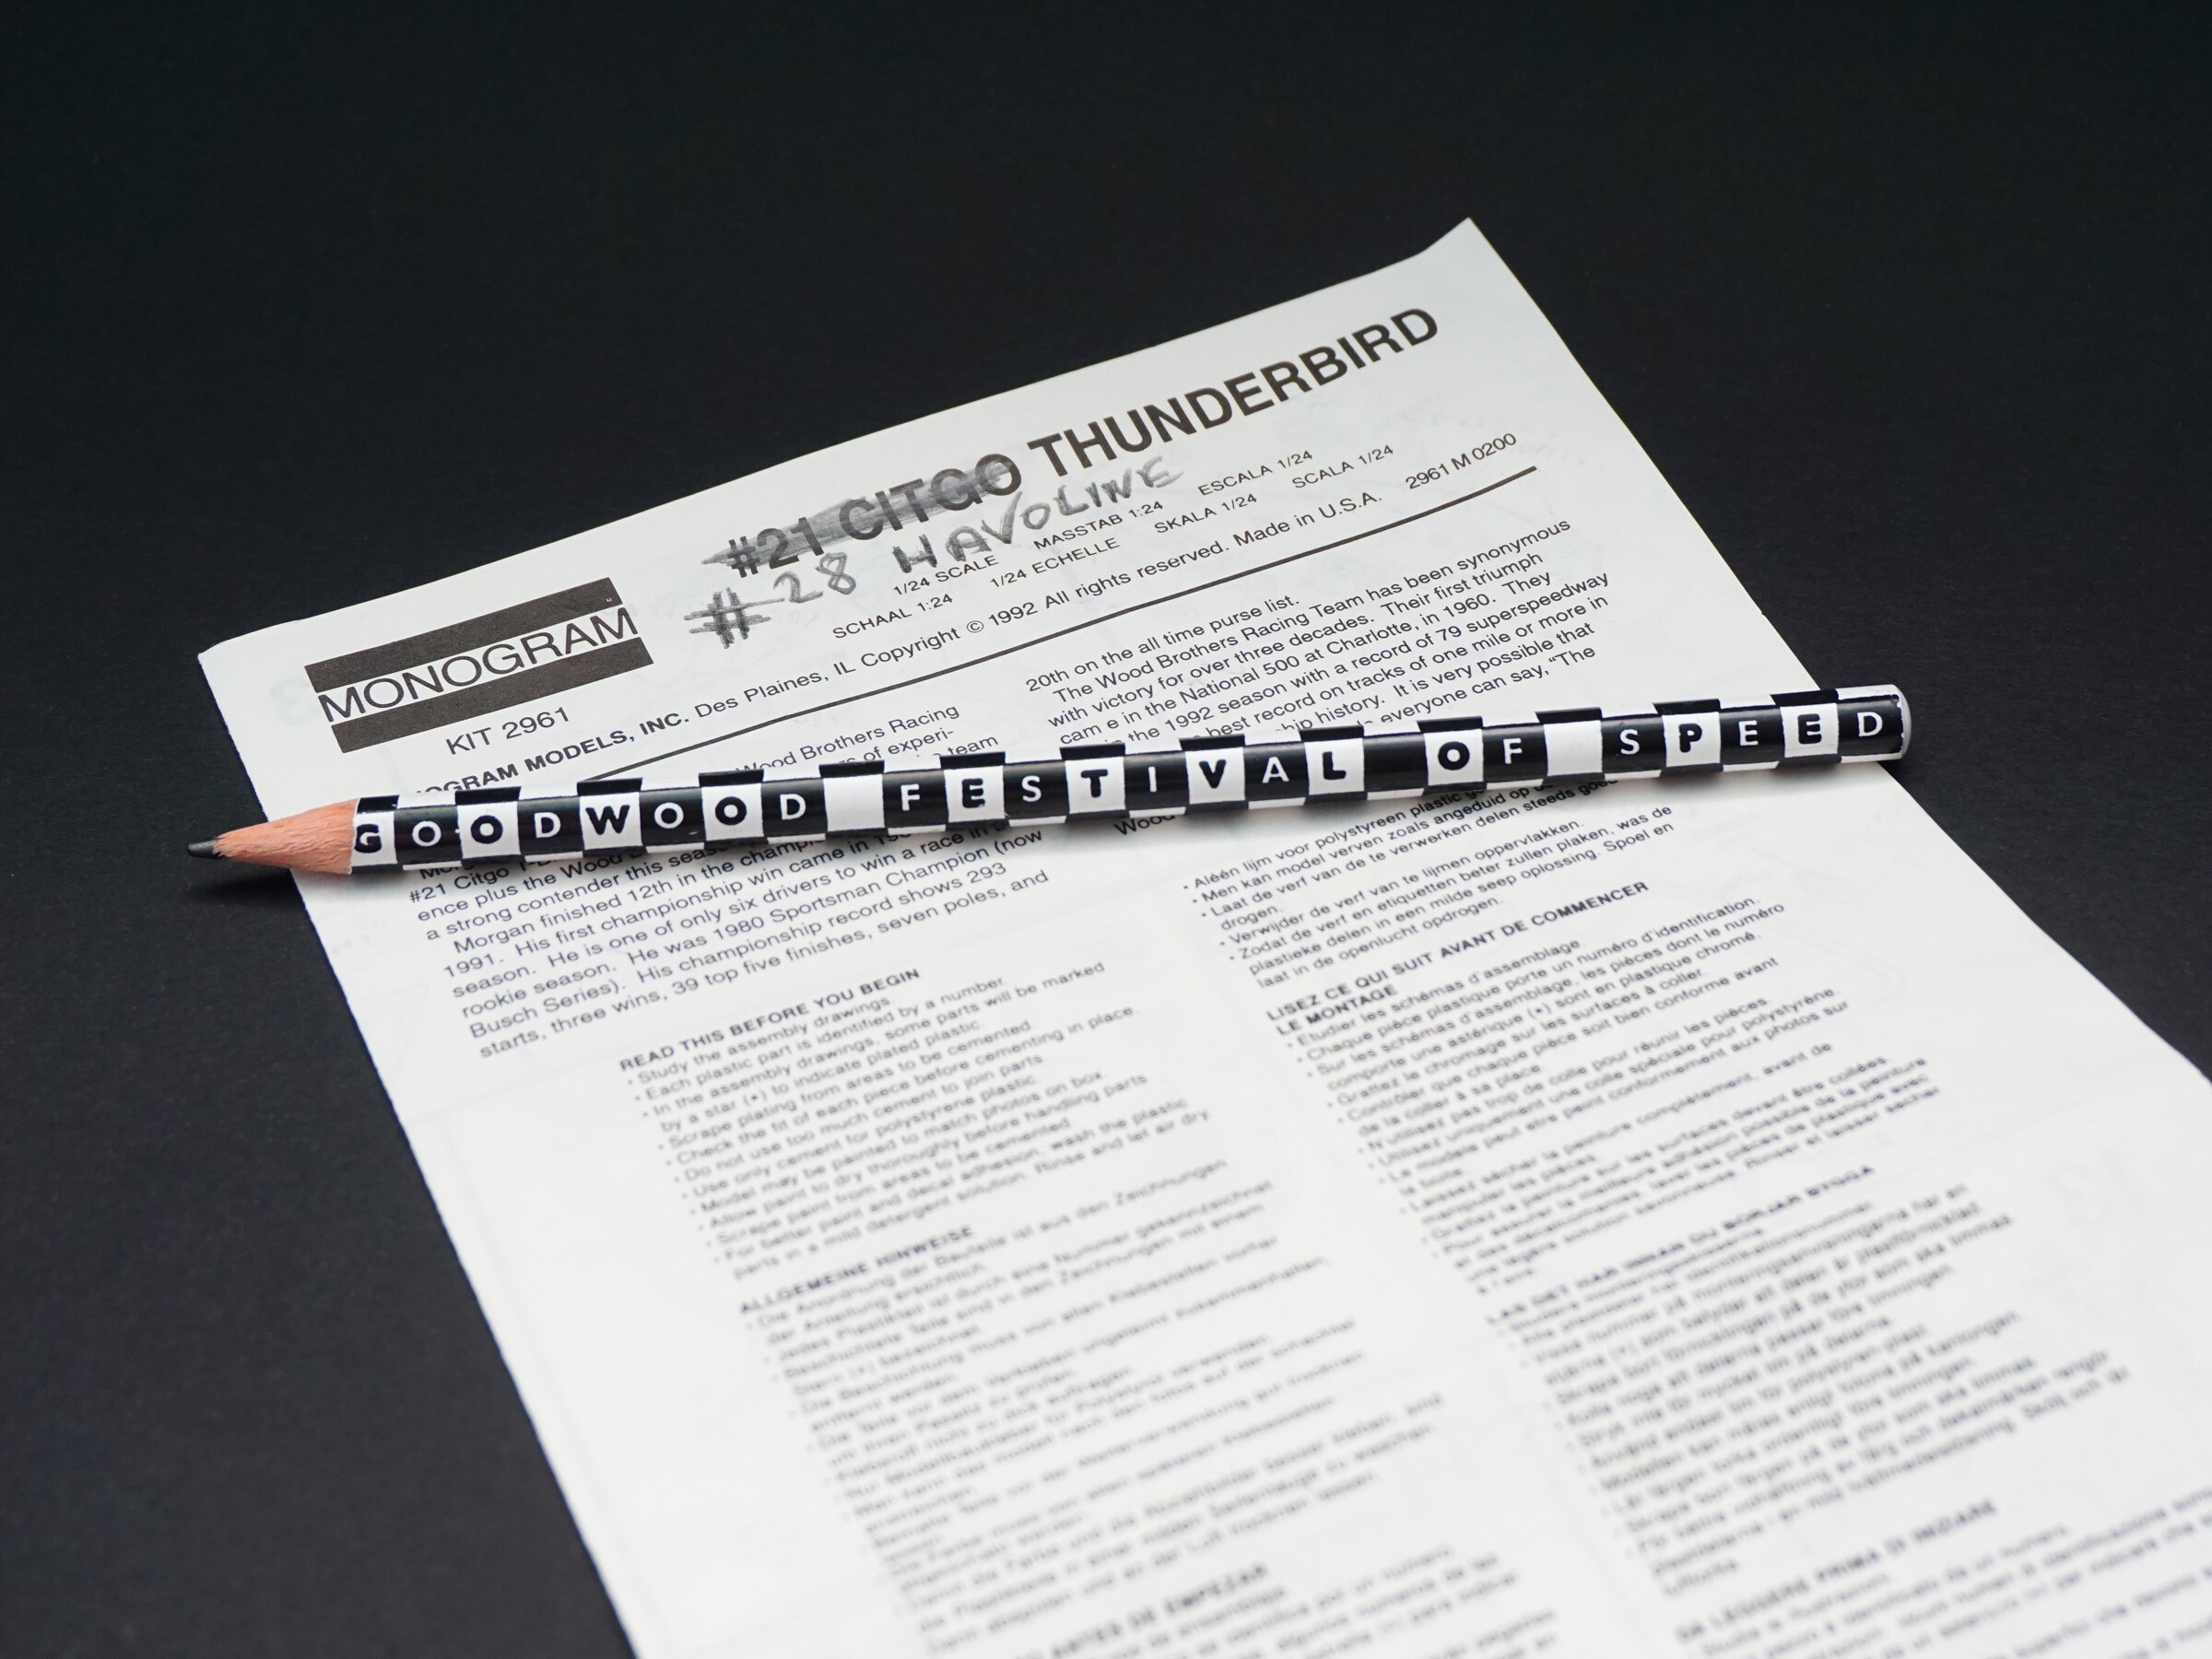
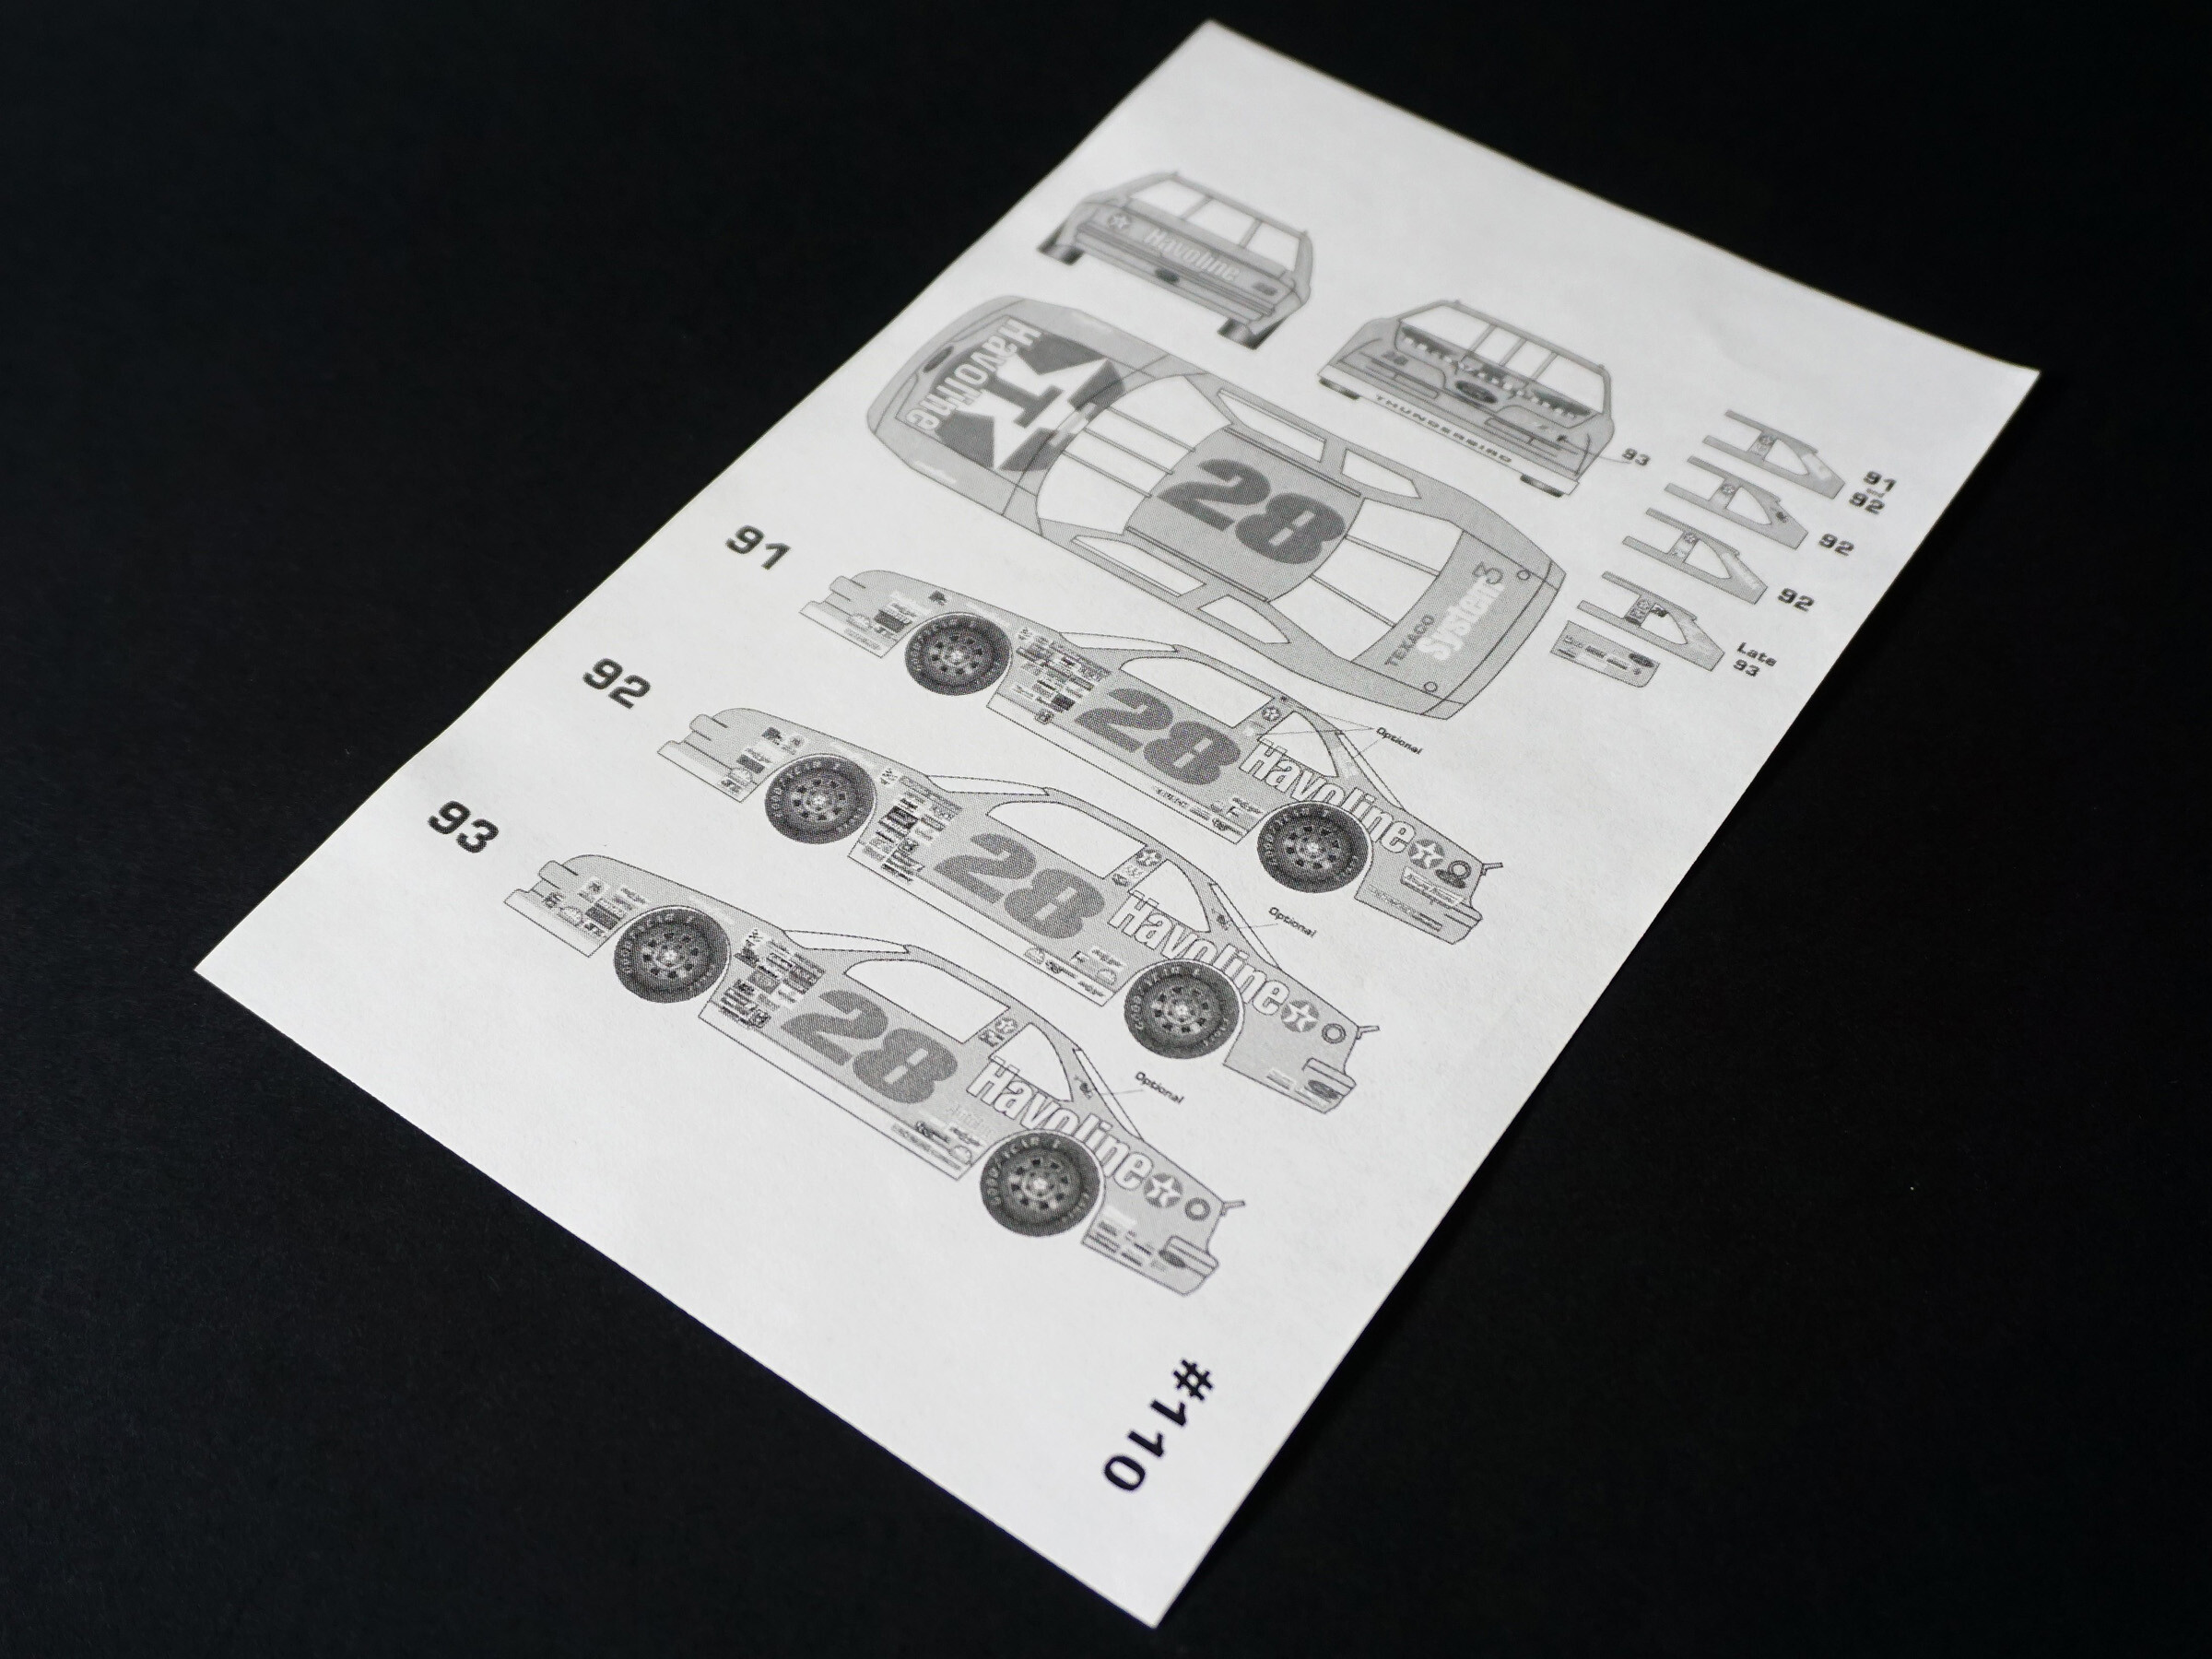
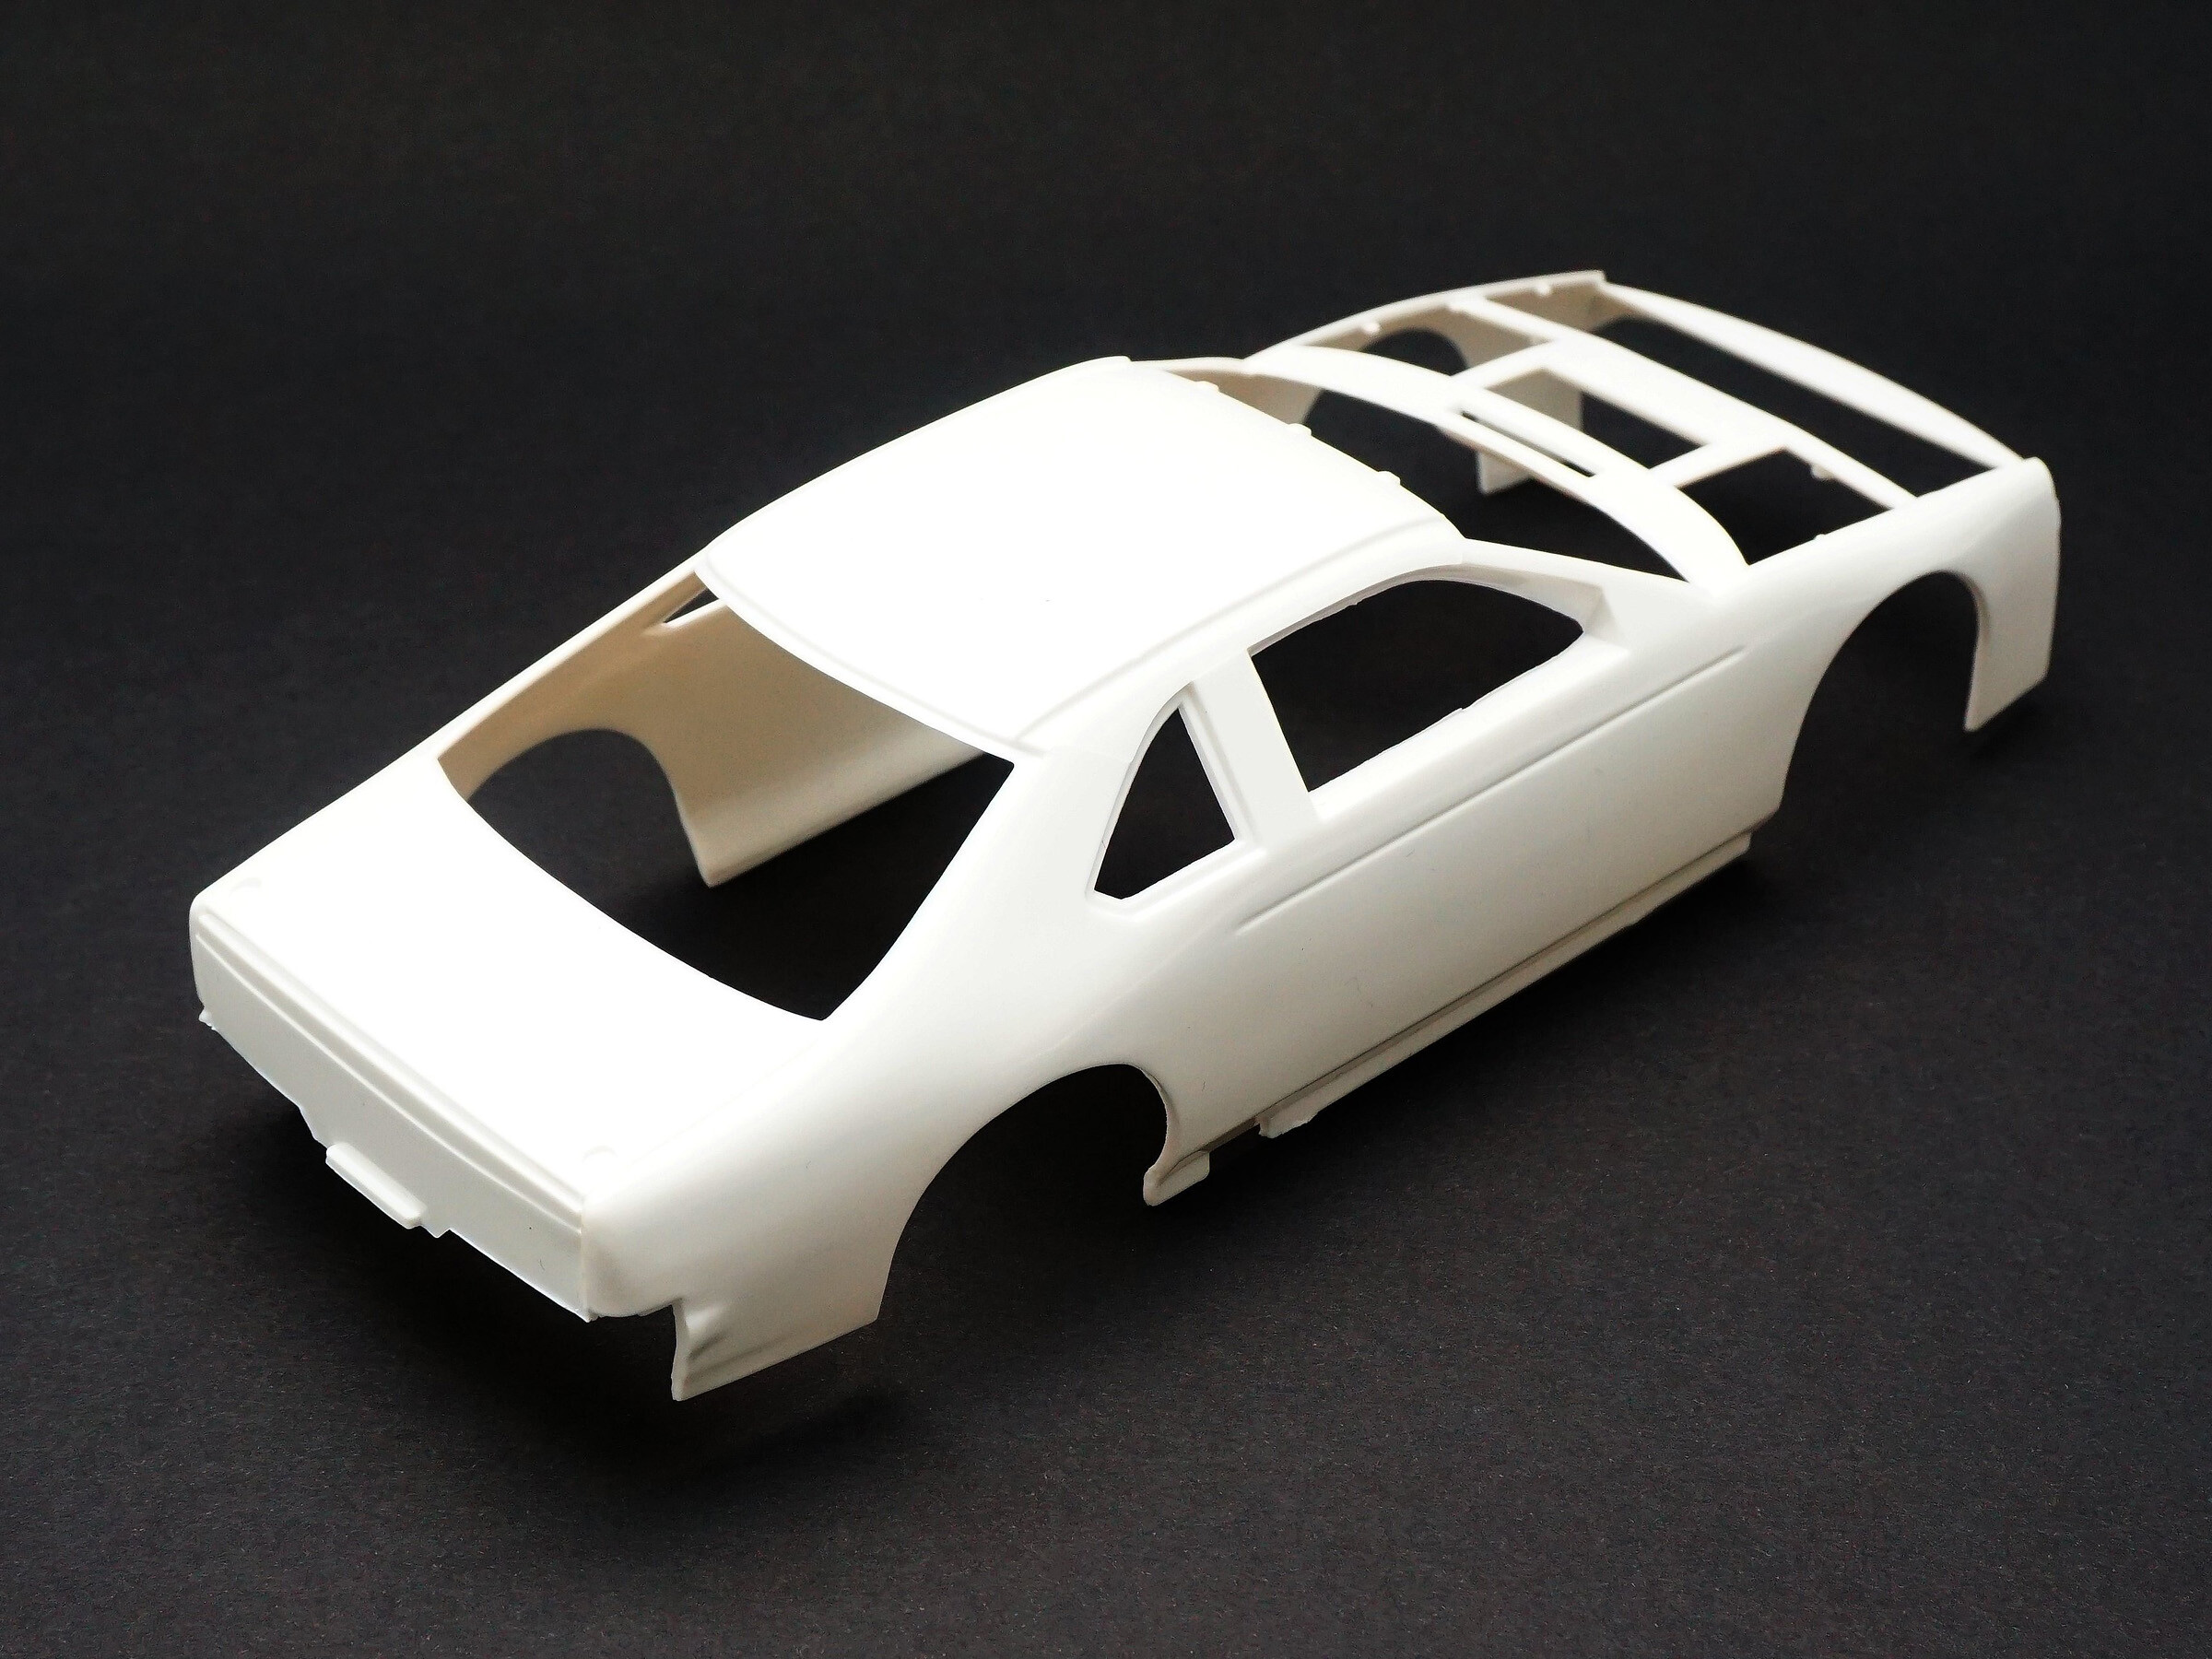
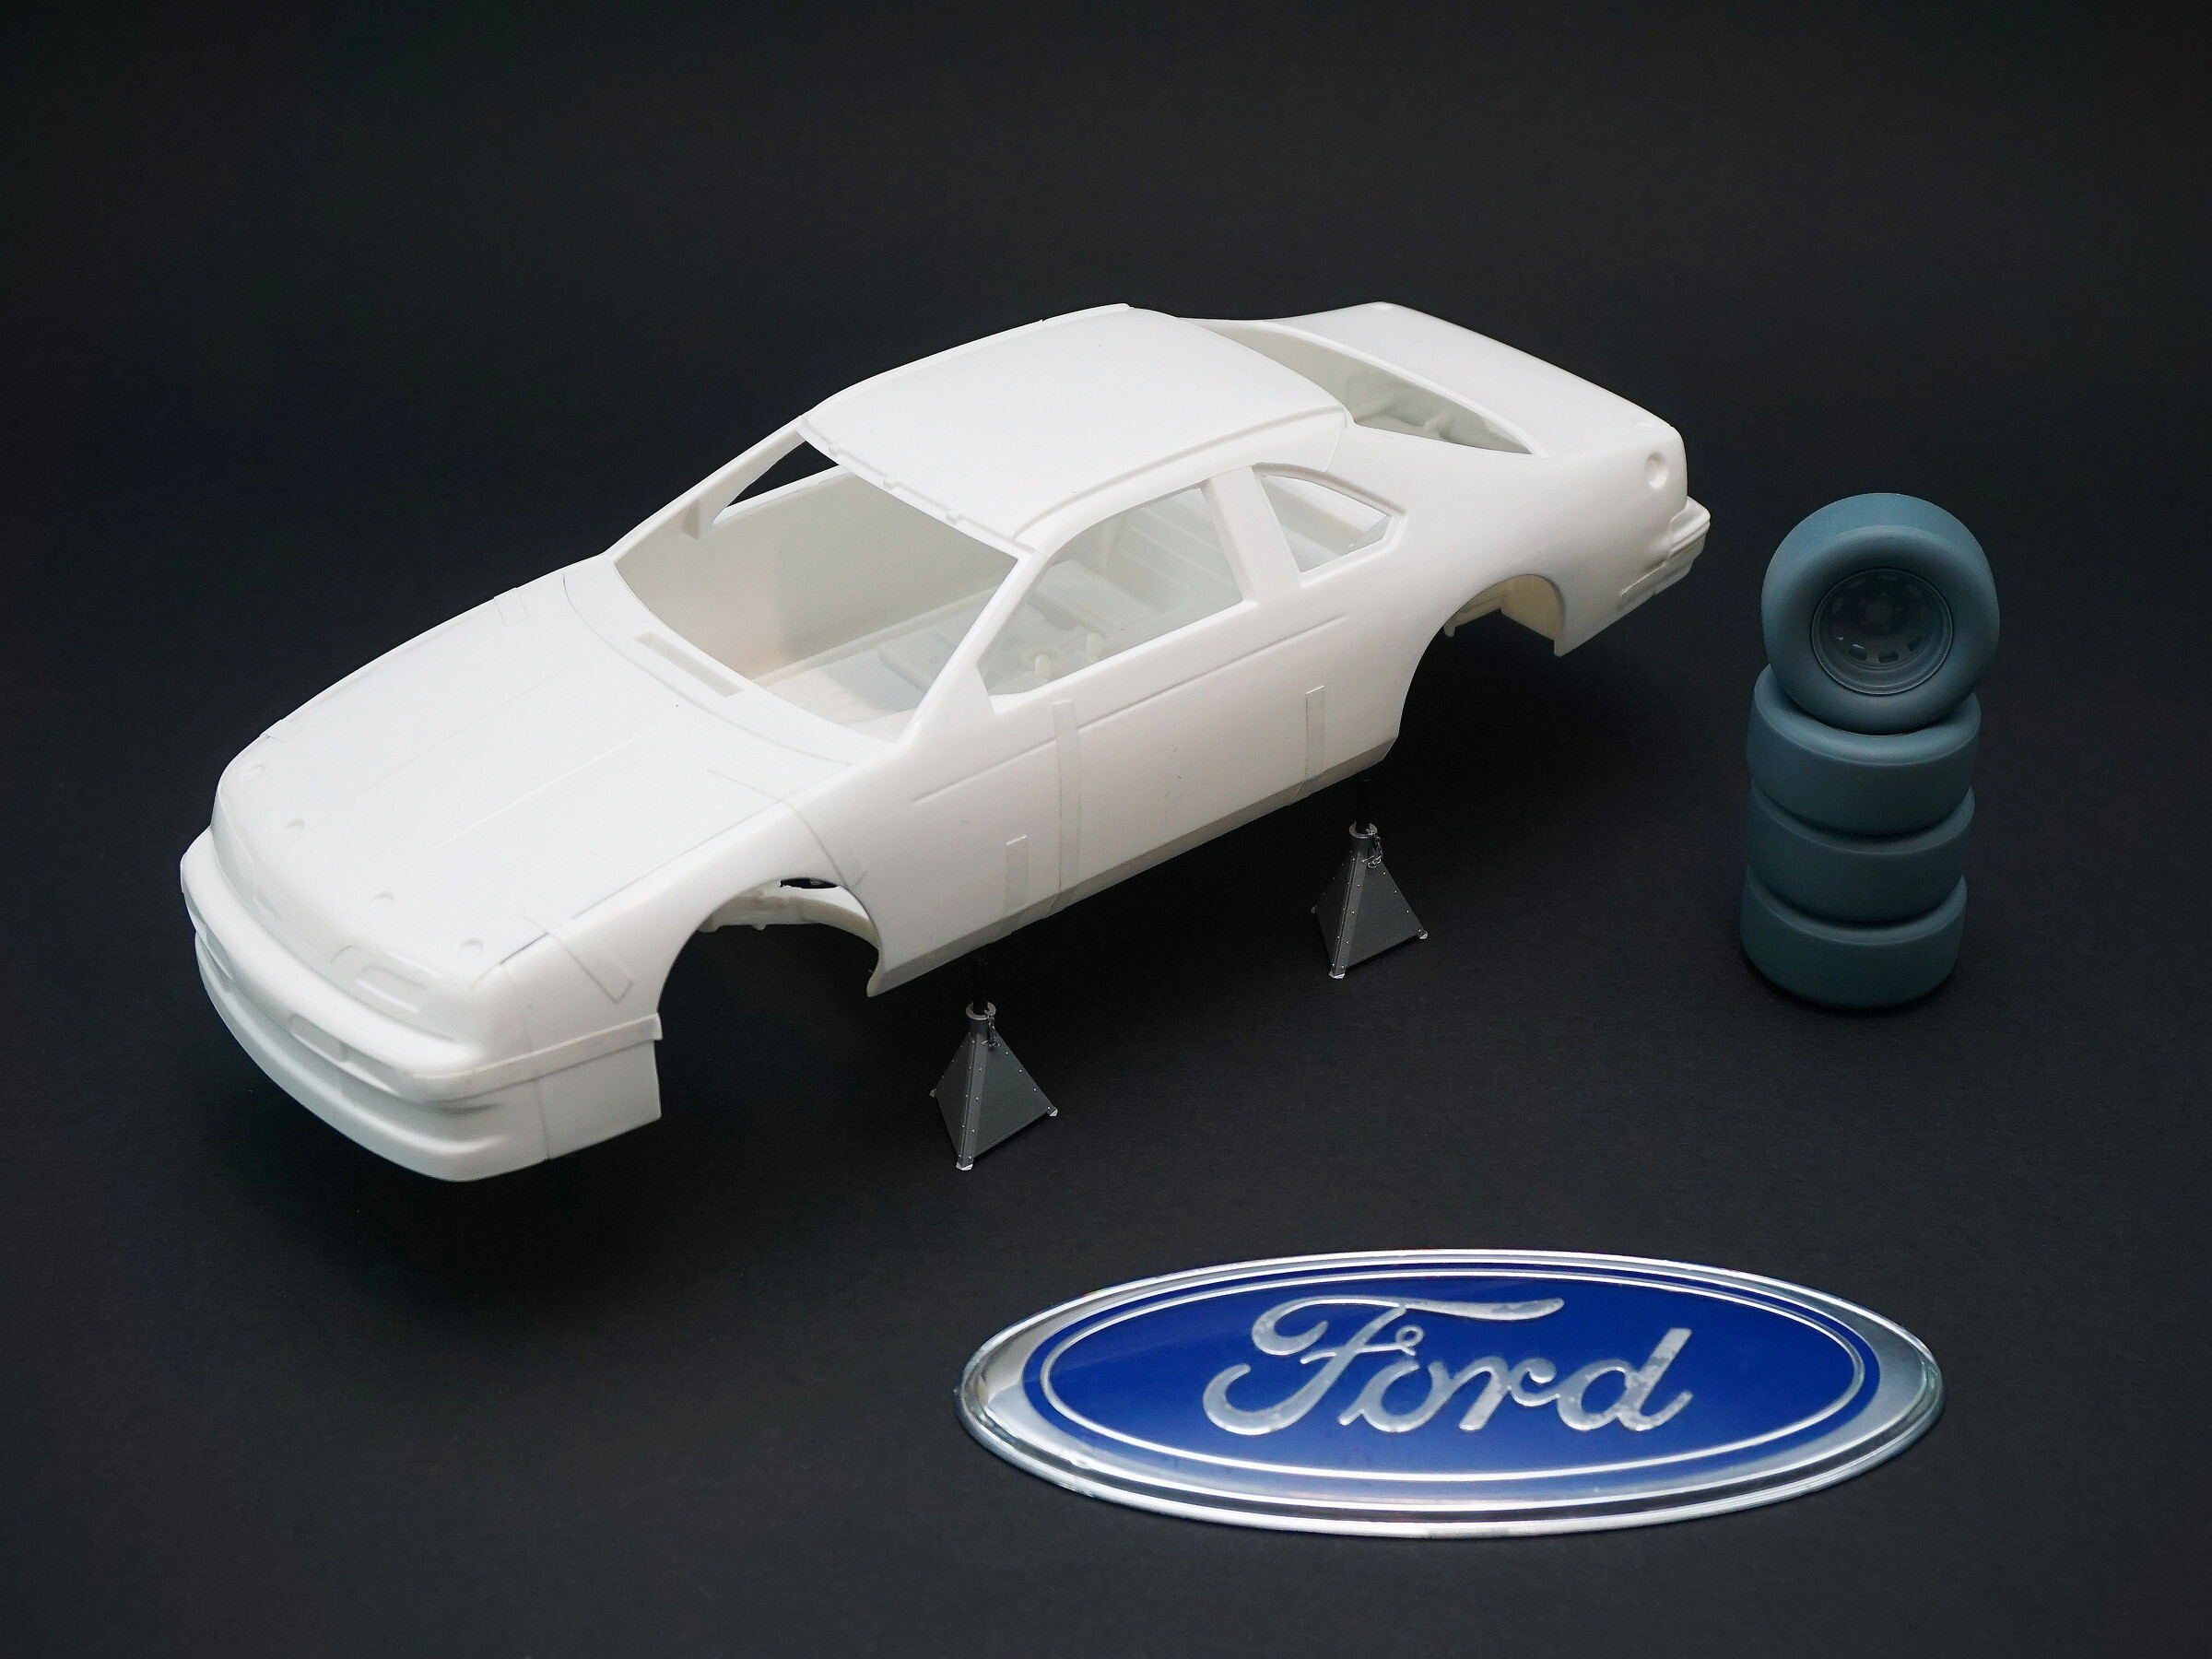
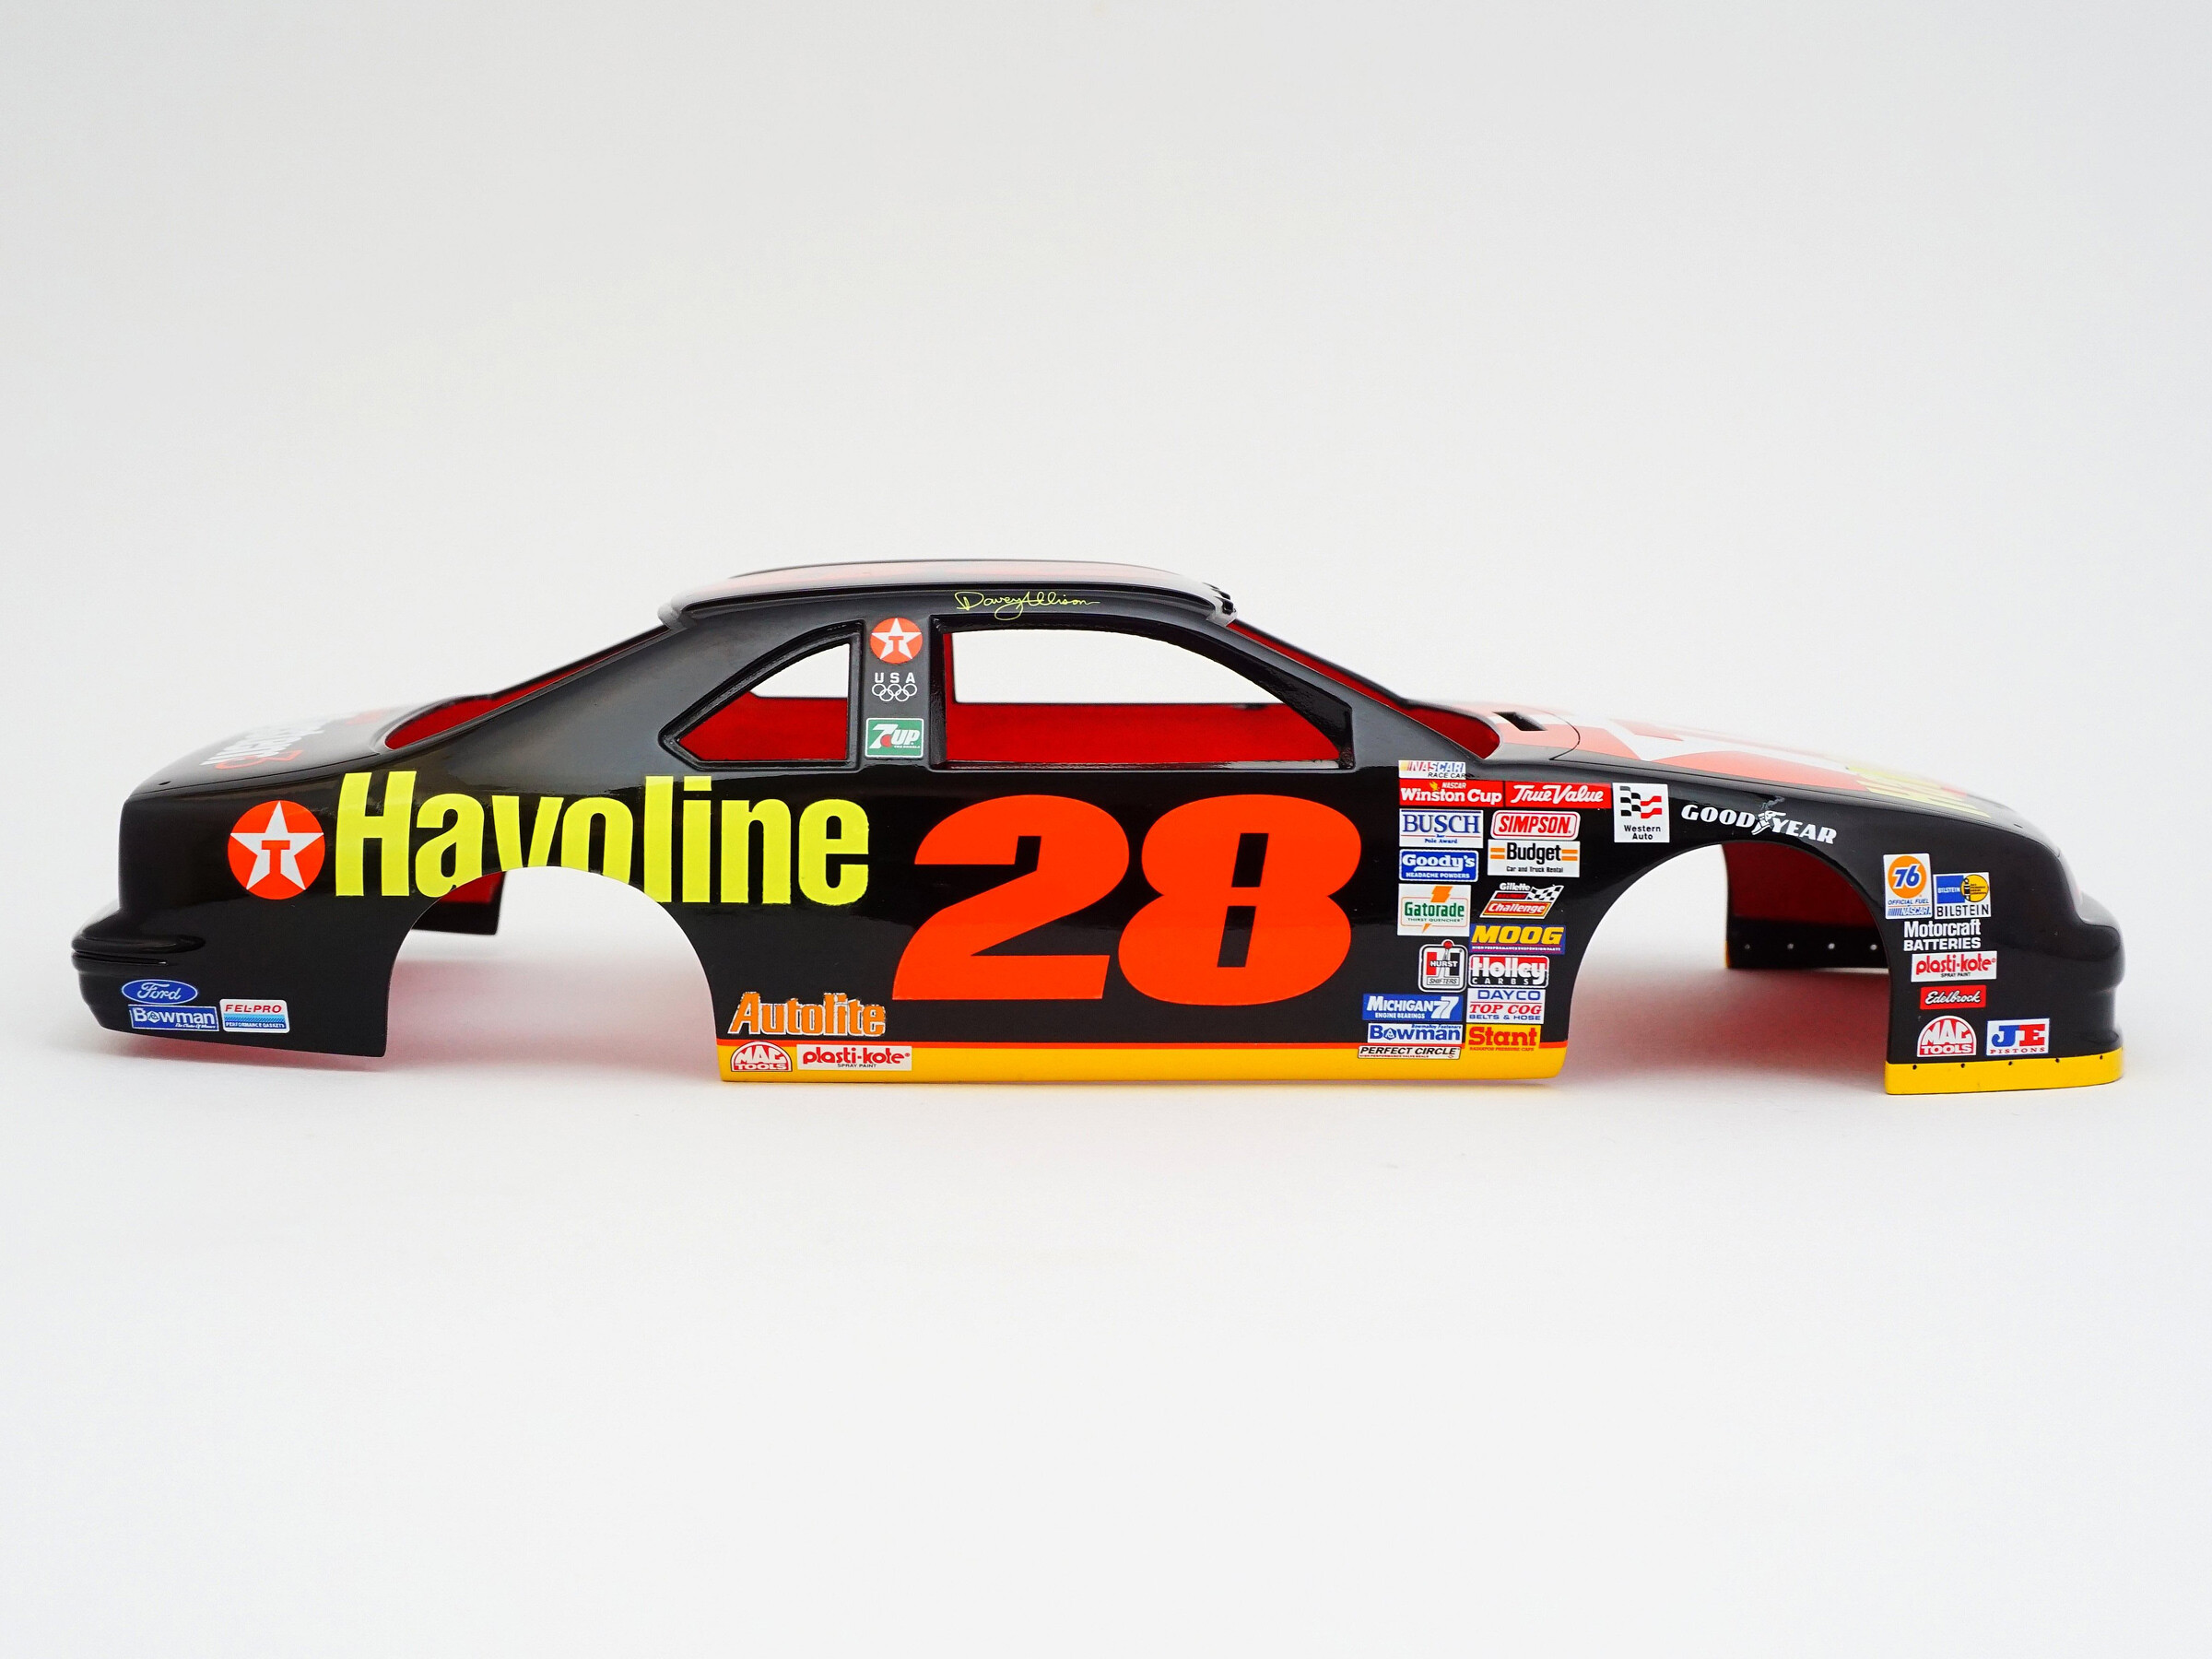
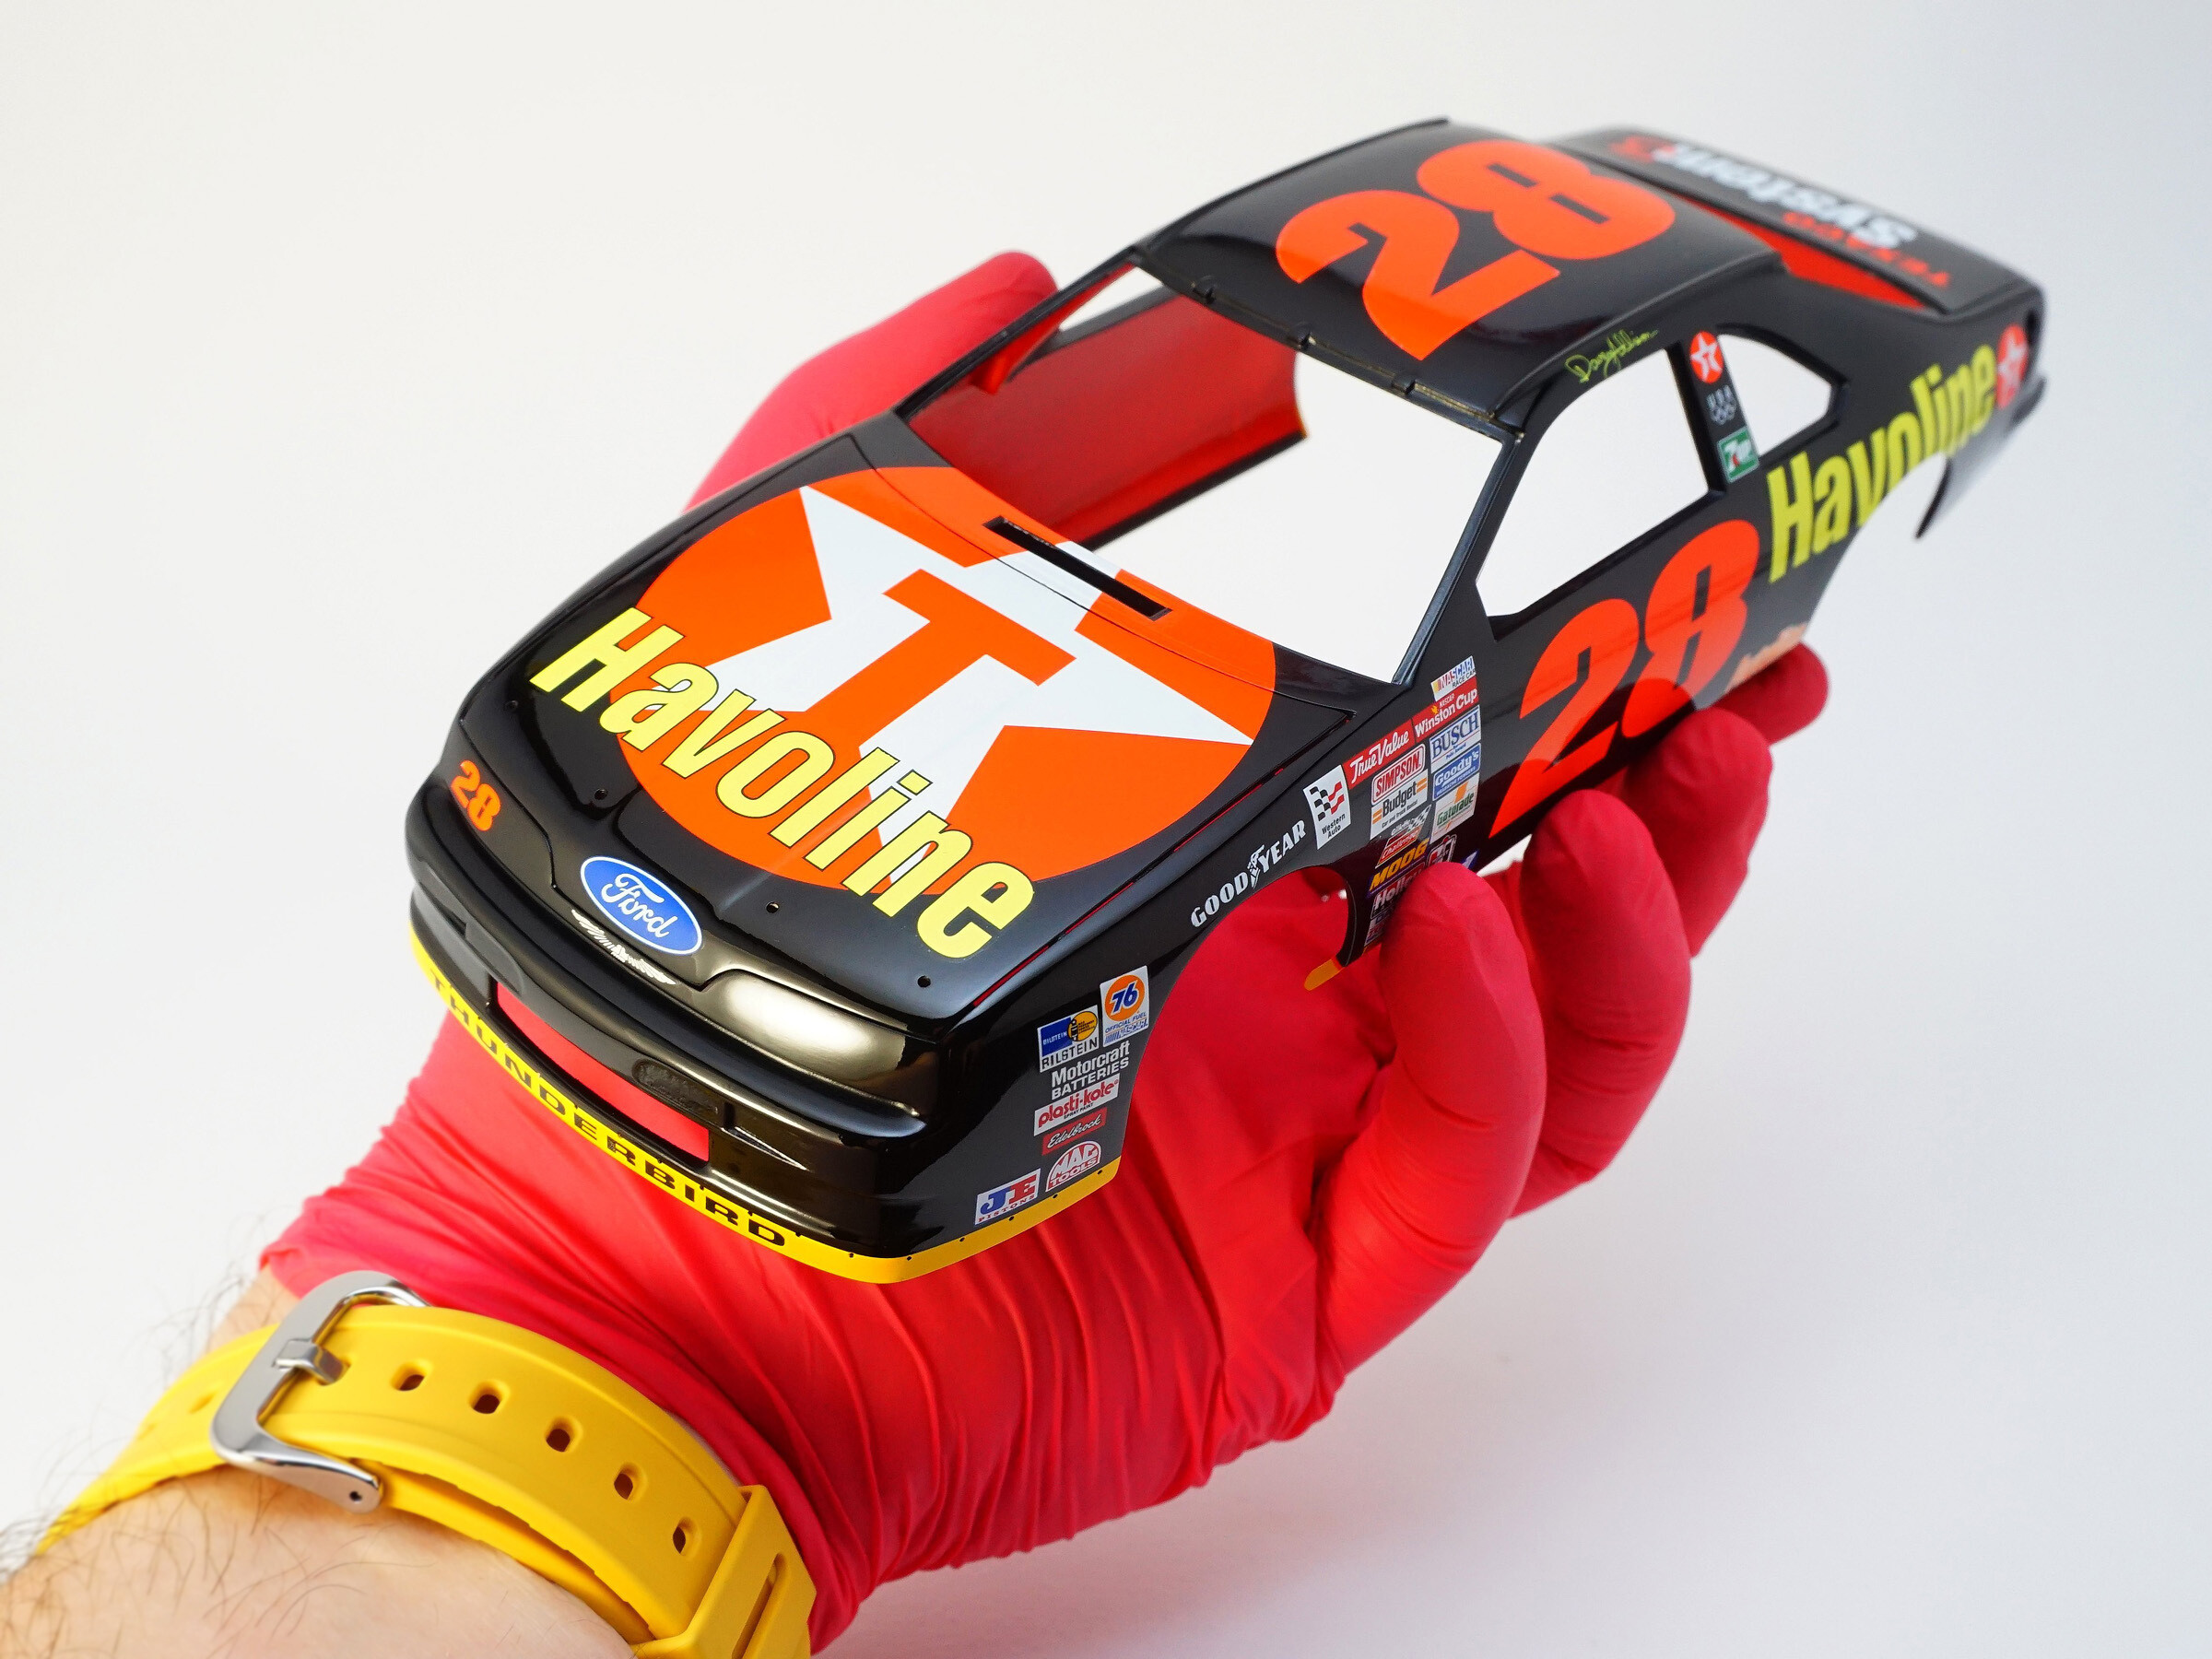
To build this classic, I will use the Monogram 2961 #21 CITGO T-BIRD STOCK CAR model kit, the painting and decals of which will be changed. I will use Powerslide decals printed by Italian Cartograf.
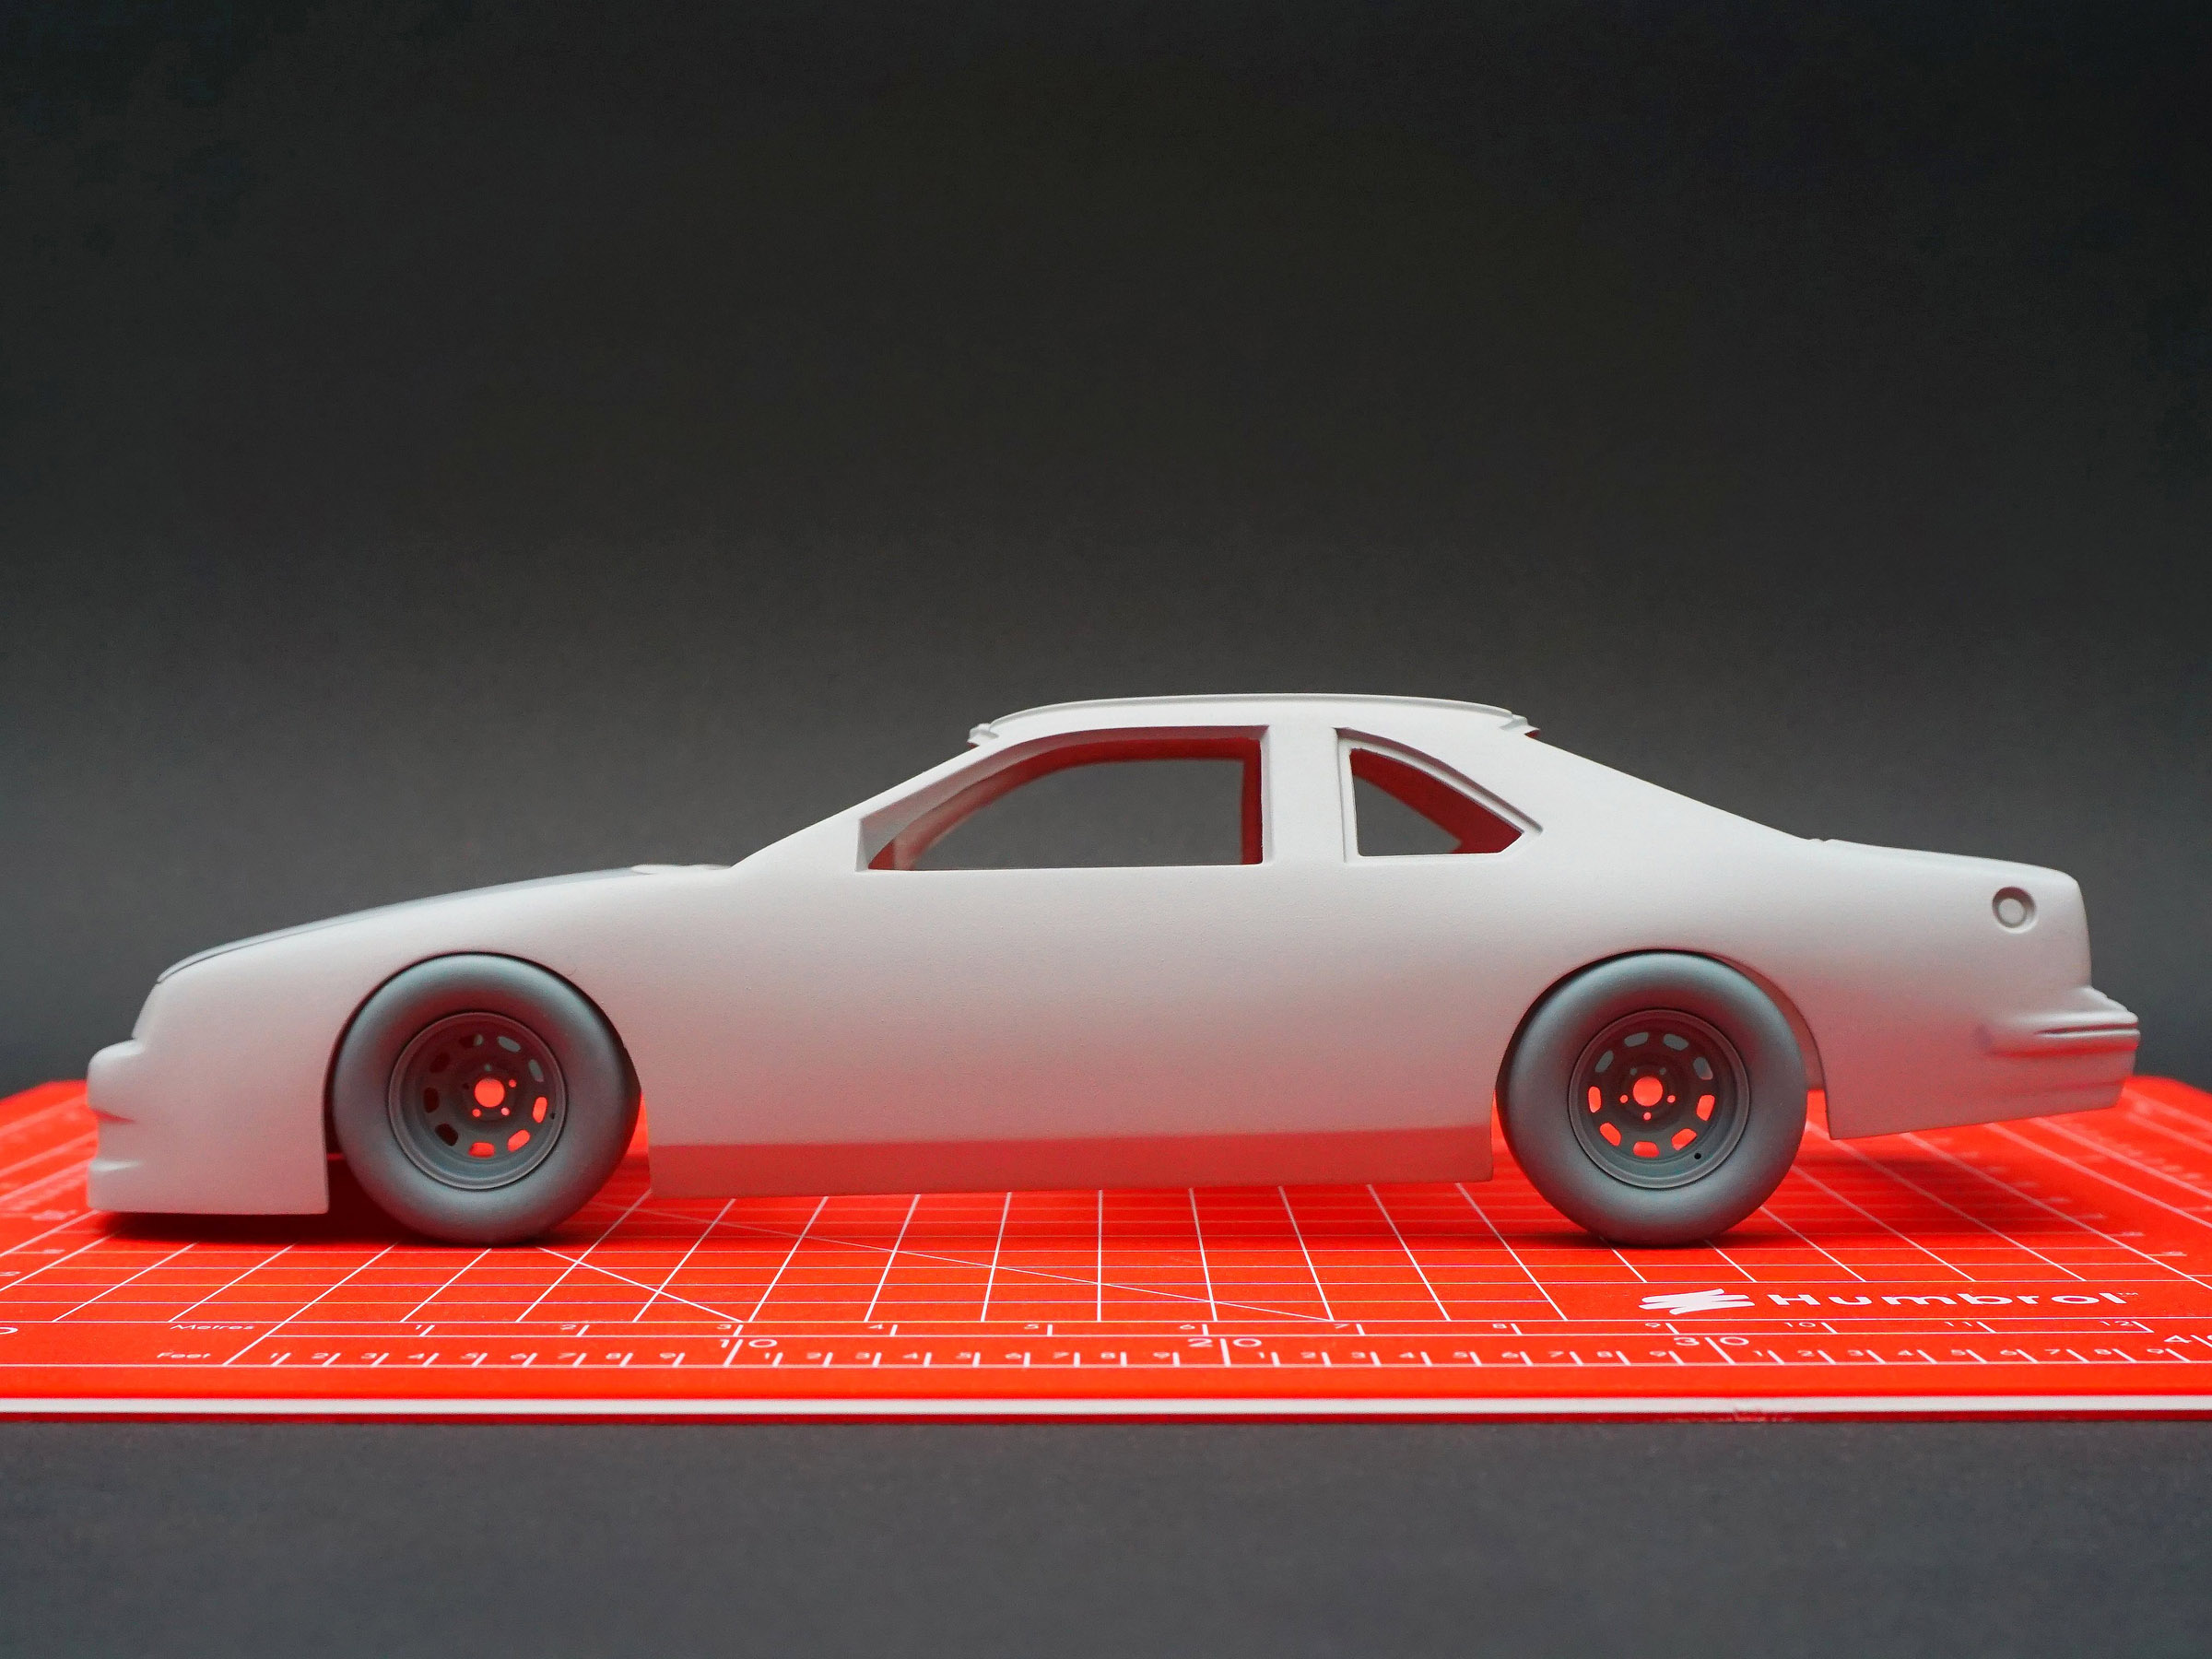
One of the main changes, apart from the color scheme of the model, will be the rims. I will replace the wheels, which are very poor in details, with SCO rims and tires (SCO-R052), in which I will use bolts (SCO-R048) and valves (SCO-R055) dedicated to NASCAR. Additionally, I will install brakes (SCO-R053), which the model does not have in the original set. I will enrich the tires and rims with tags and the manufacturer's logo using Powerslide decals.
The basic color palette is black and red. Typically, I will use Tamiya and Humbrol products.
Update 2 | 18.09.2024
I begin my first work on the model with puttying.

I sanded off the excess filler and then marked the filler areas with a marker. This way, you can easily see any imperfections that I now need to fix. It's faster and more convenient than painting the entire model with primer.
Individual body elements were improved with a second coat of putty. I painted the model with thin layers of Tamiya primer to see where further improvements need to be made. Unfortunately, there are a few places that require further corrections... but so far everything is going in the right direction.
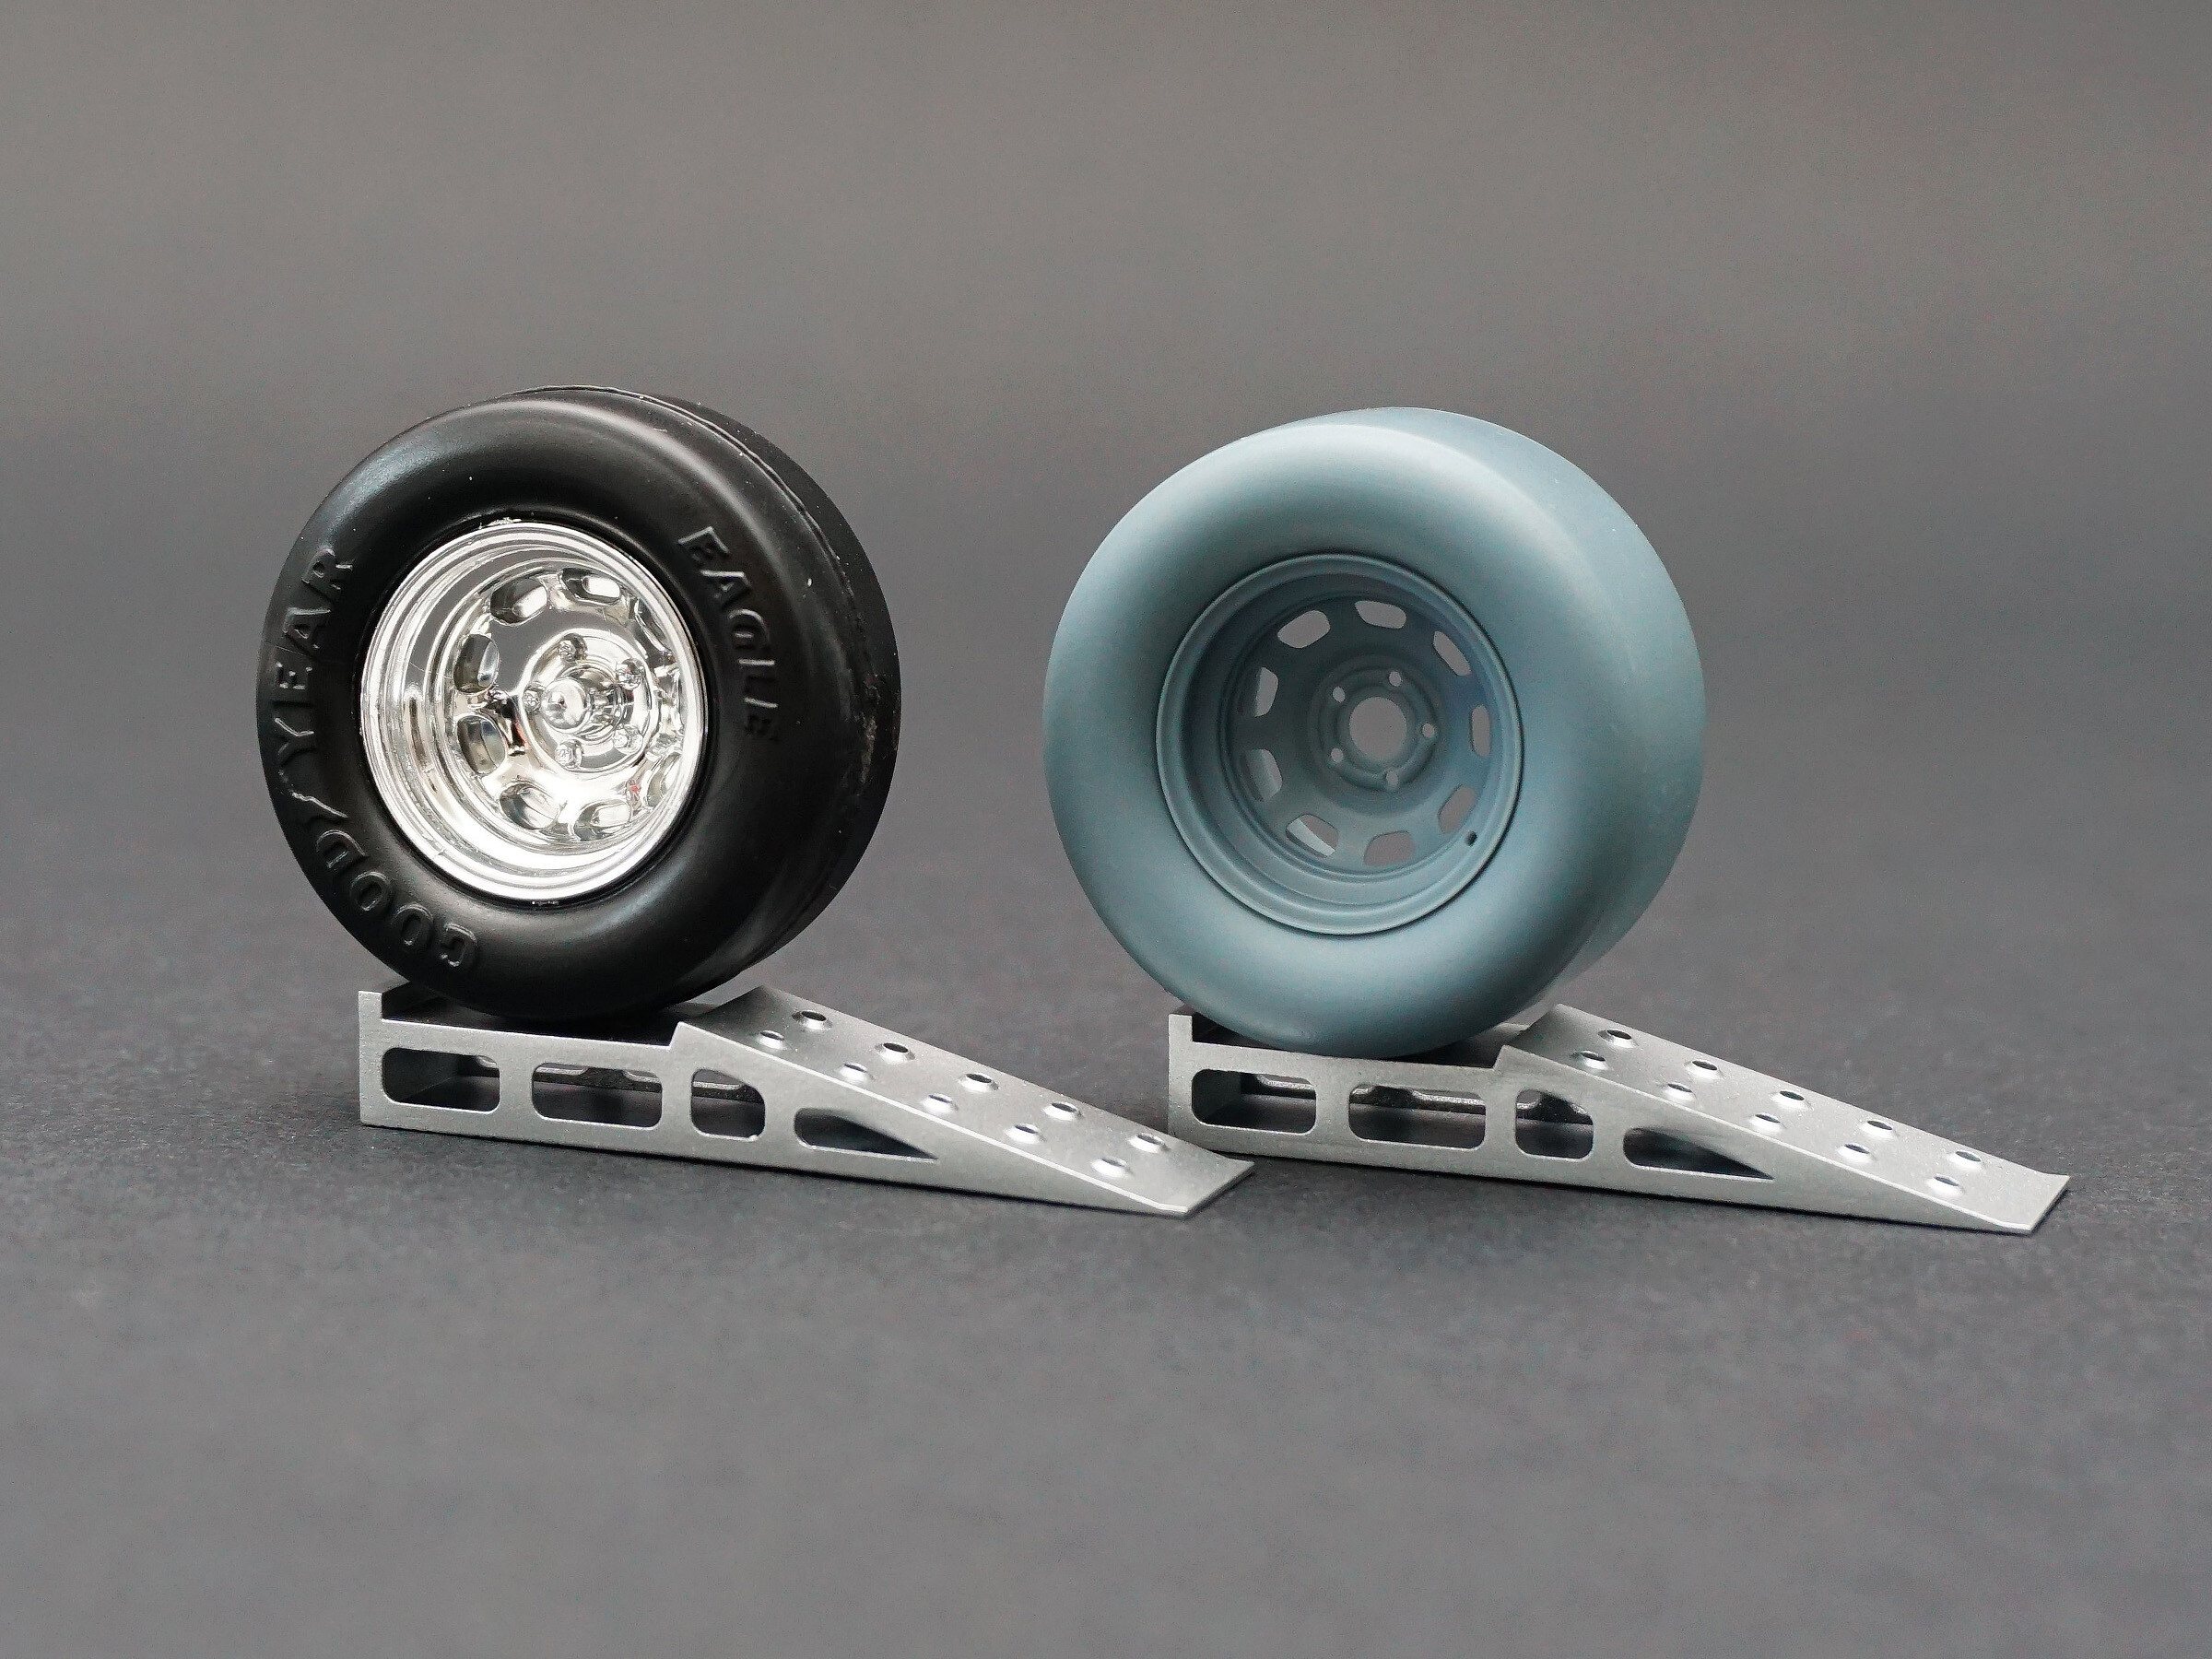
In the meantime, I decided to work on the Ford wheels.
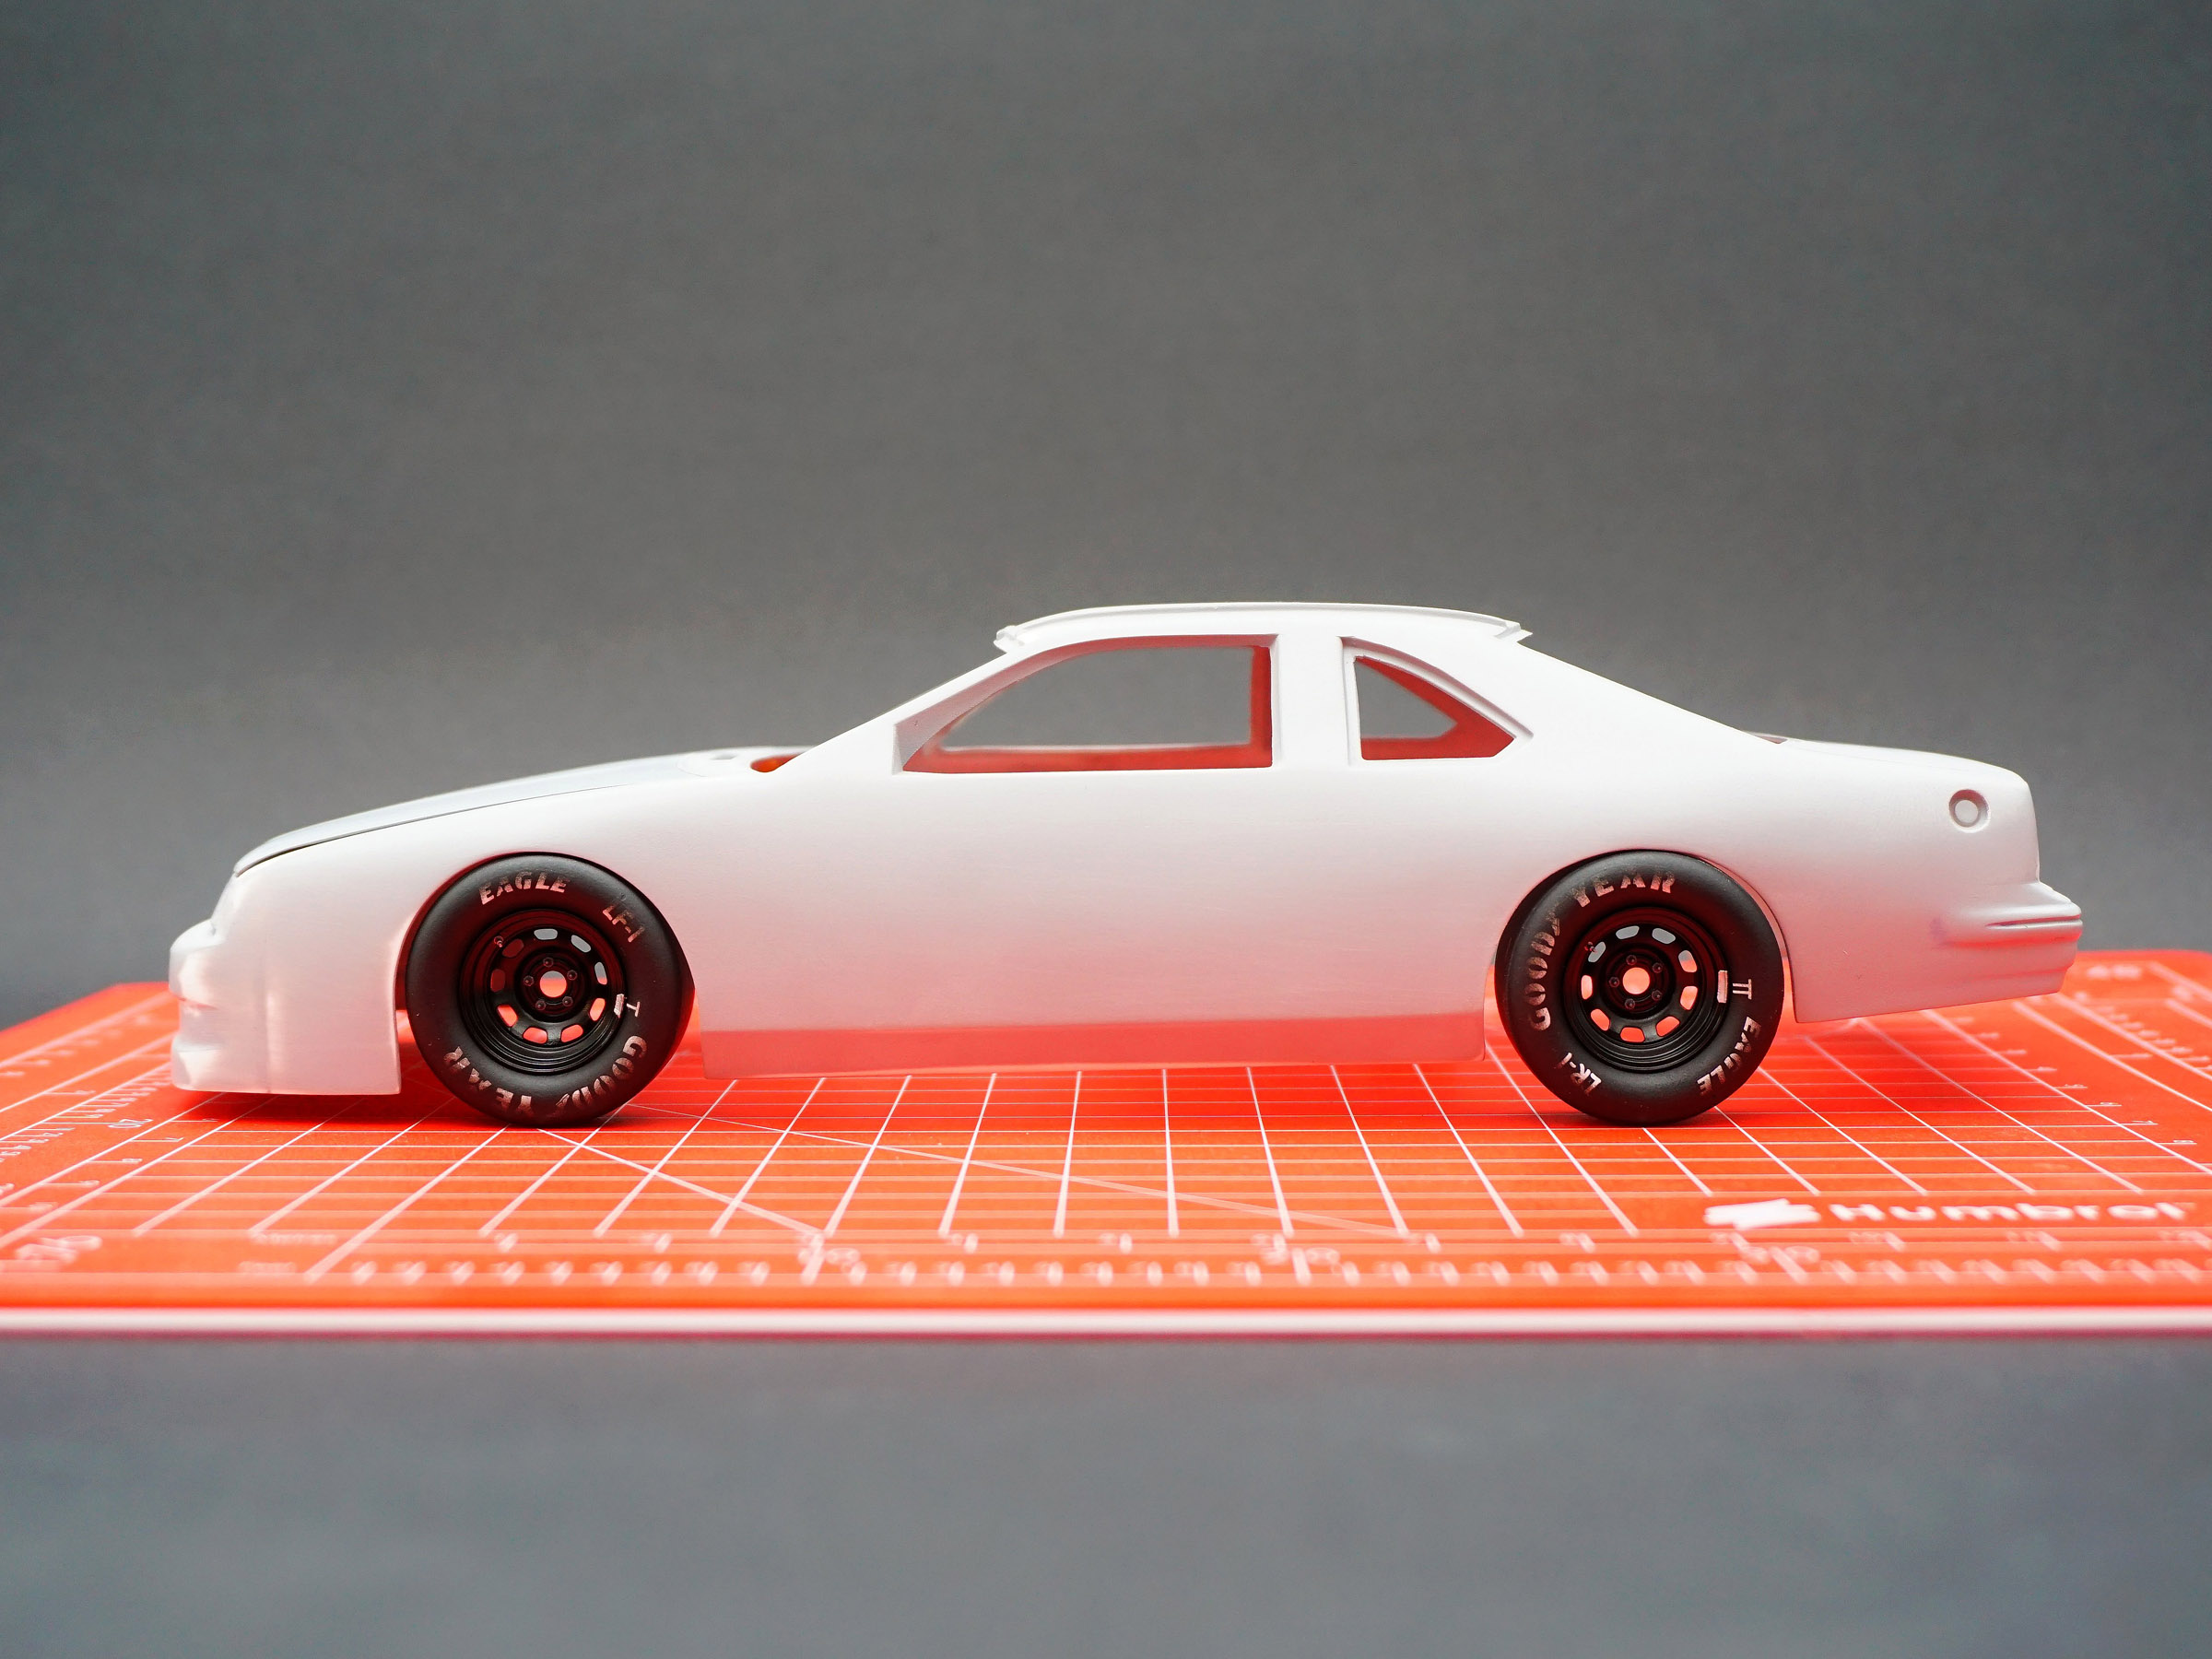
I used Humbrol and Tamiya spray paints to paint the tires. First I sprayed them with matte black, then masked the slick tires and painted the edges with Tamiya's TS-79 Semi Gloss Clear. The next step was to apply the decals, then cover the whole thing with TS-80 Flat Clear. The next step on the tires was a wash using Tamiya Weathering Master Set-B and a final coat of TS-80 Flat Clear.
I painted the rims Tamiya TS-14 Gloss Black. The bolts are
SCO-R048 NASCAR type V.1, the valves are
SCO-R055 NASCAR type V.1
I made the wheel weights from masking tape.
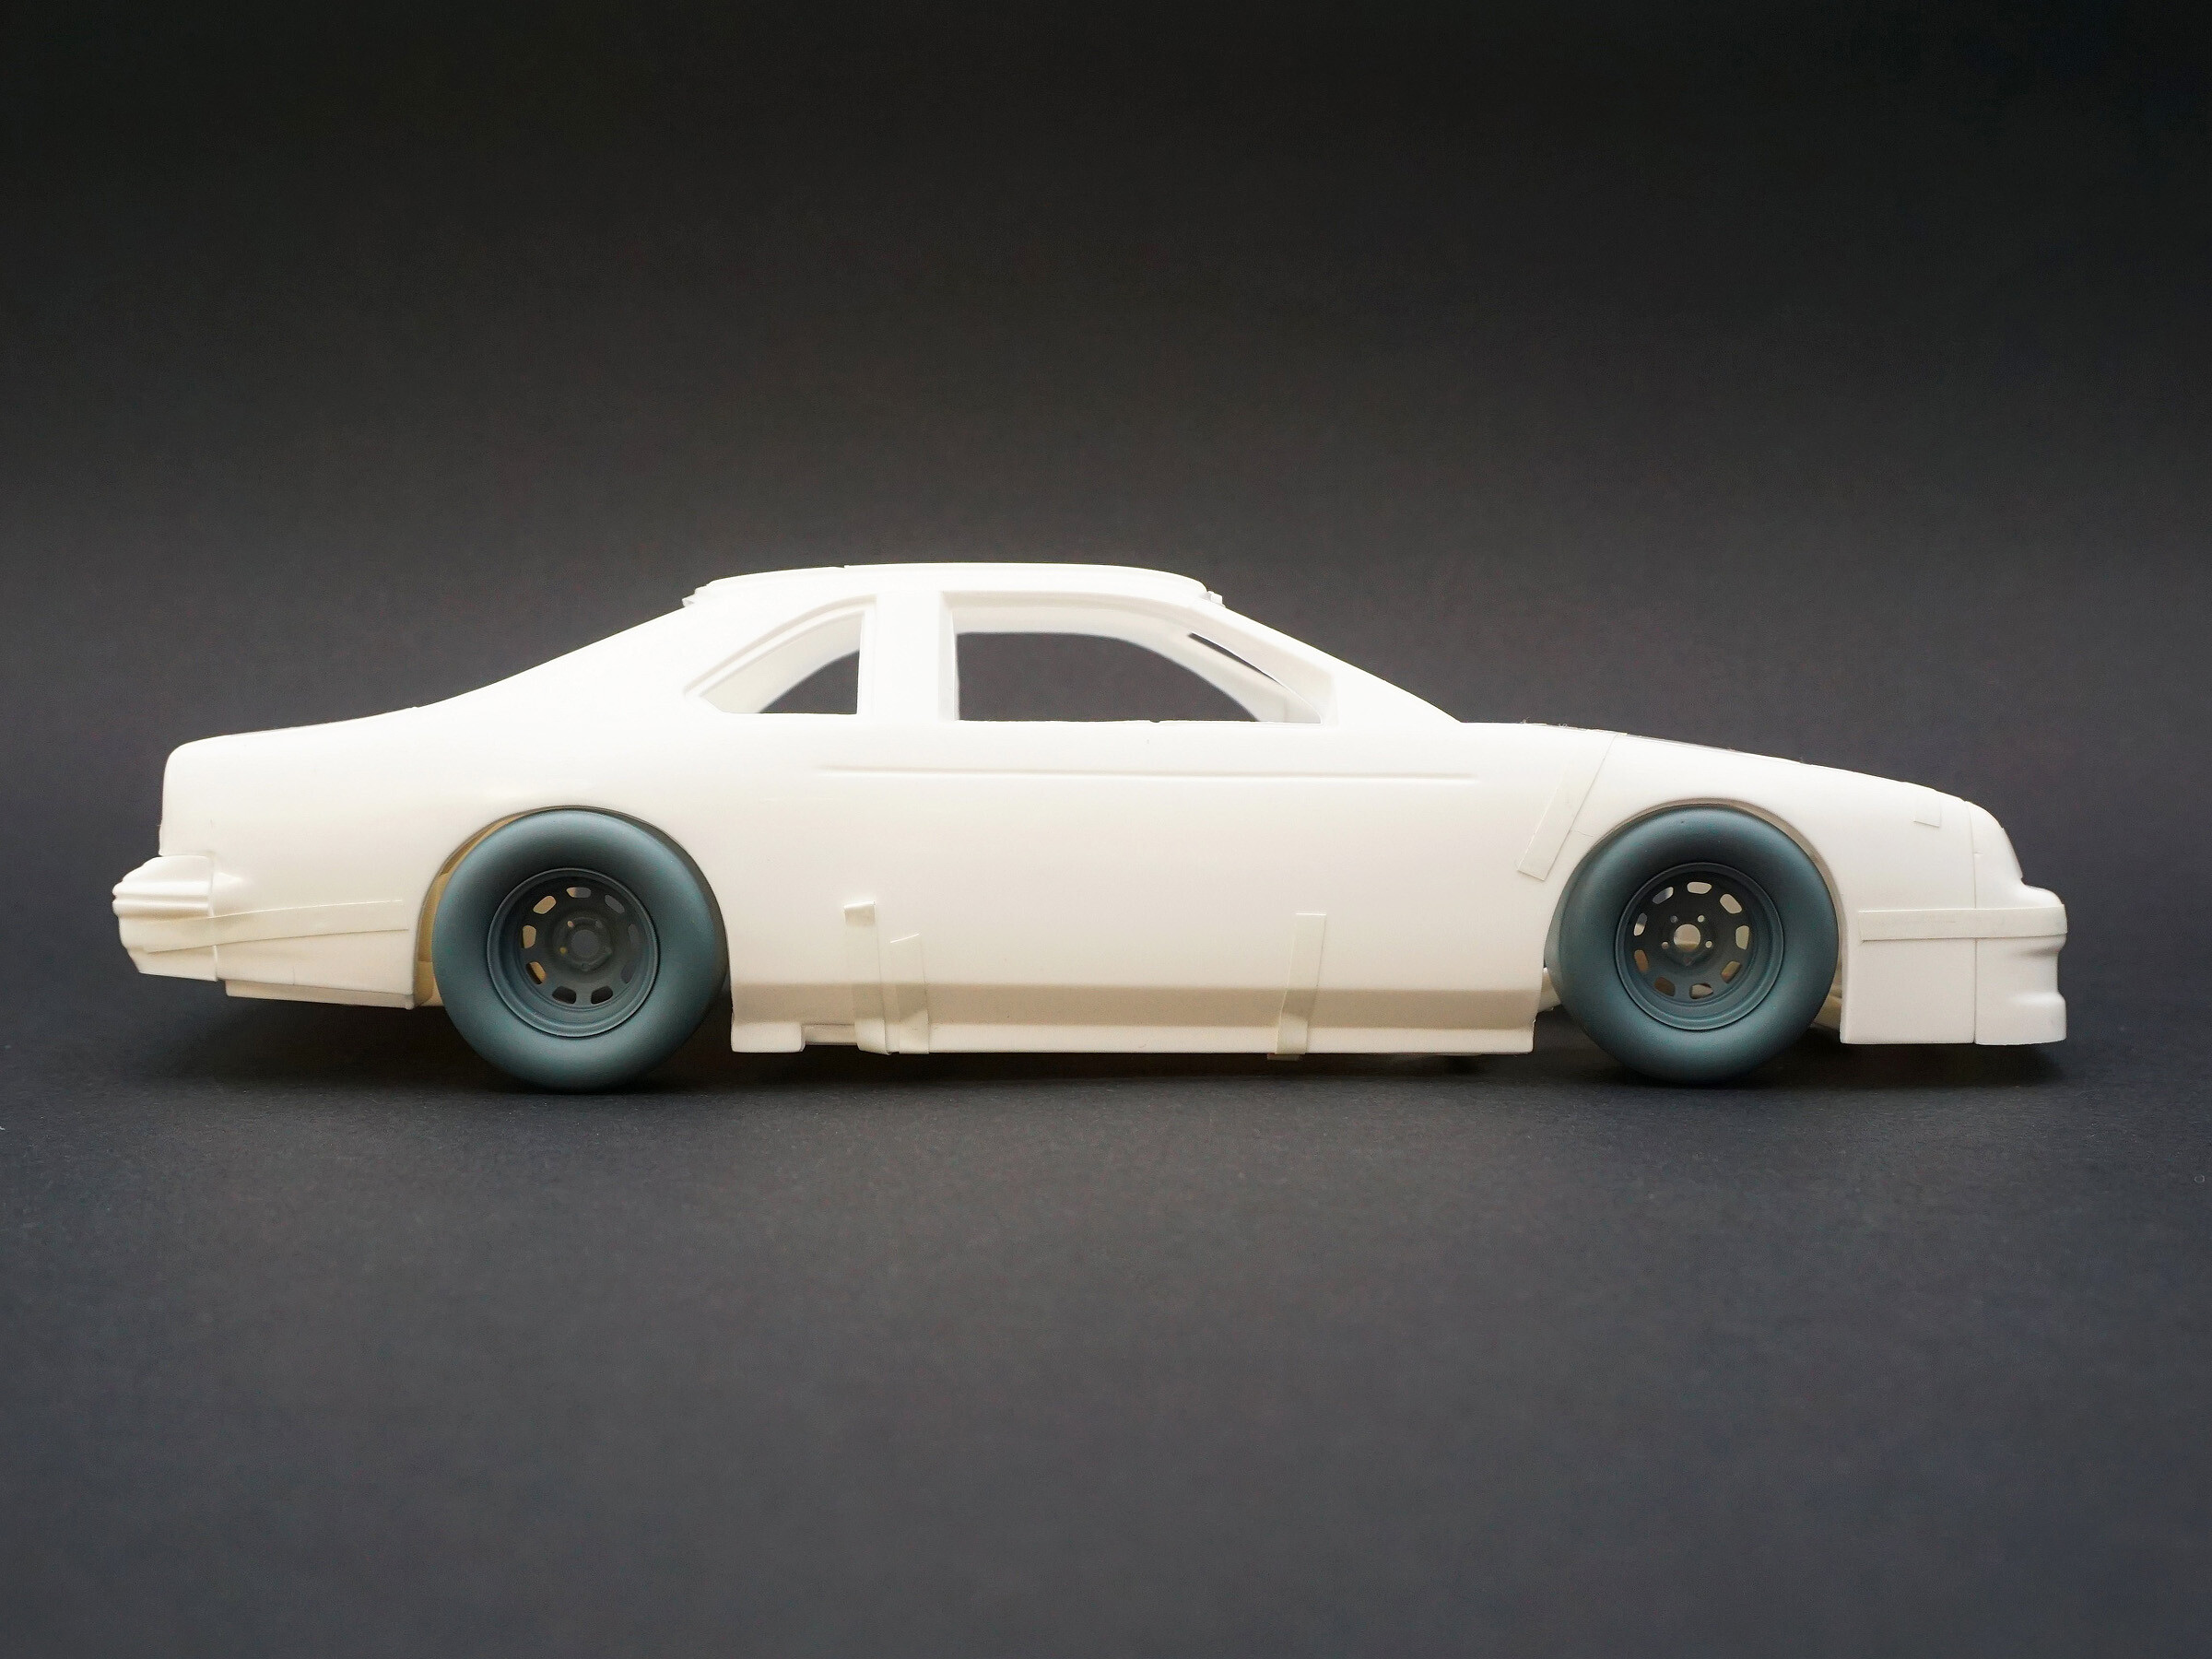
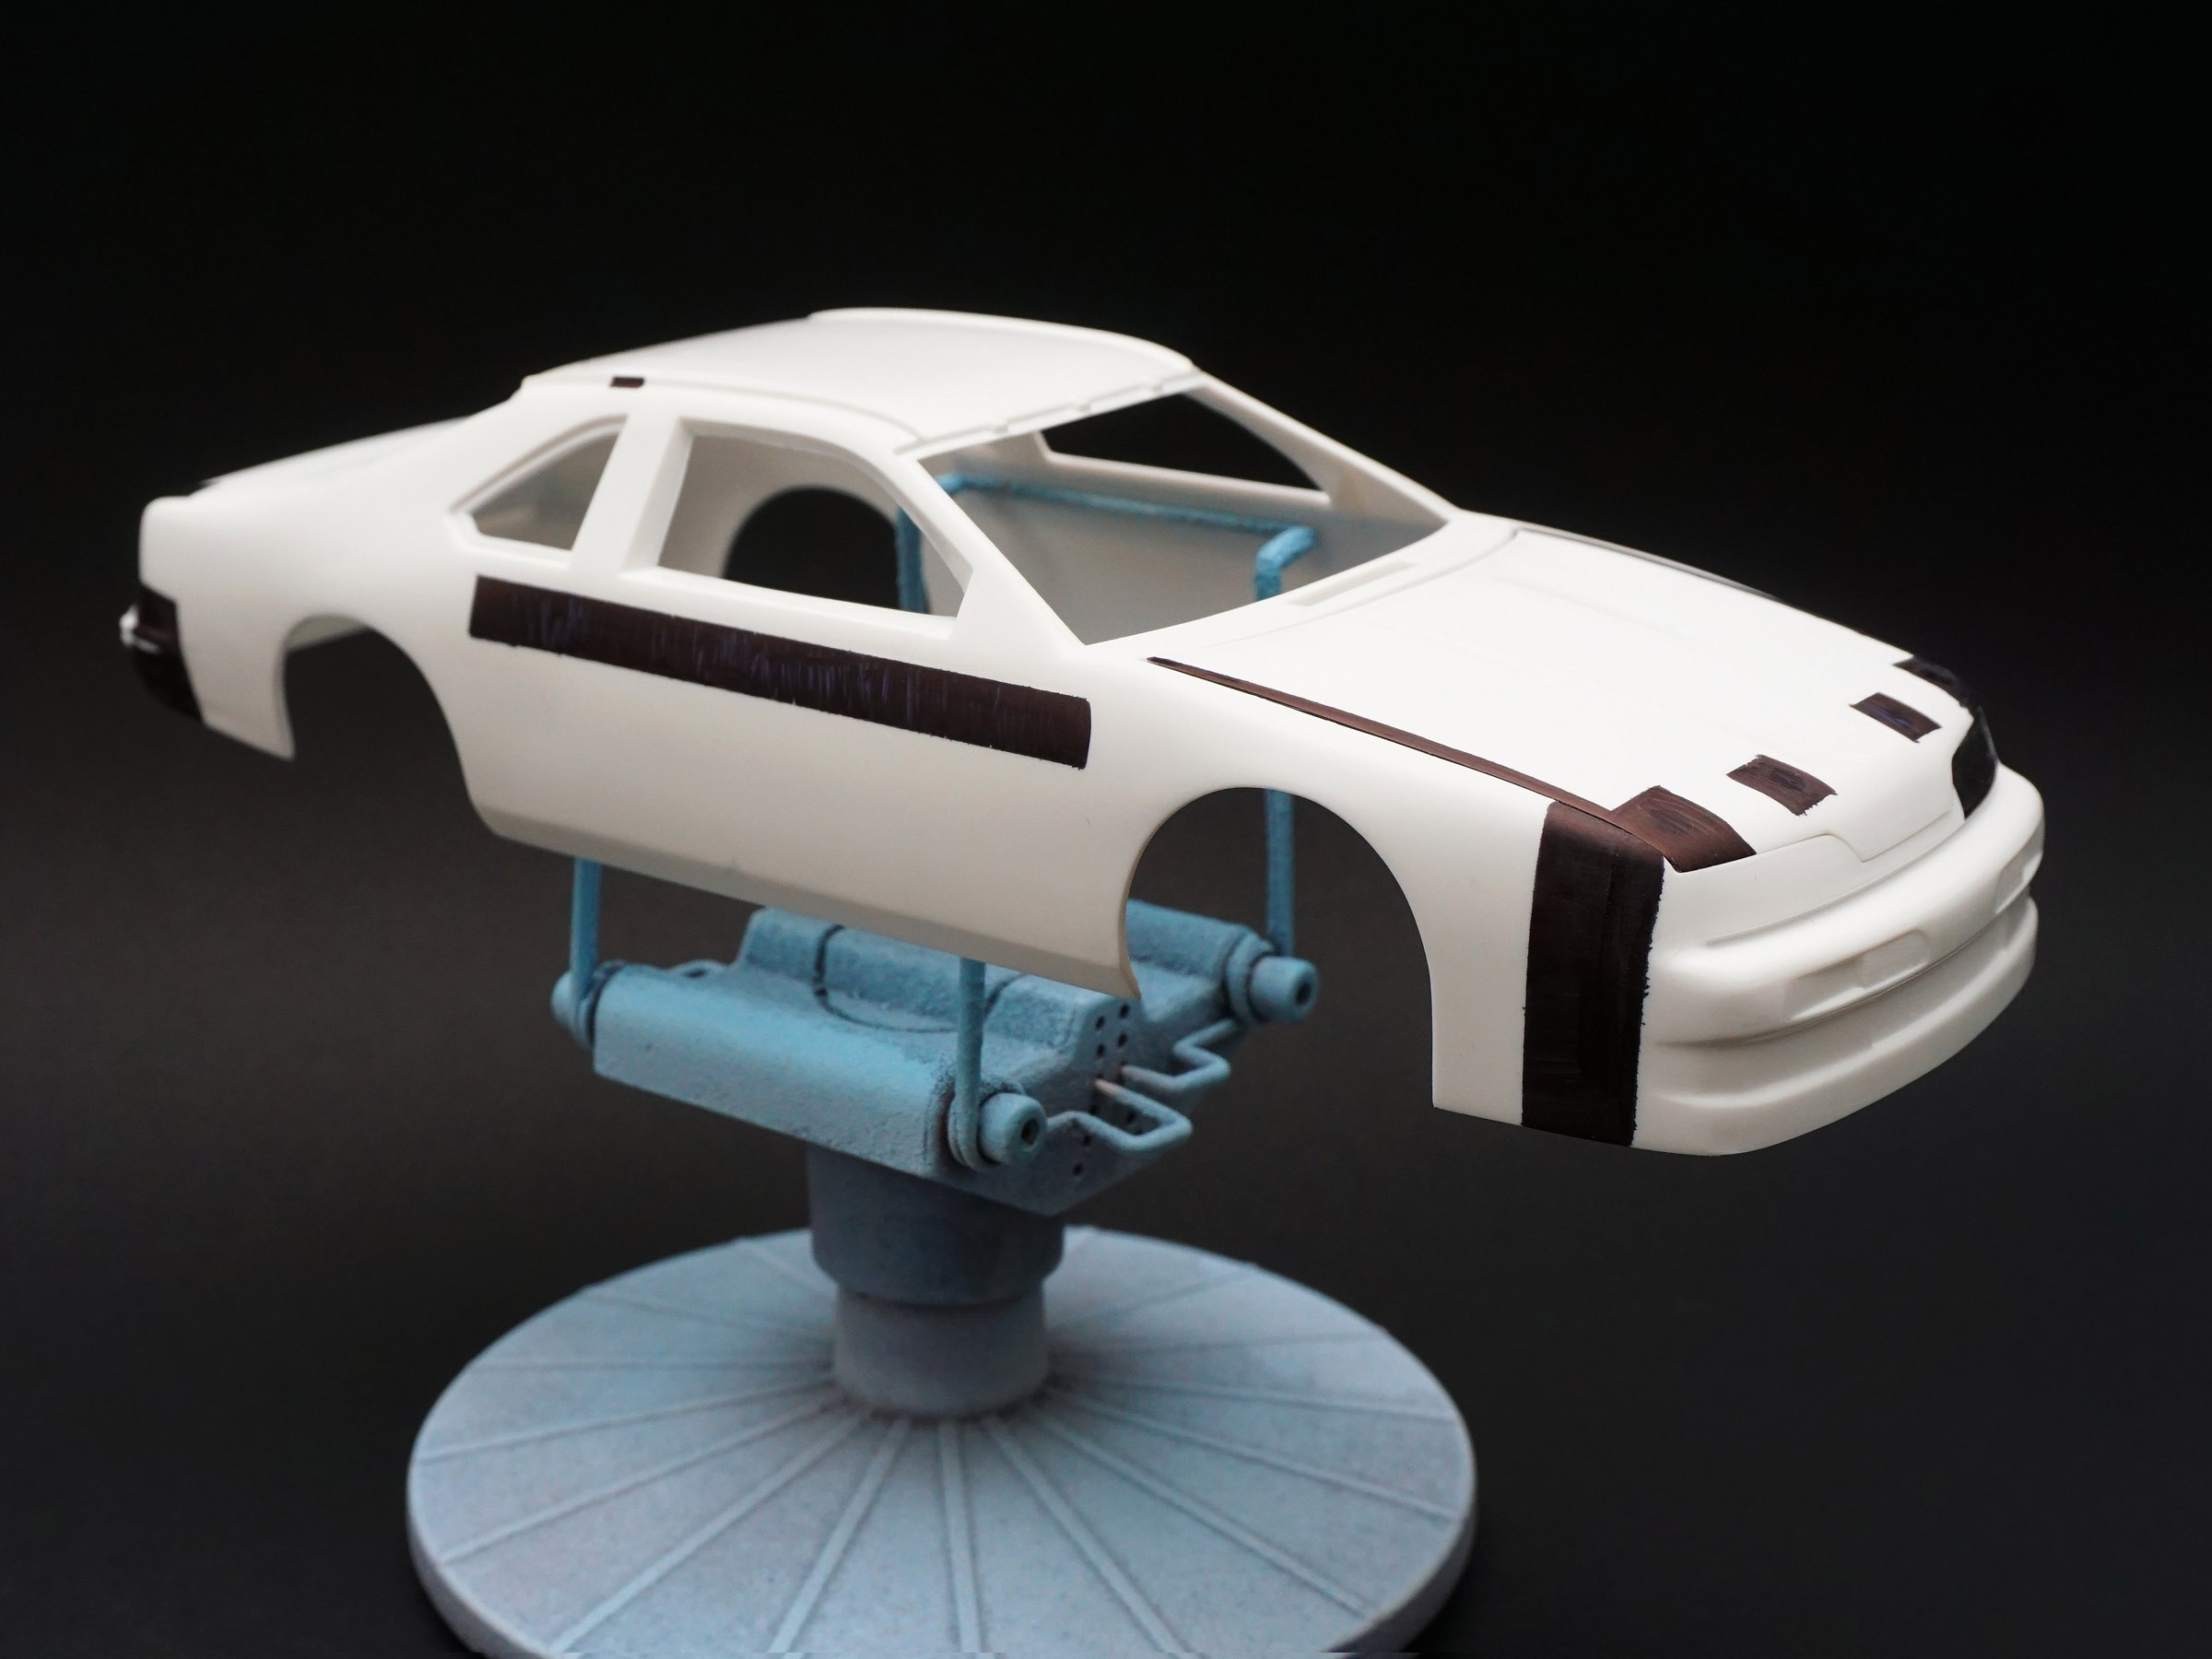
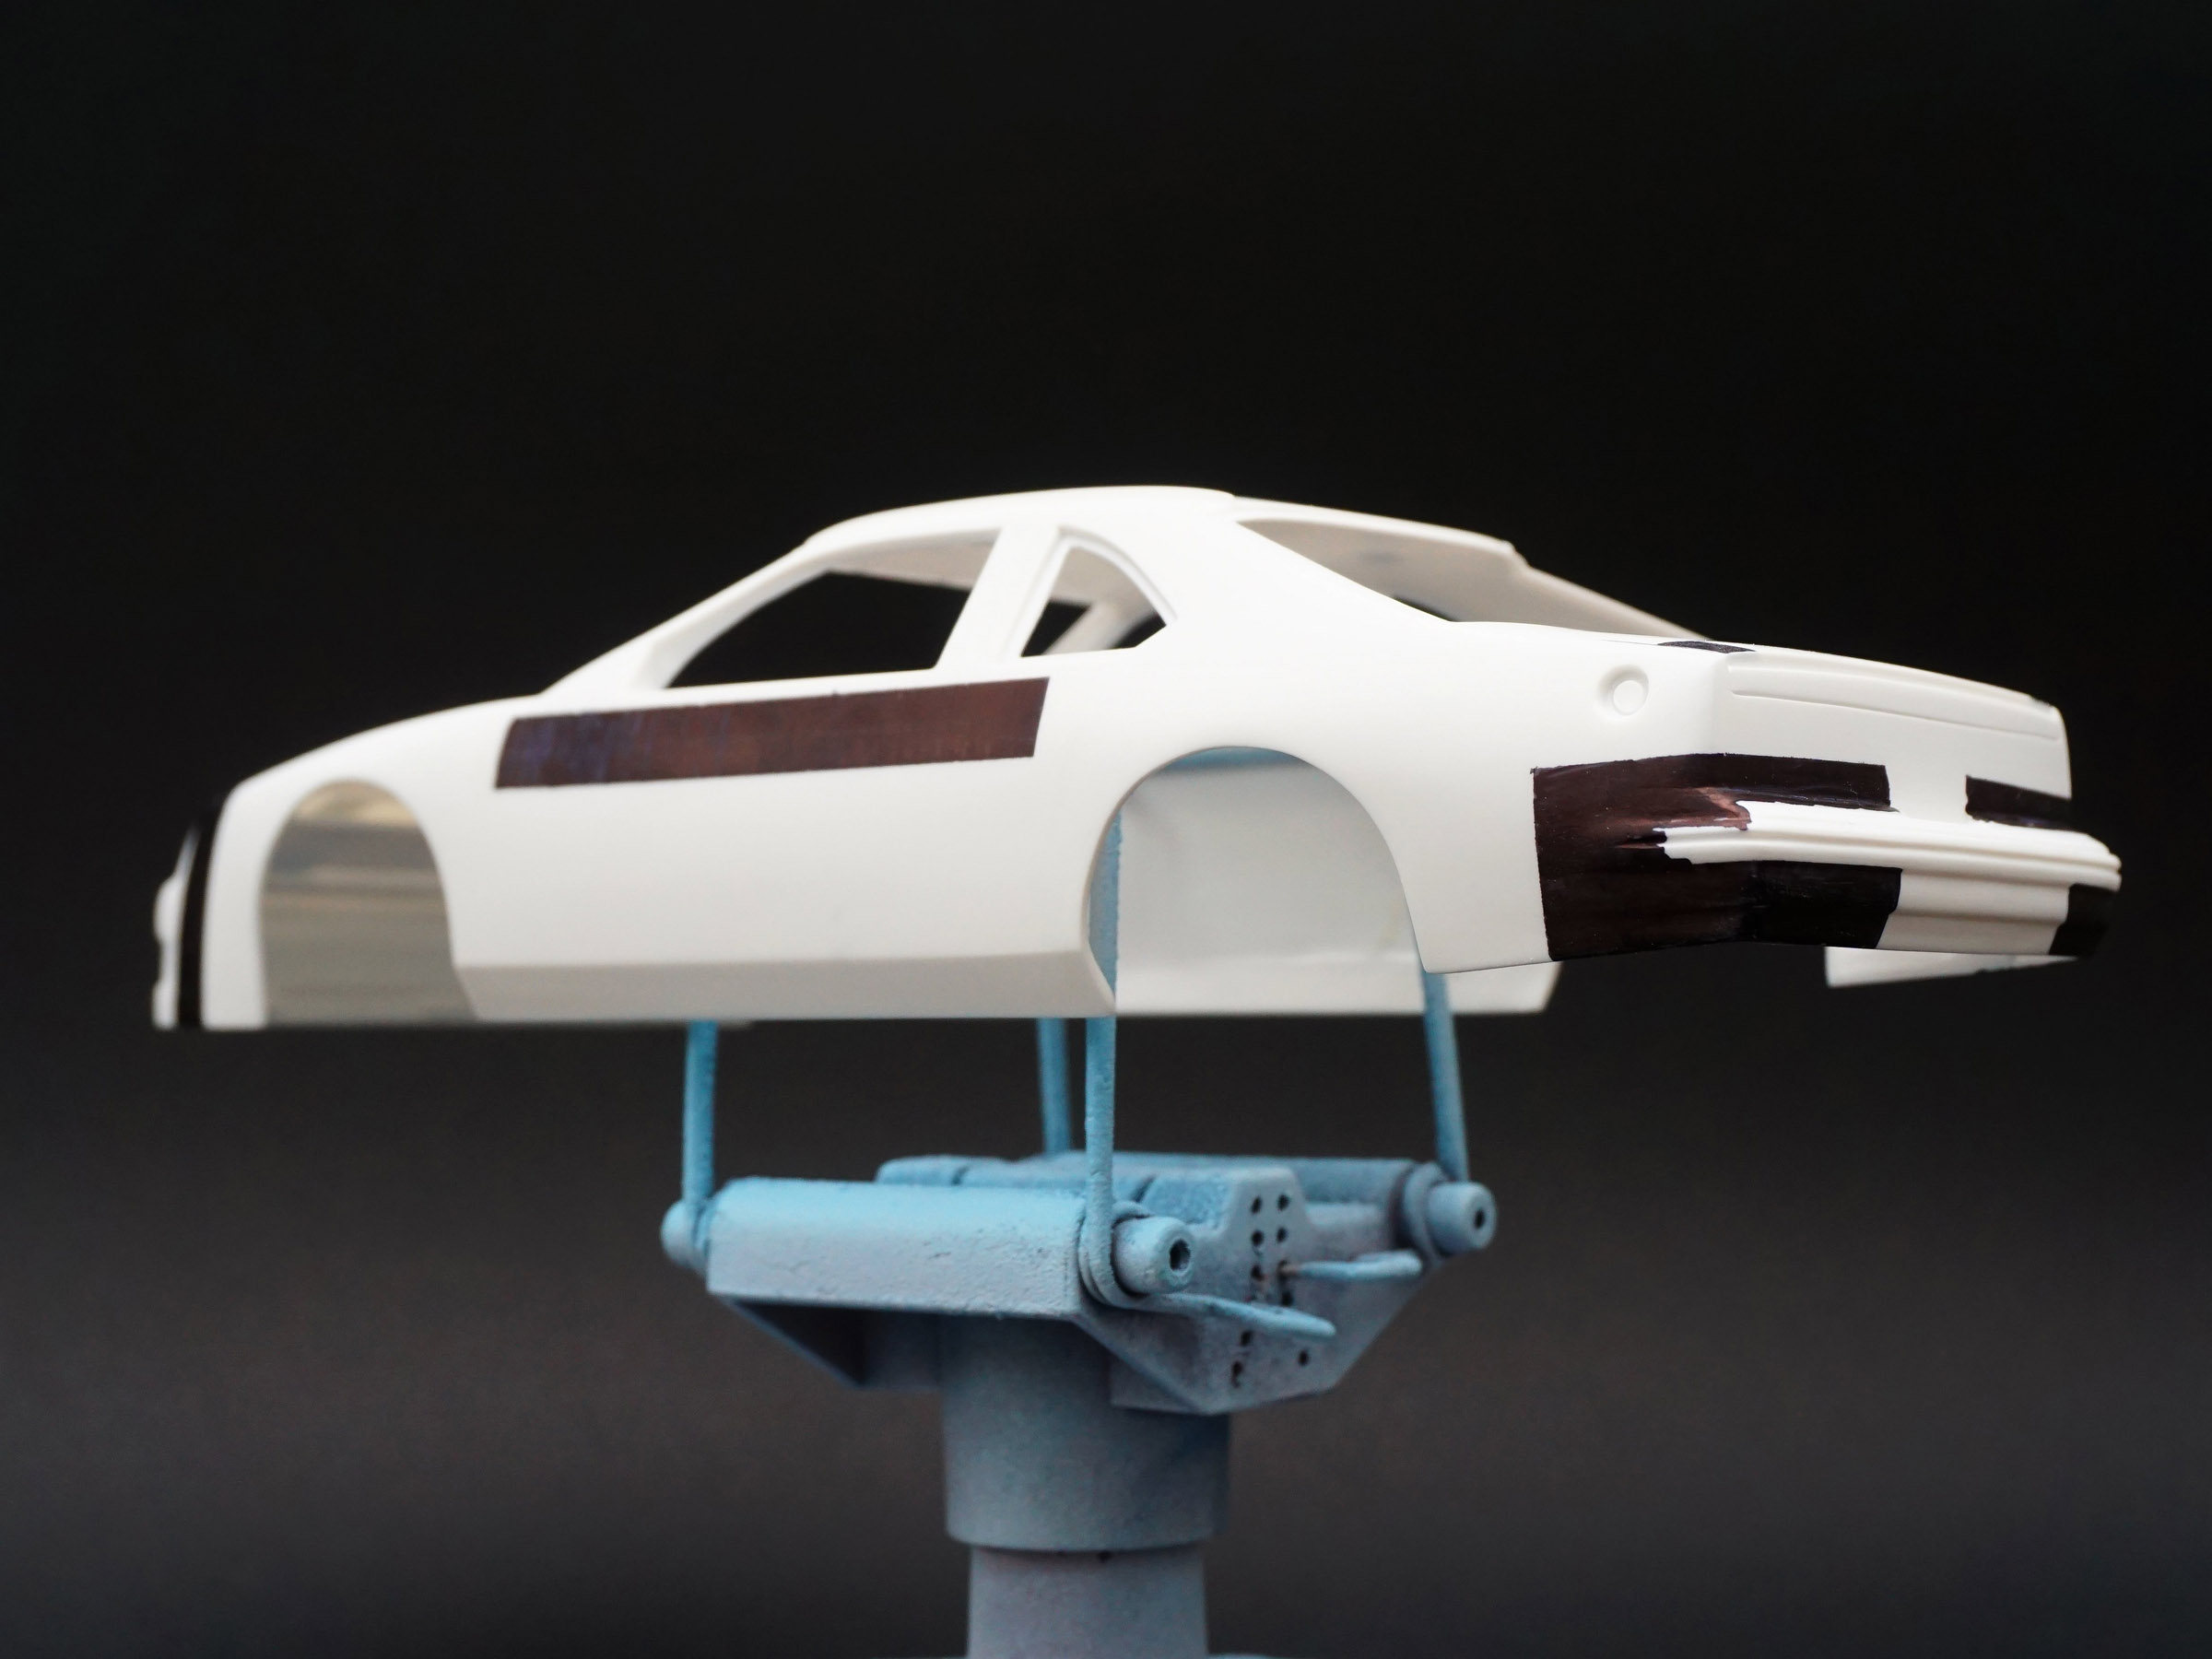
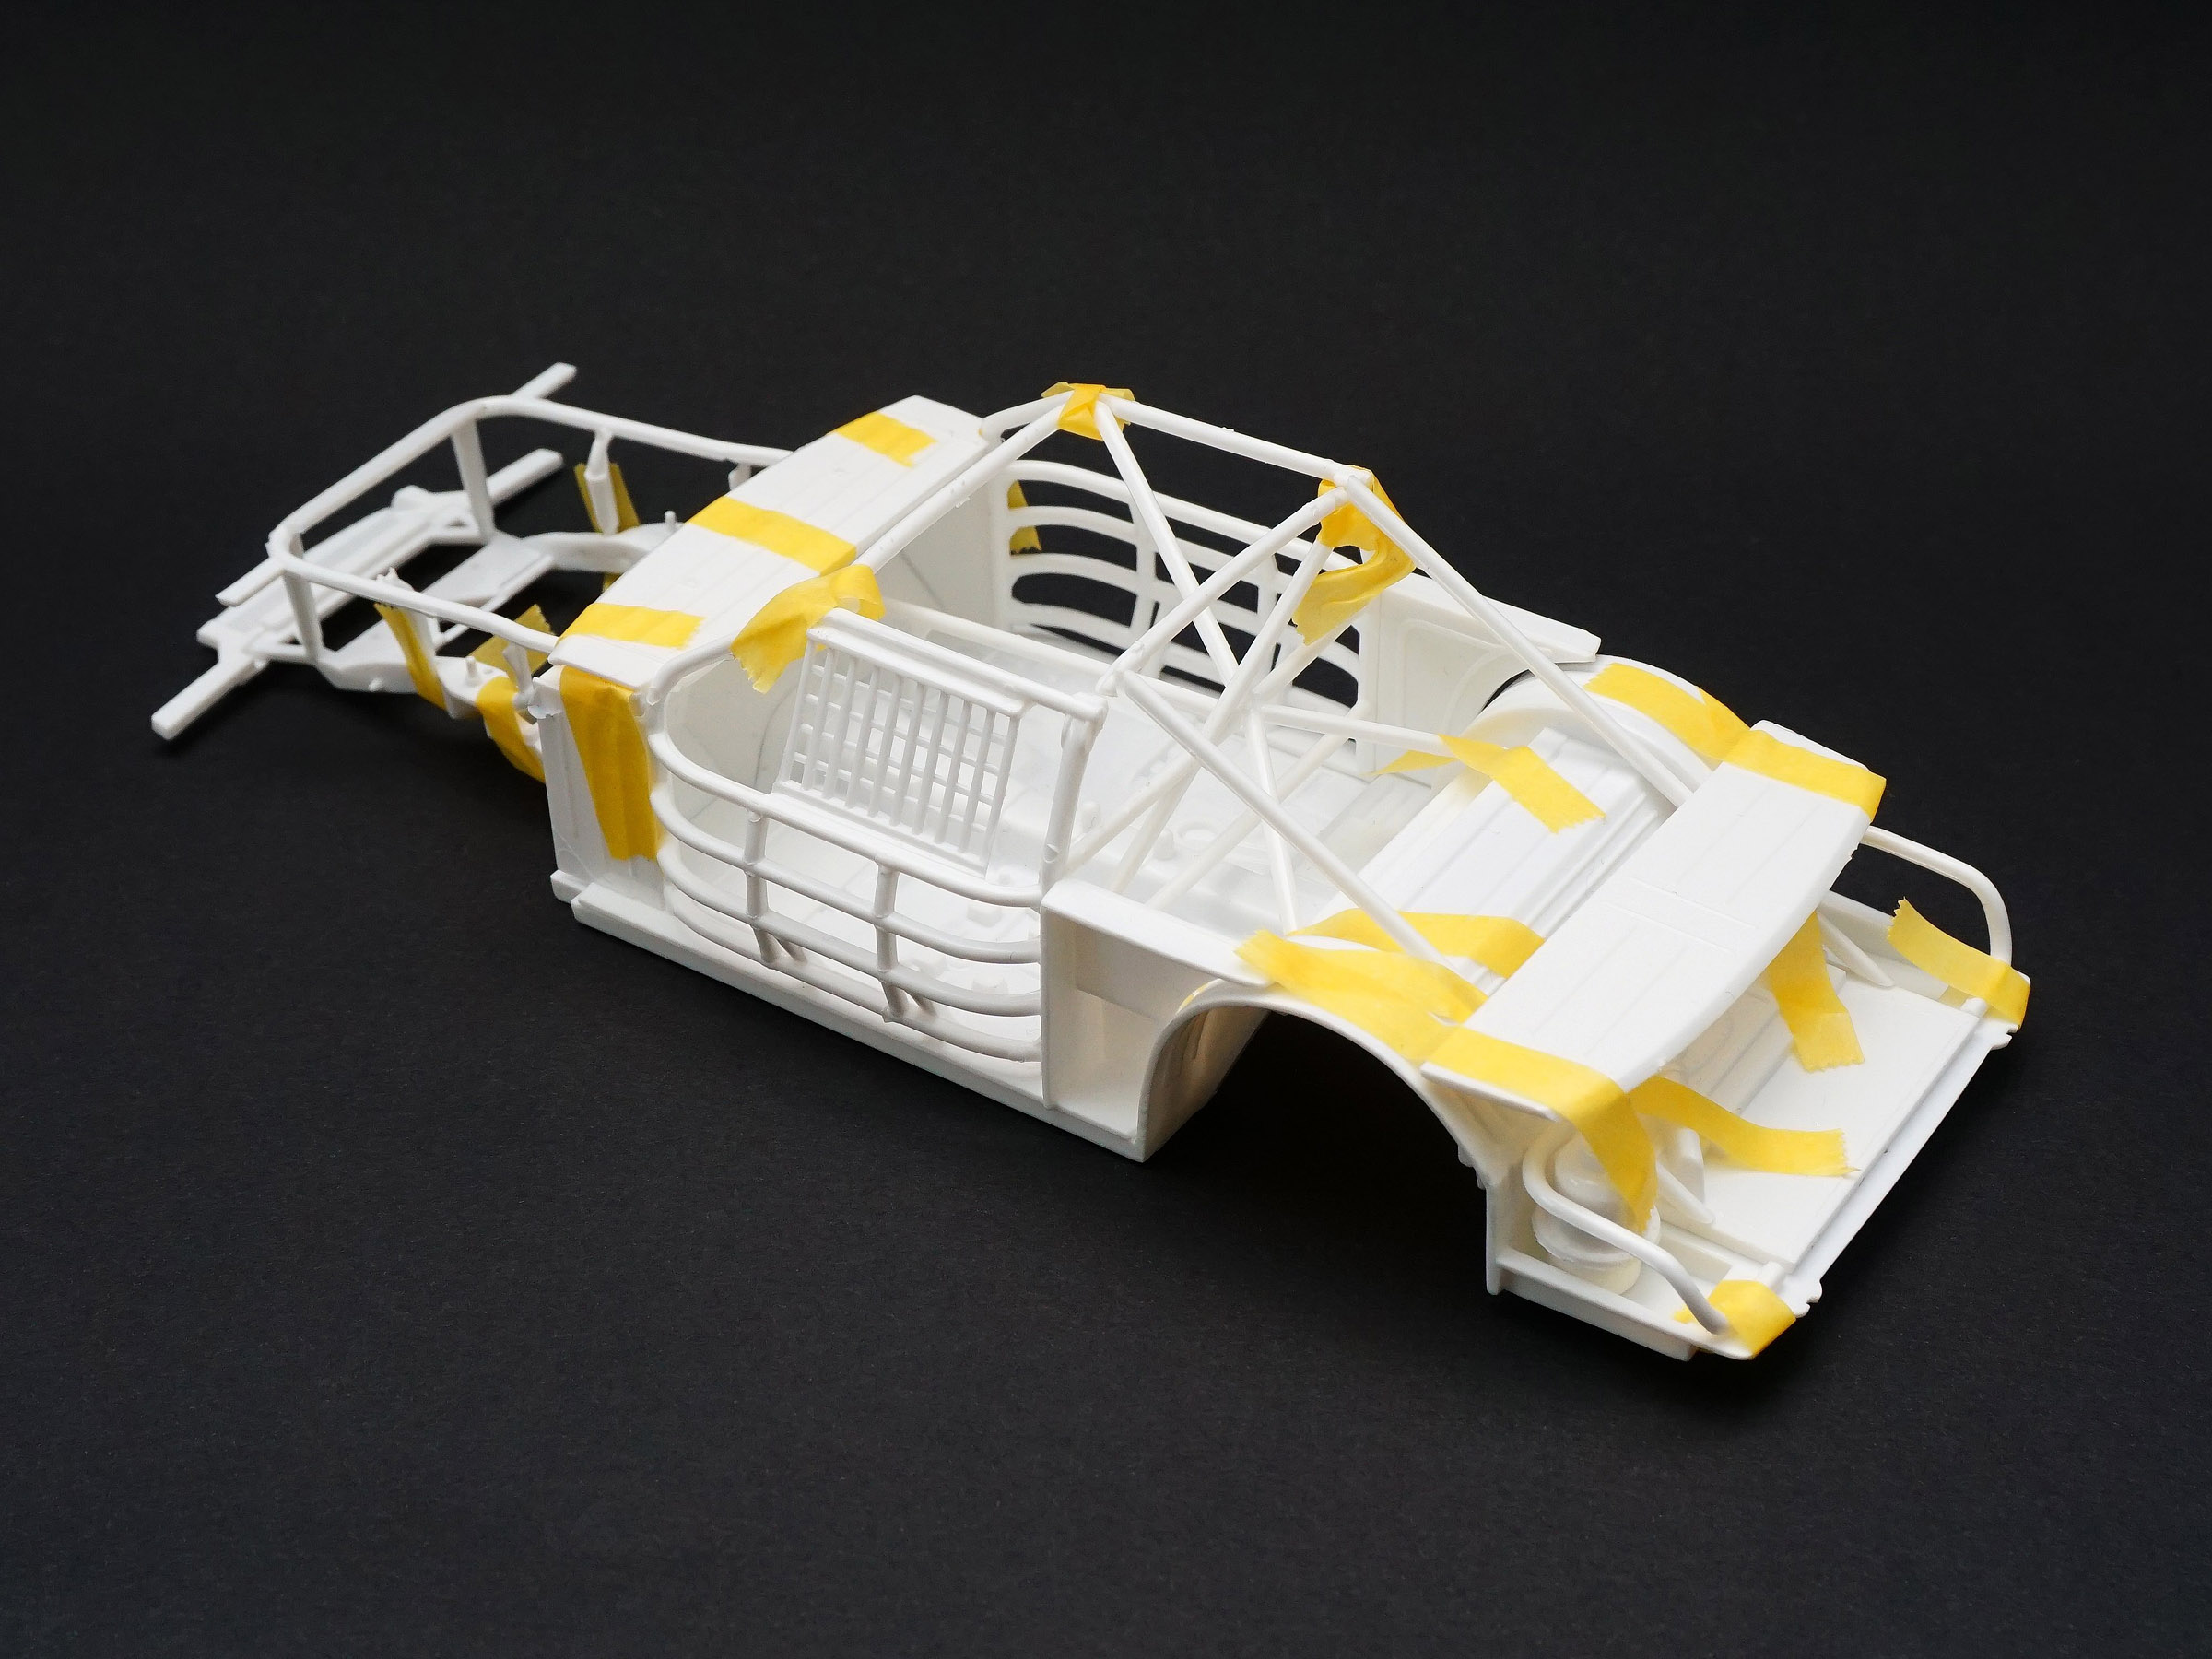
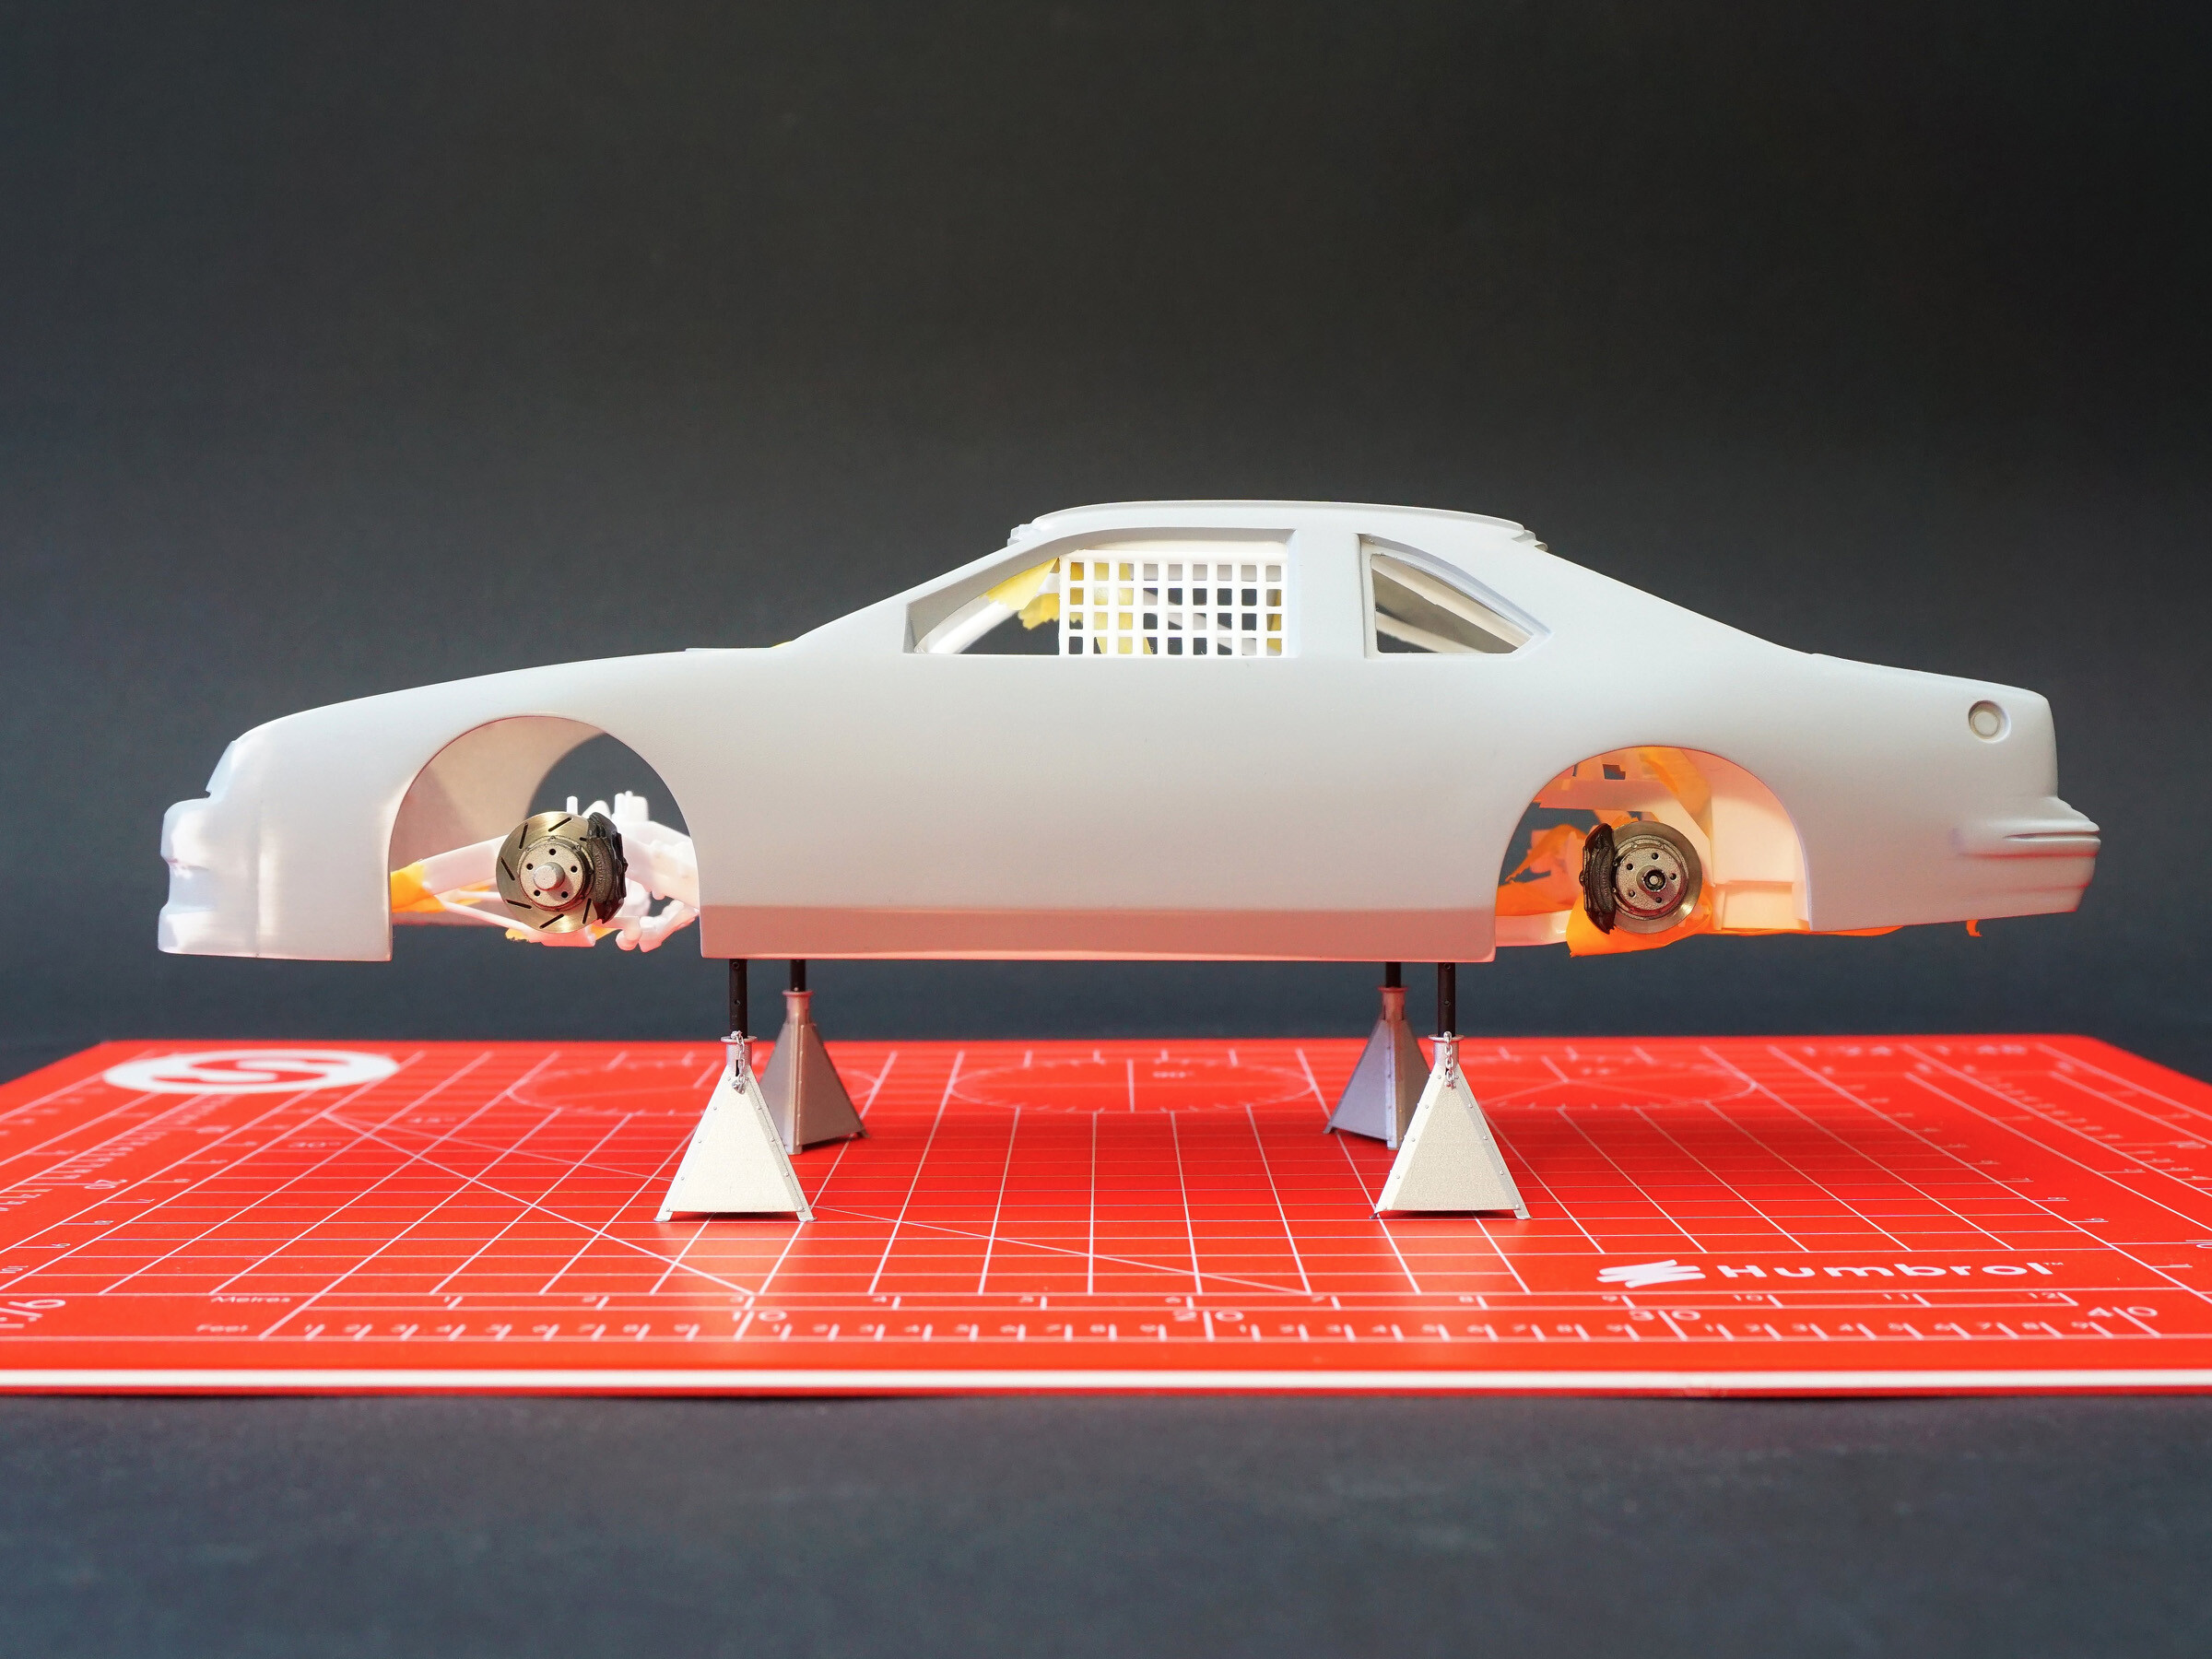
The next step is fitting and testing the roll cage. This is a very important stage, because thanks to it I am able to plan the necessary modifications to the model's interior elements.
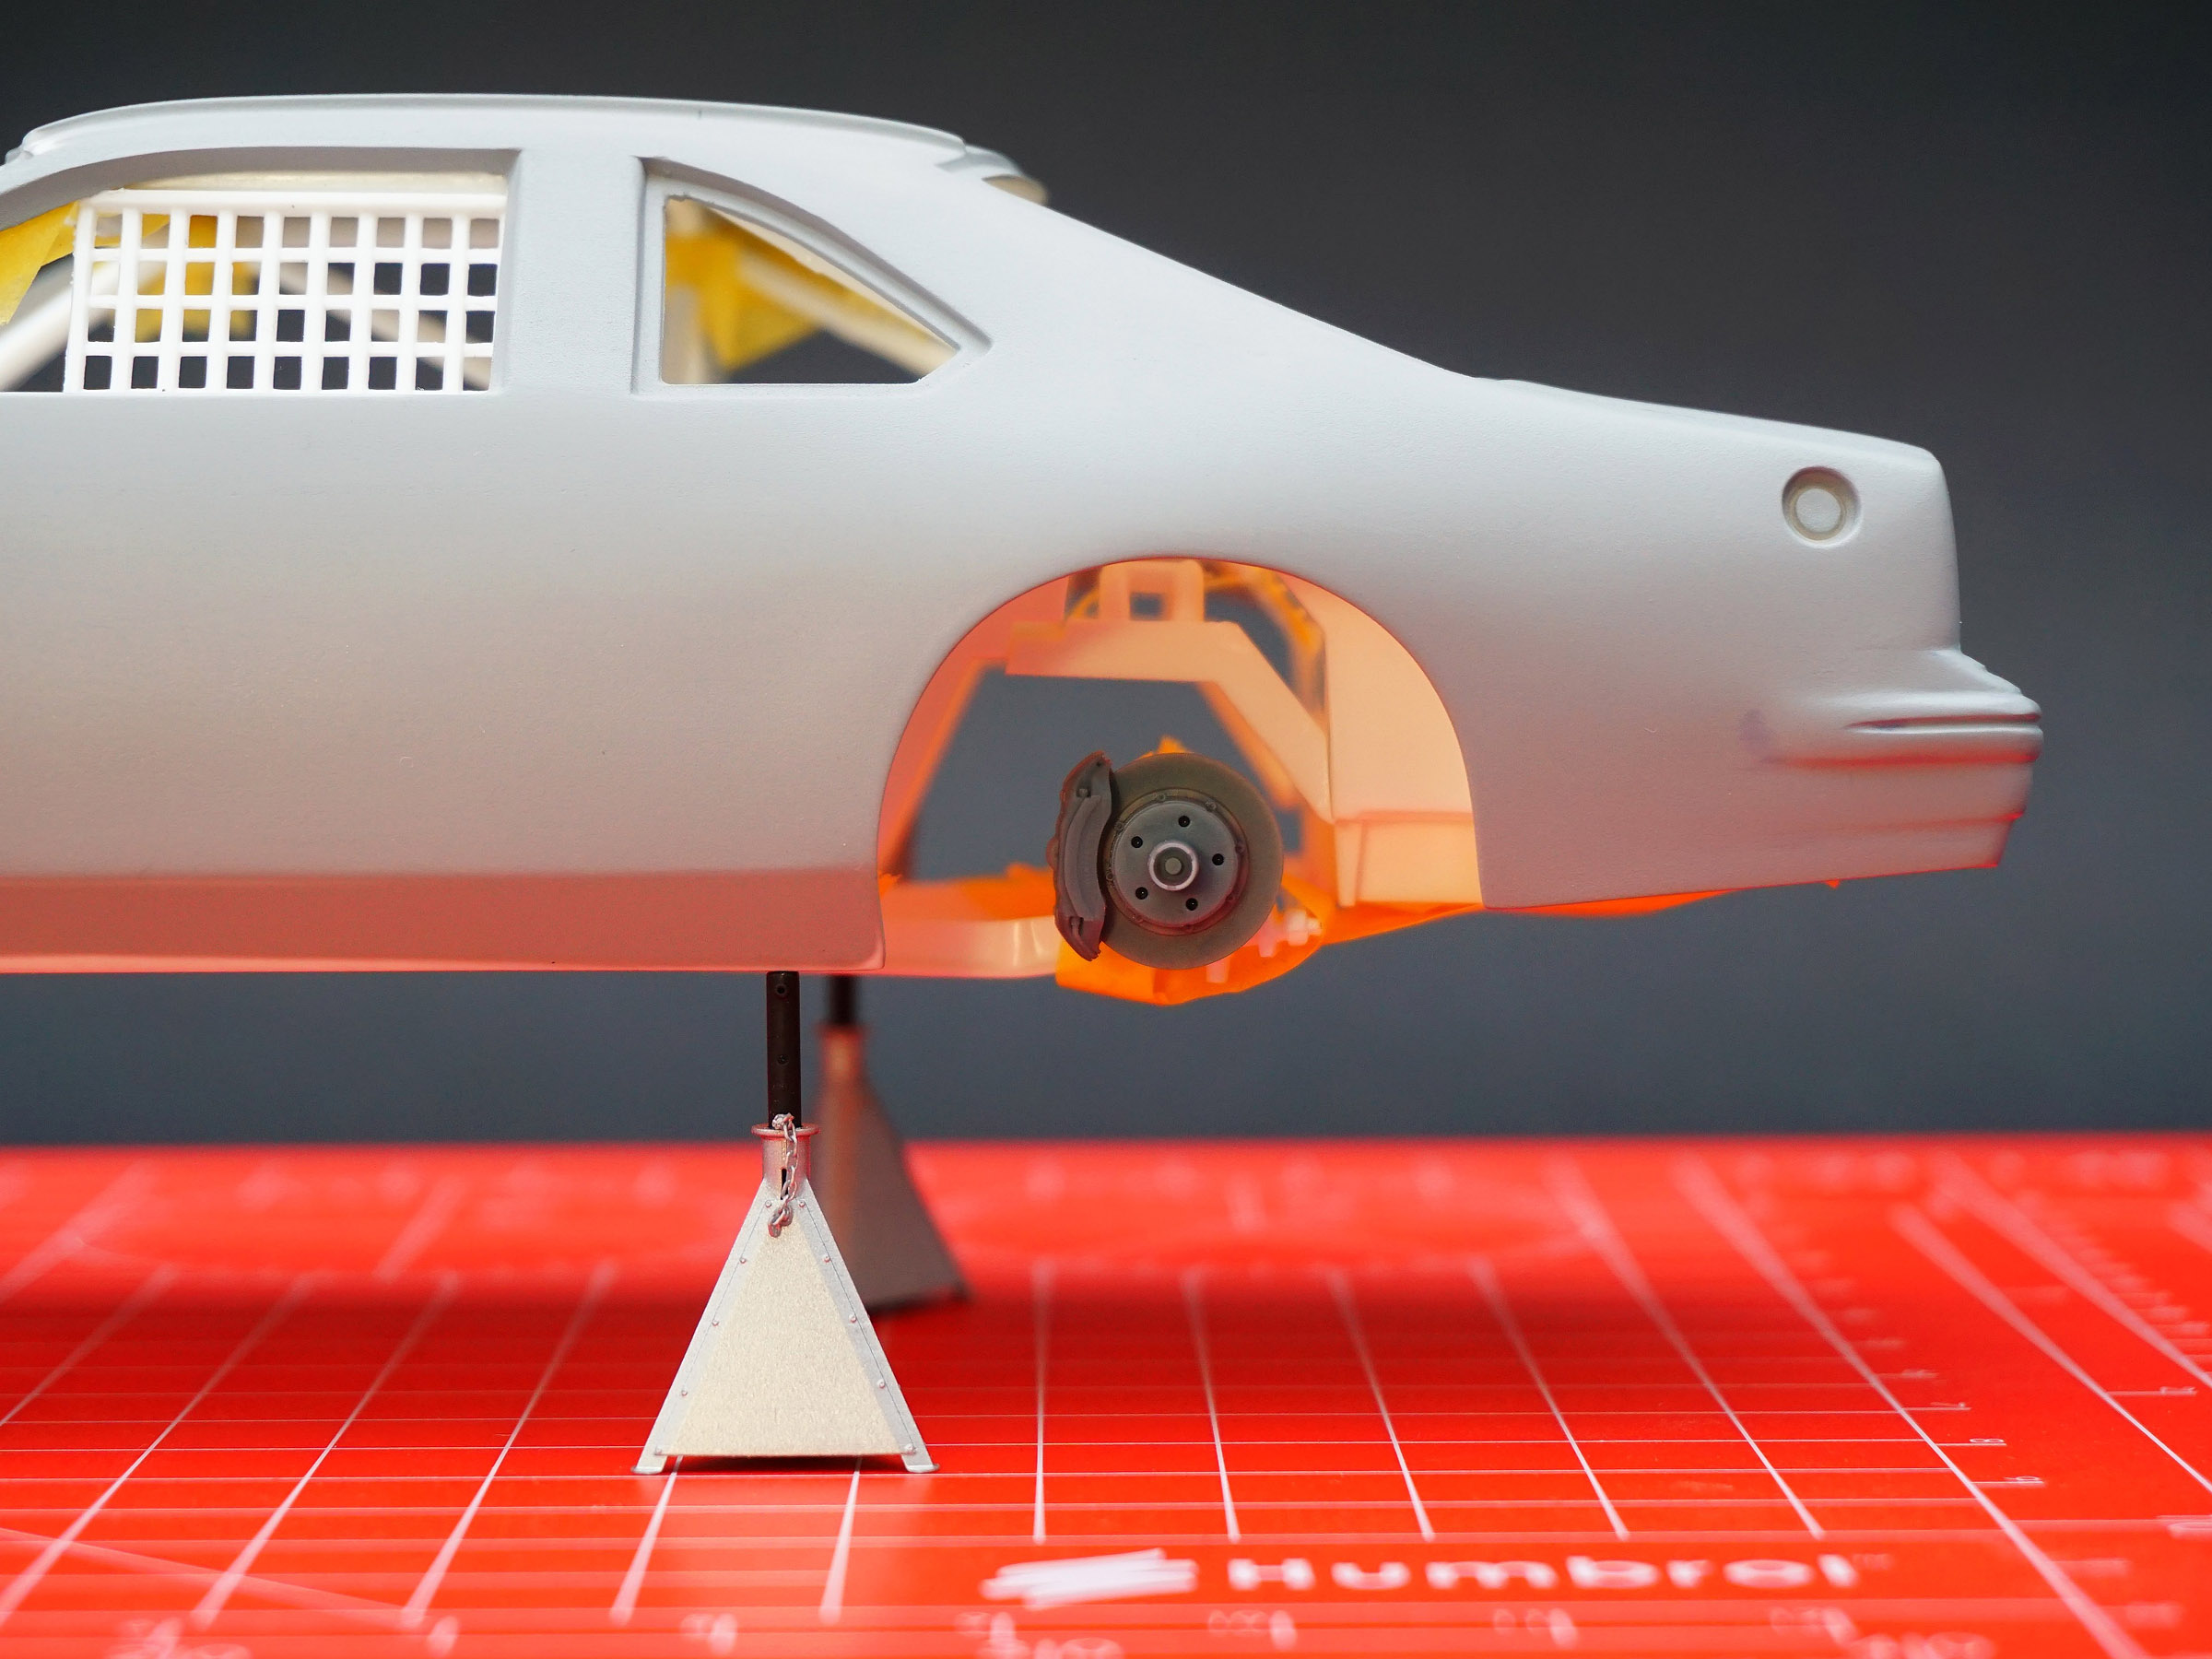
The next tests are to check the fit of the suspension in order to adapt the new brakes.
All NASCAR modelers know that the old Monograms have a problem in the form of lack of brakes. The only thing we get in the set is a very poor imitation of calipers, and there are no discs at all... I decided to solve this problem with the product SCO-R054 NASCAR type V.2
Fitting the new brakes is very simple - just remove the original brake caliper and gently grind down the center pin. The new brakes with calipers are simply placed on the original center pin and everything fits perfectly.
Update 3 | 29.10.2024
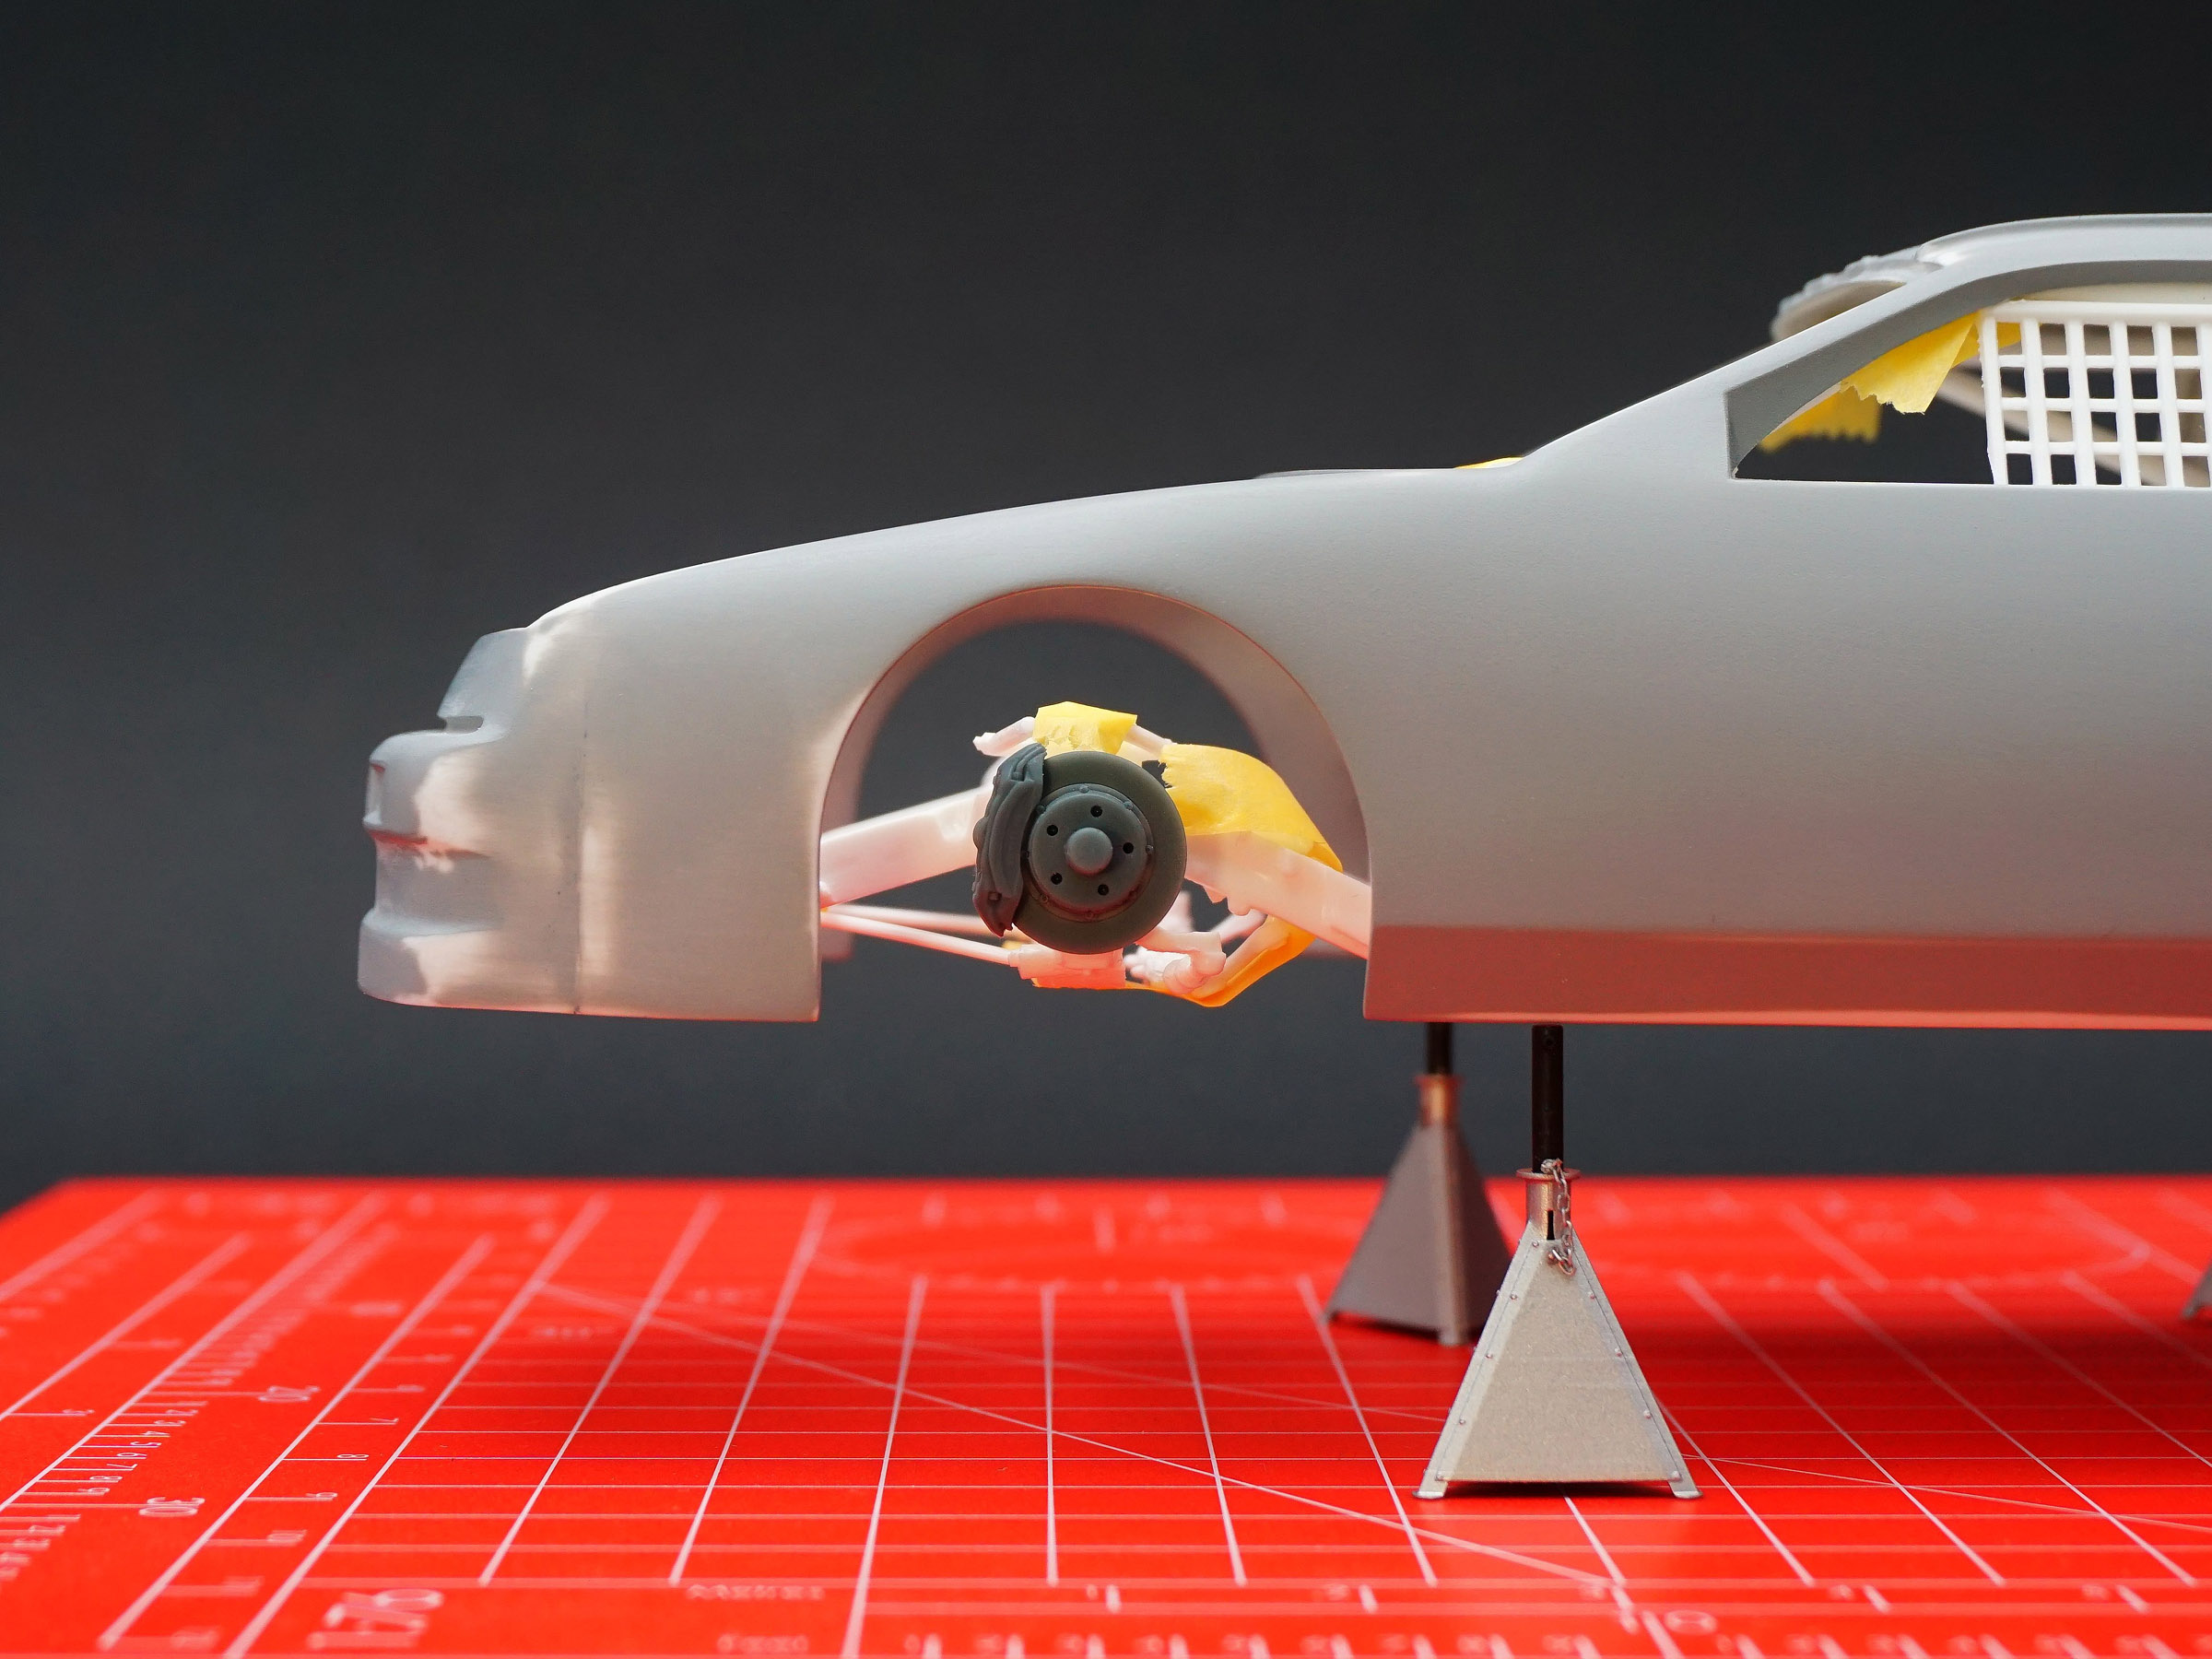
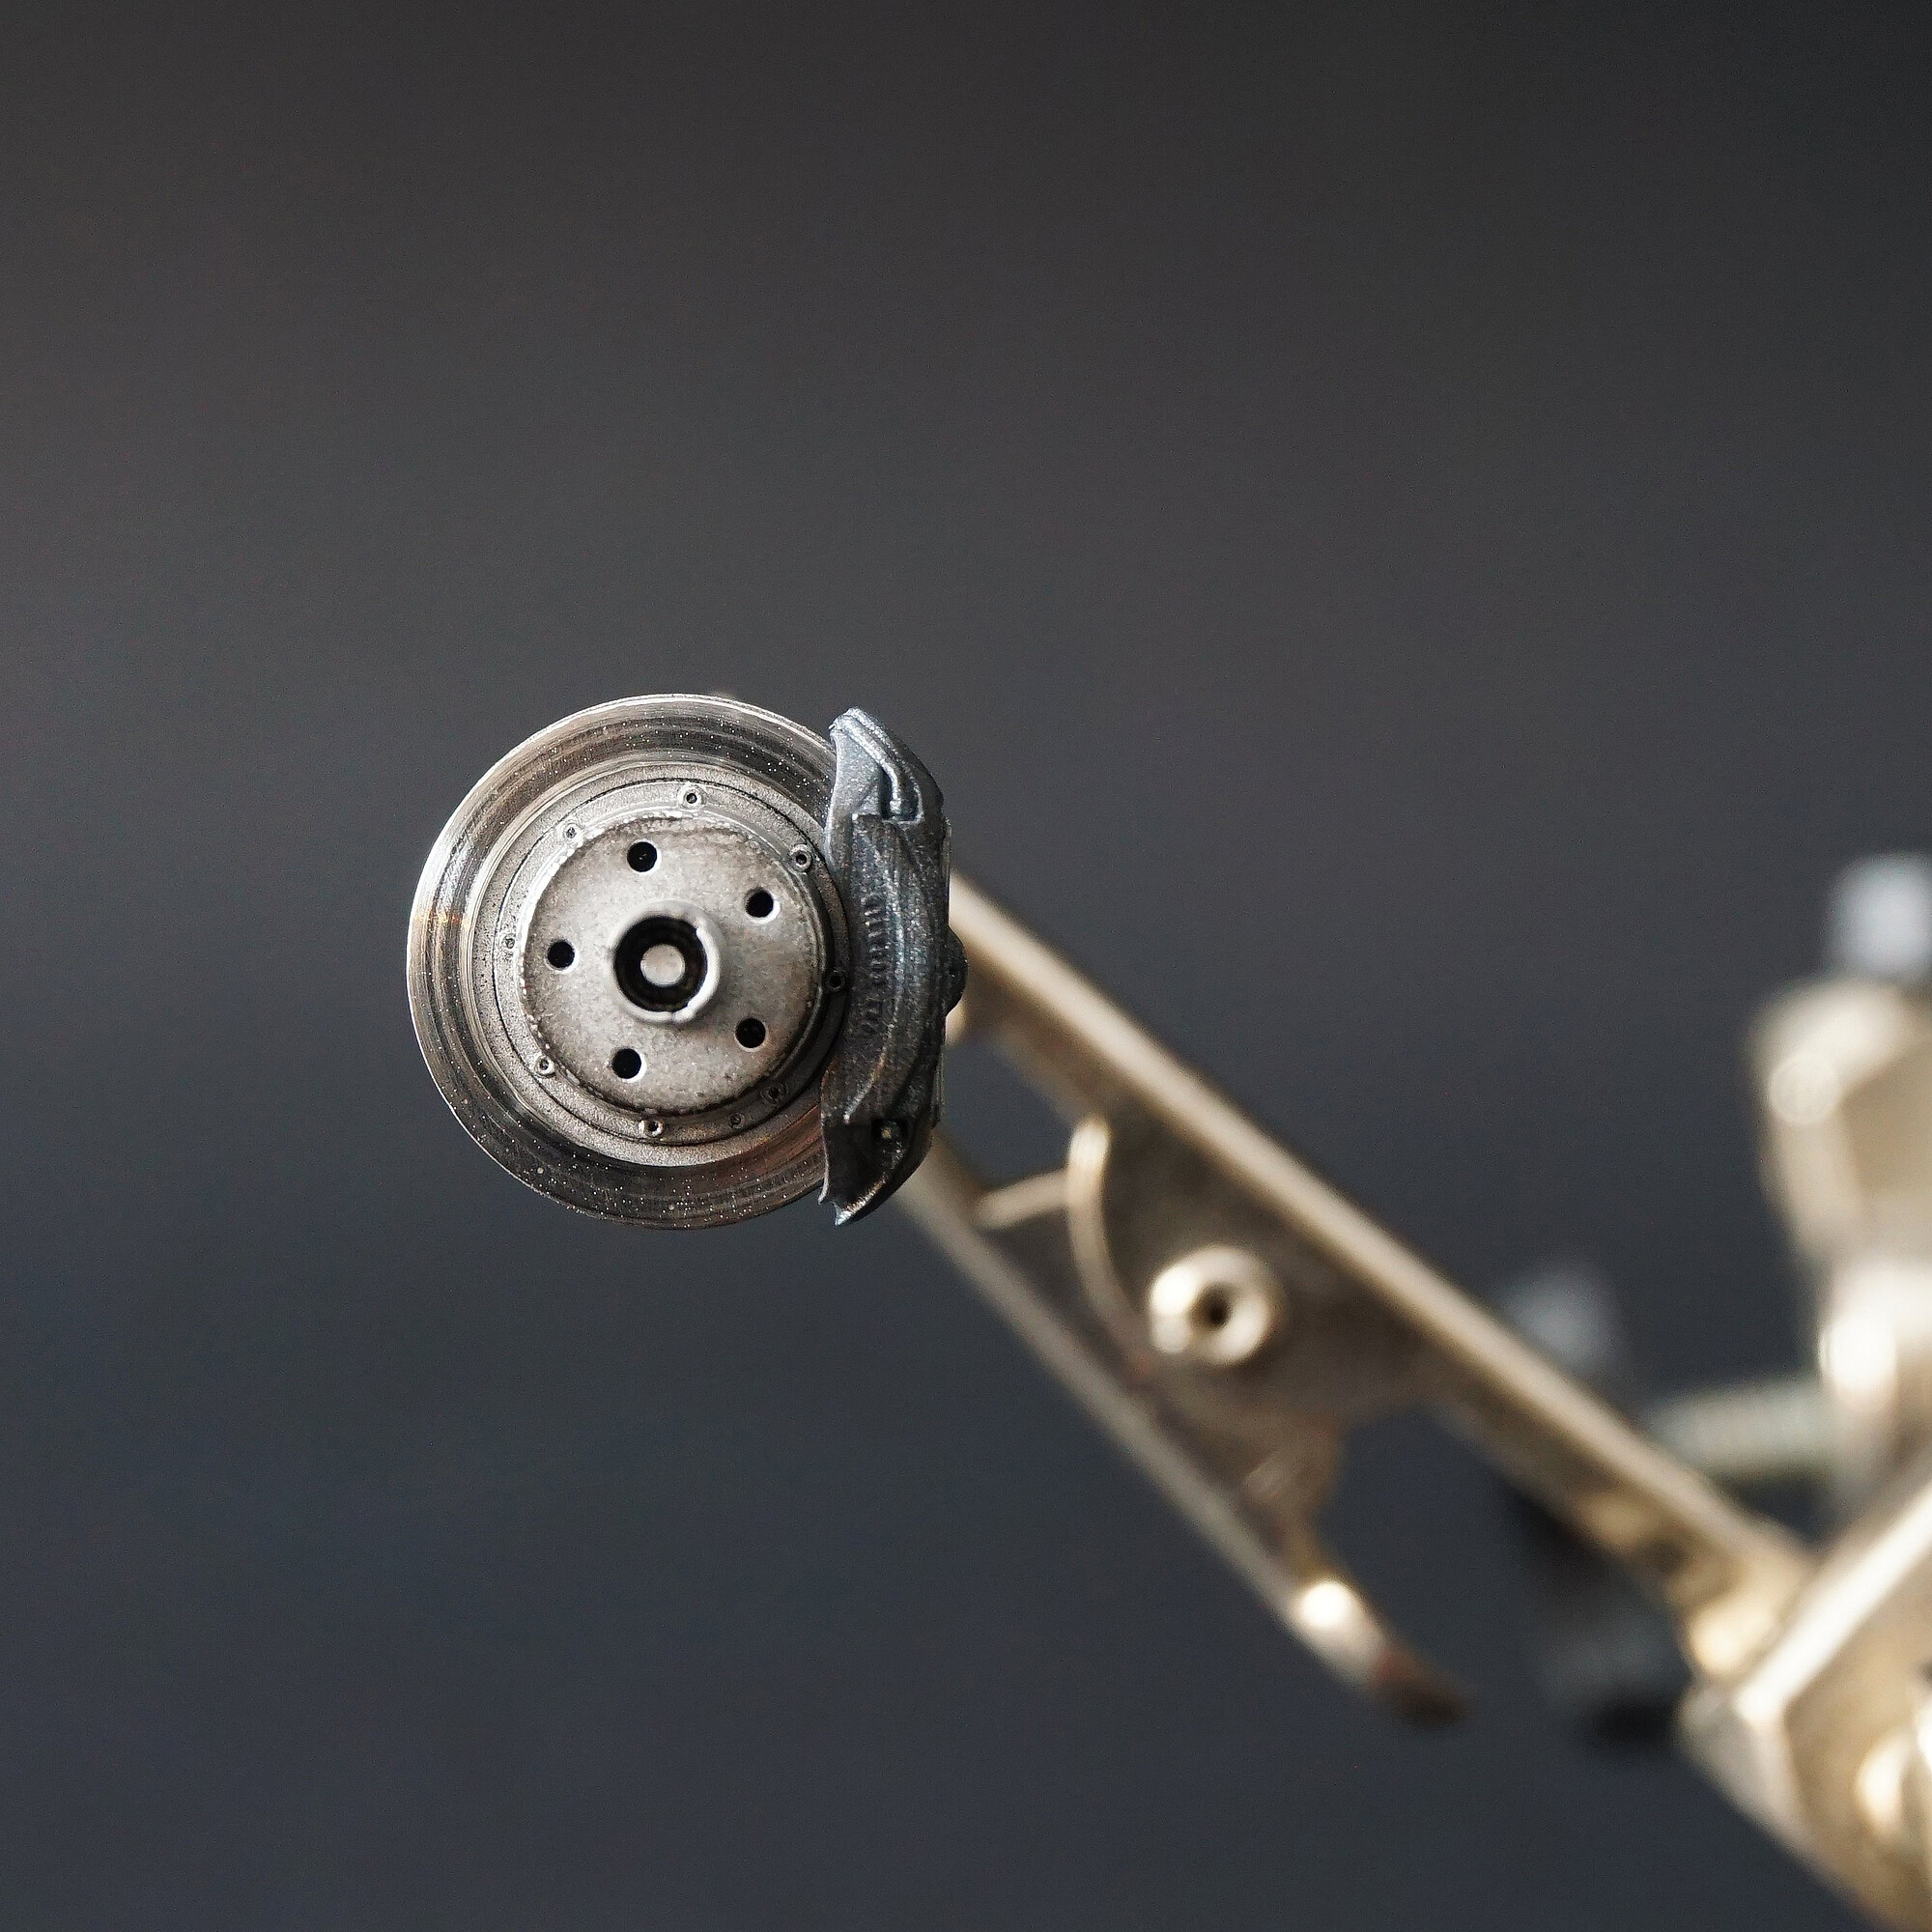
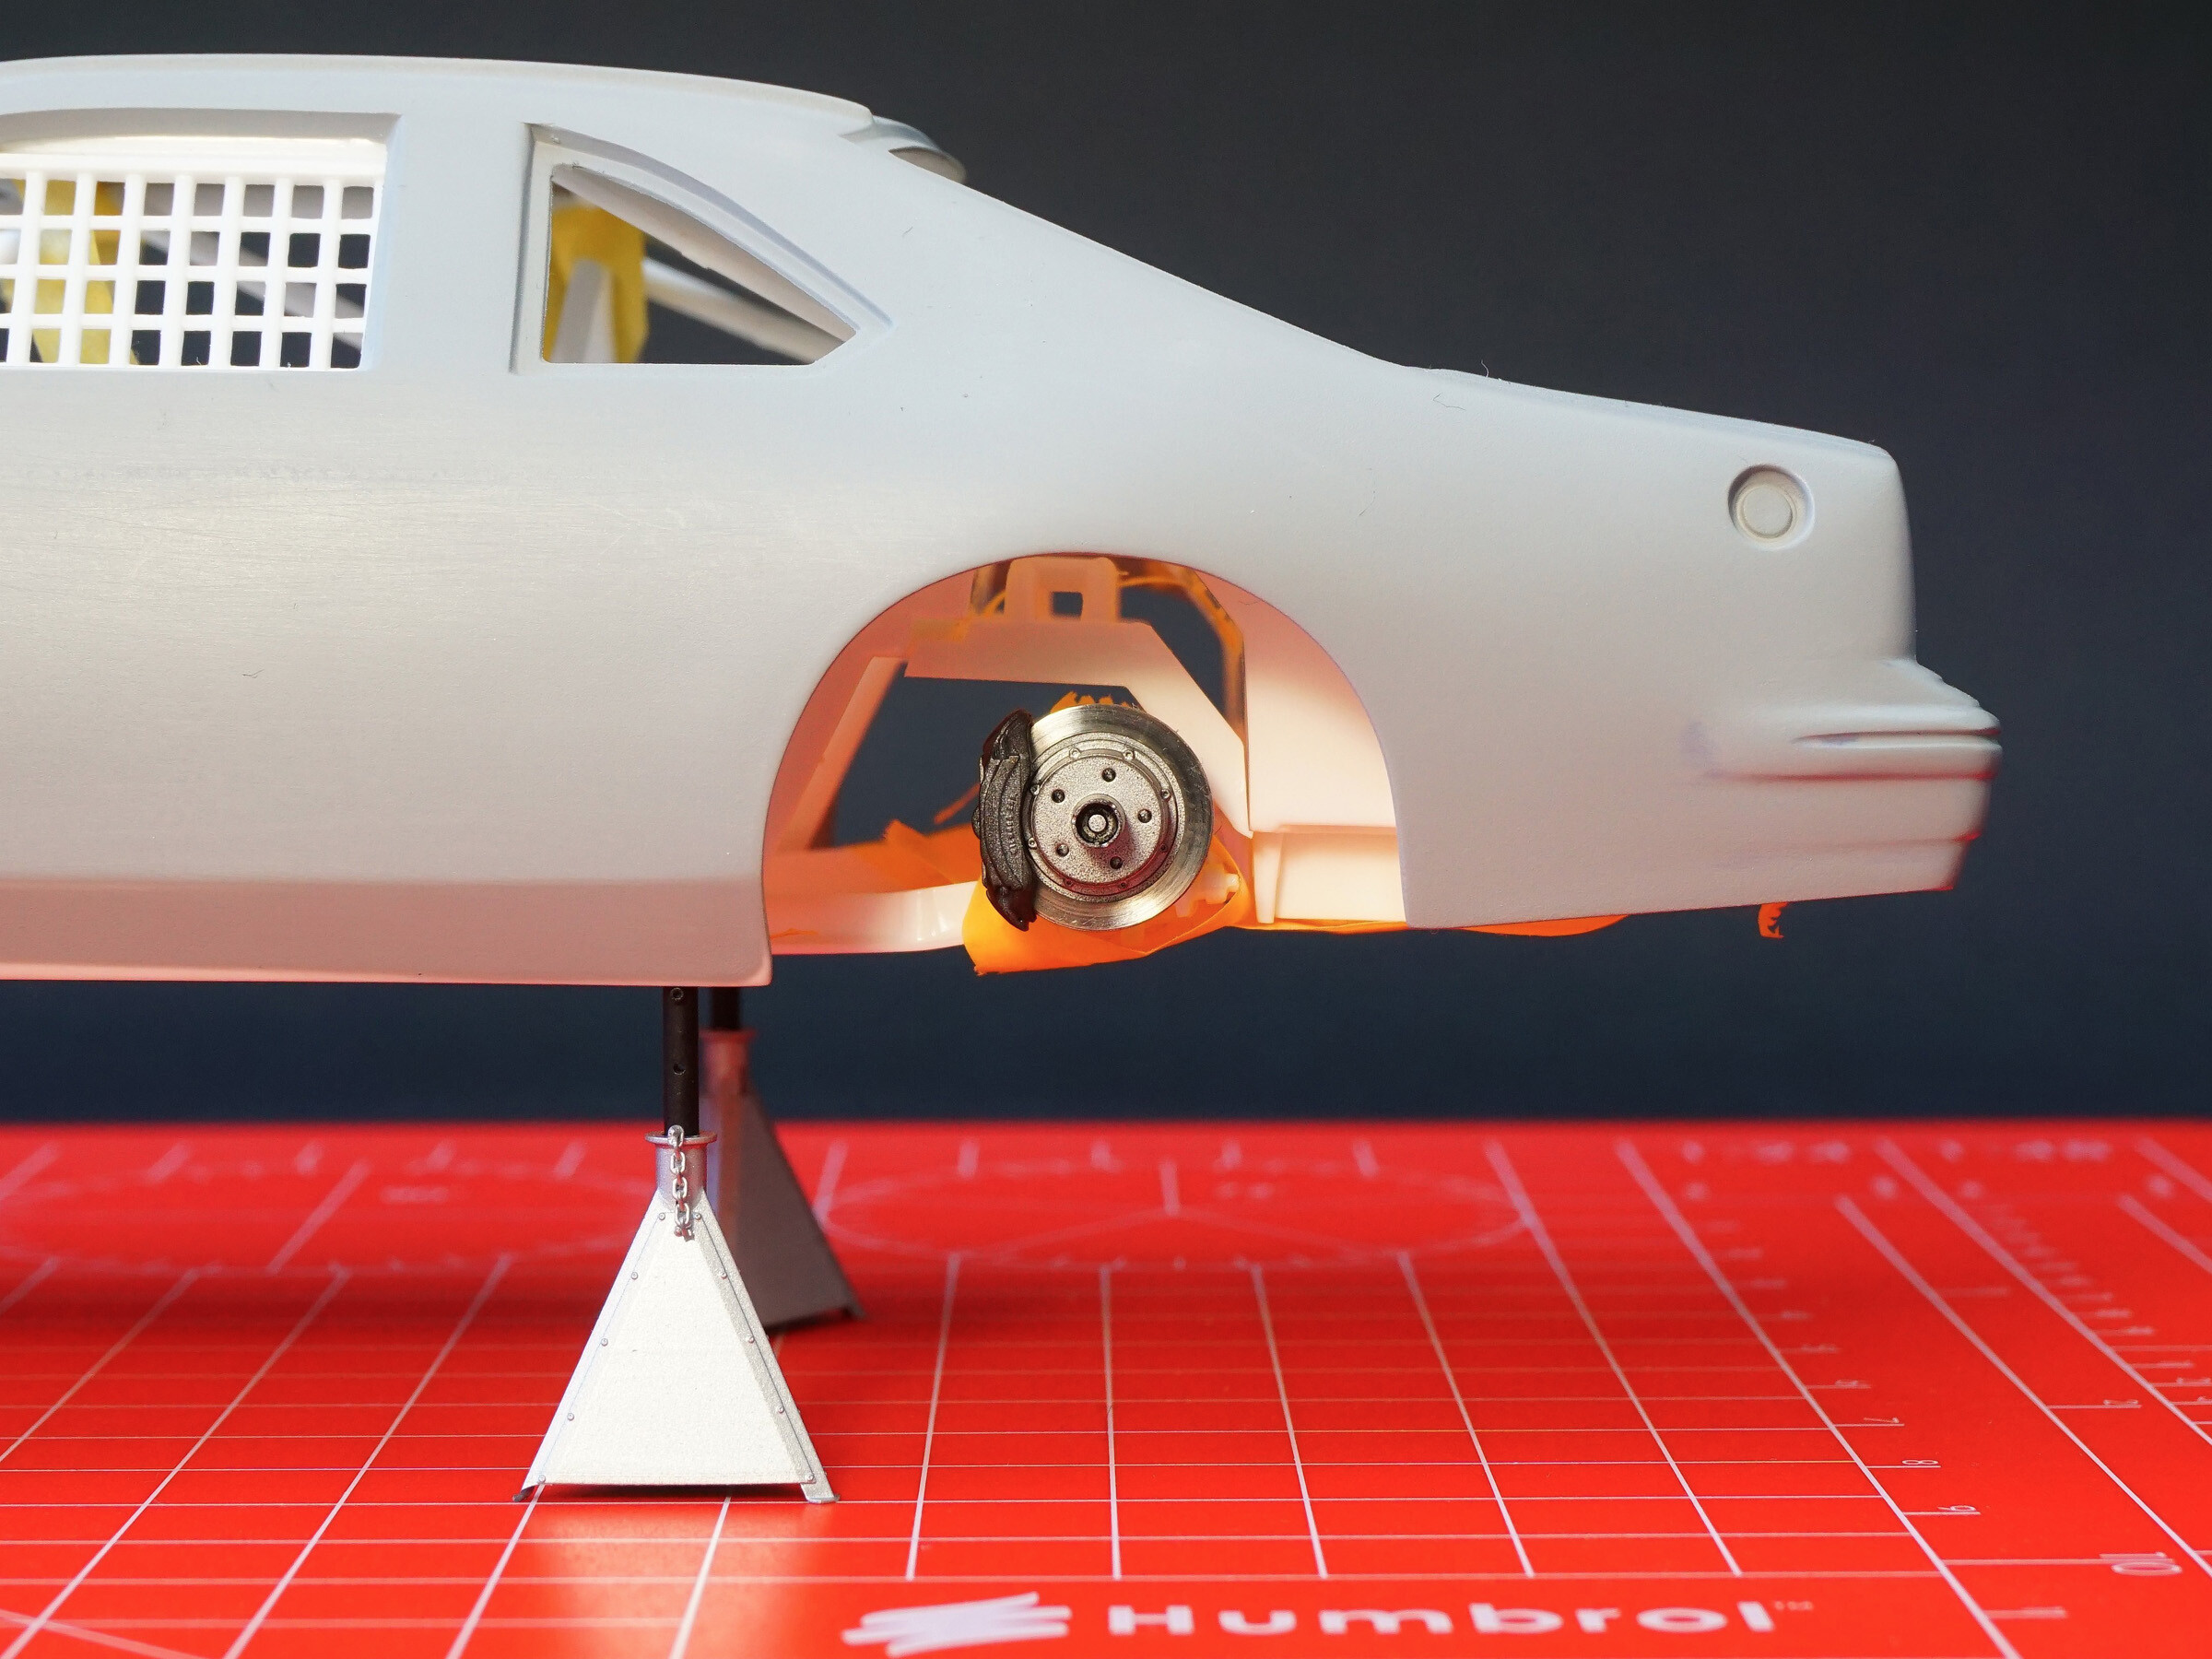
First results of work on the brakes. In addition to painting, I used photo-etched parts to refine the discs. Before assembly, the discs were sanded with sandpaper on a Dremel to achieve the effect of natural wear.
Additional parts I used were The Model Car Garage - 13'' Slotted disc brake rotors (for the front discs) and Hobby Design - Citroen DS3 WRC 2012 For Heller (for the rear discs).
The calipers were painted and installed. When I first saw this brake kit - (NASCAR type V.2) with calipers and pads separately I thought it was crazy... But when you put it all together you will realize you have the most detailed brakes available for NASCAR models. They were a pleasure to work on.
I couldn't resist seeing what the finished brakes would look like on the Ford!
Update 4 | 18.12.2024
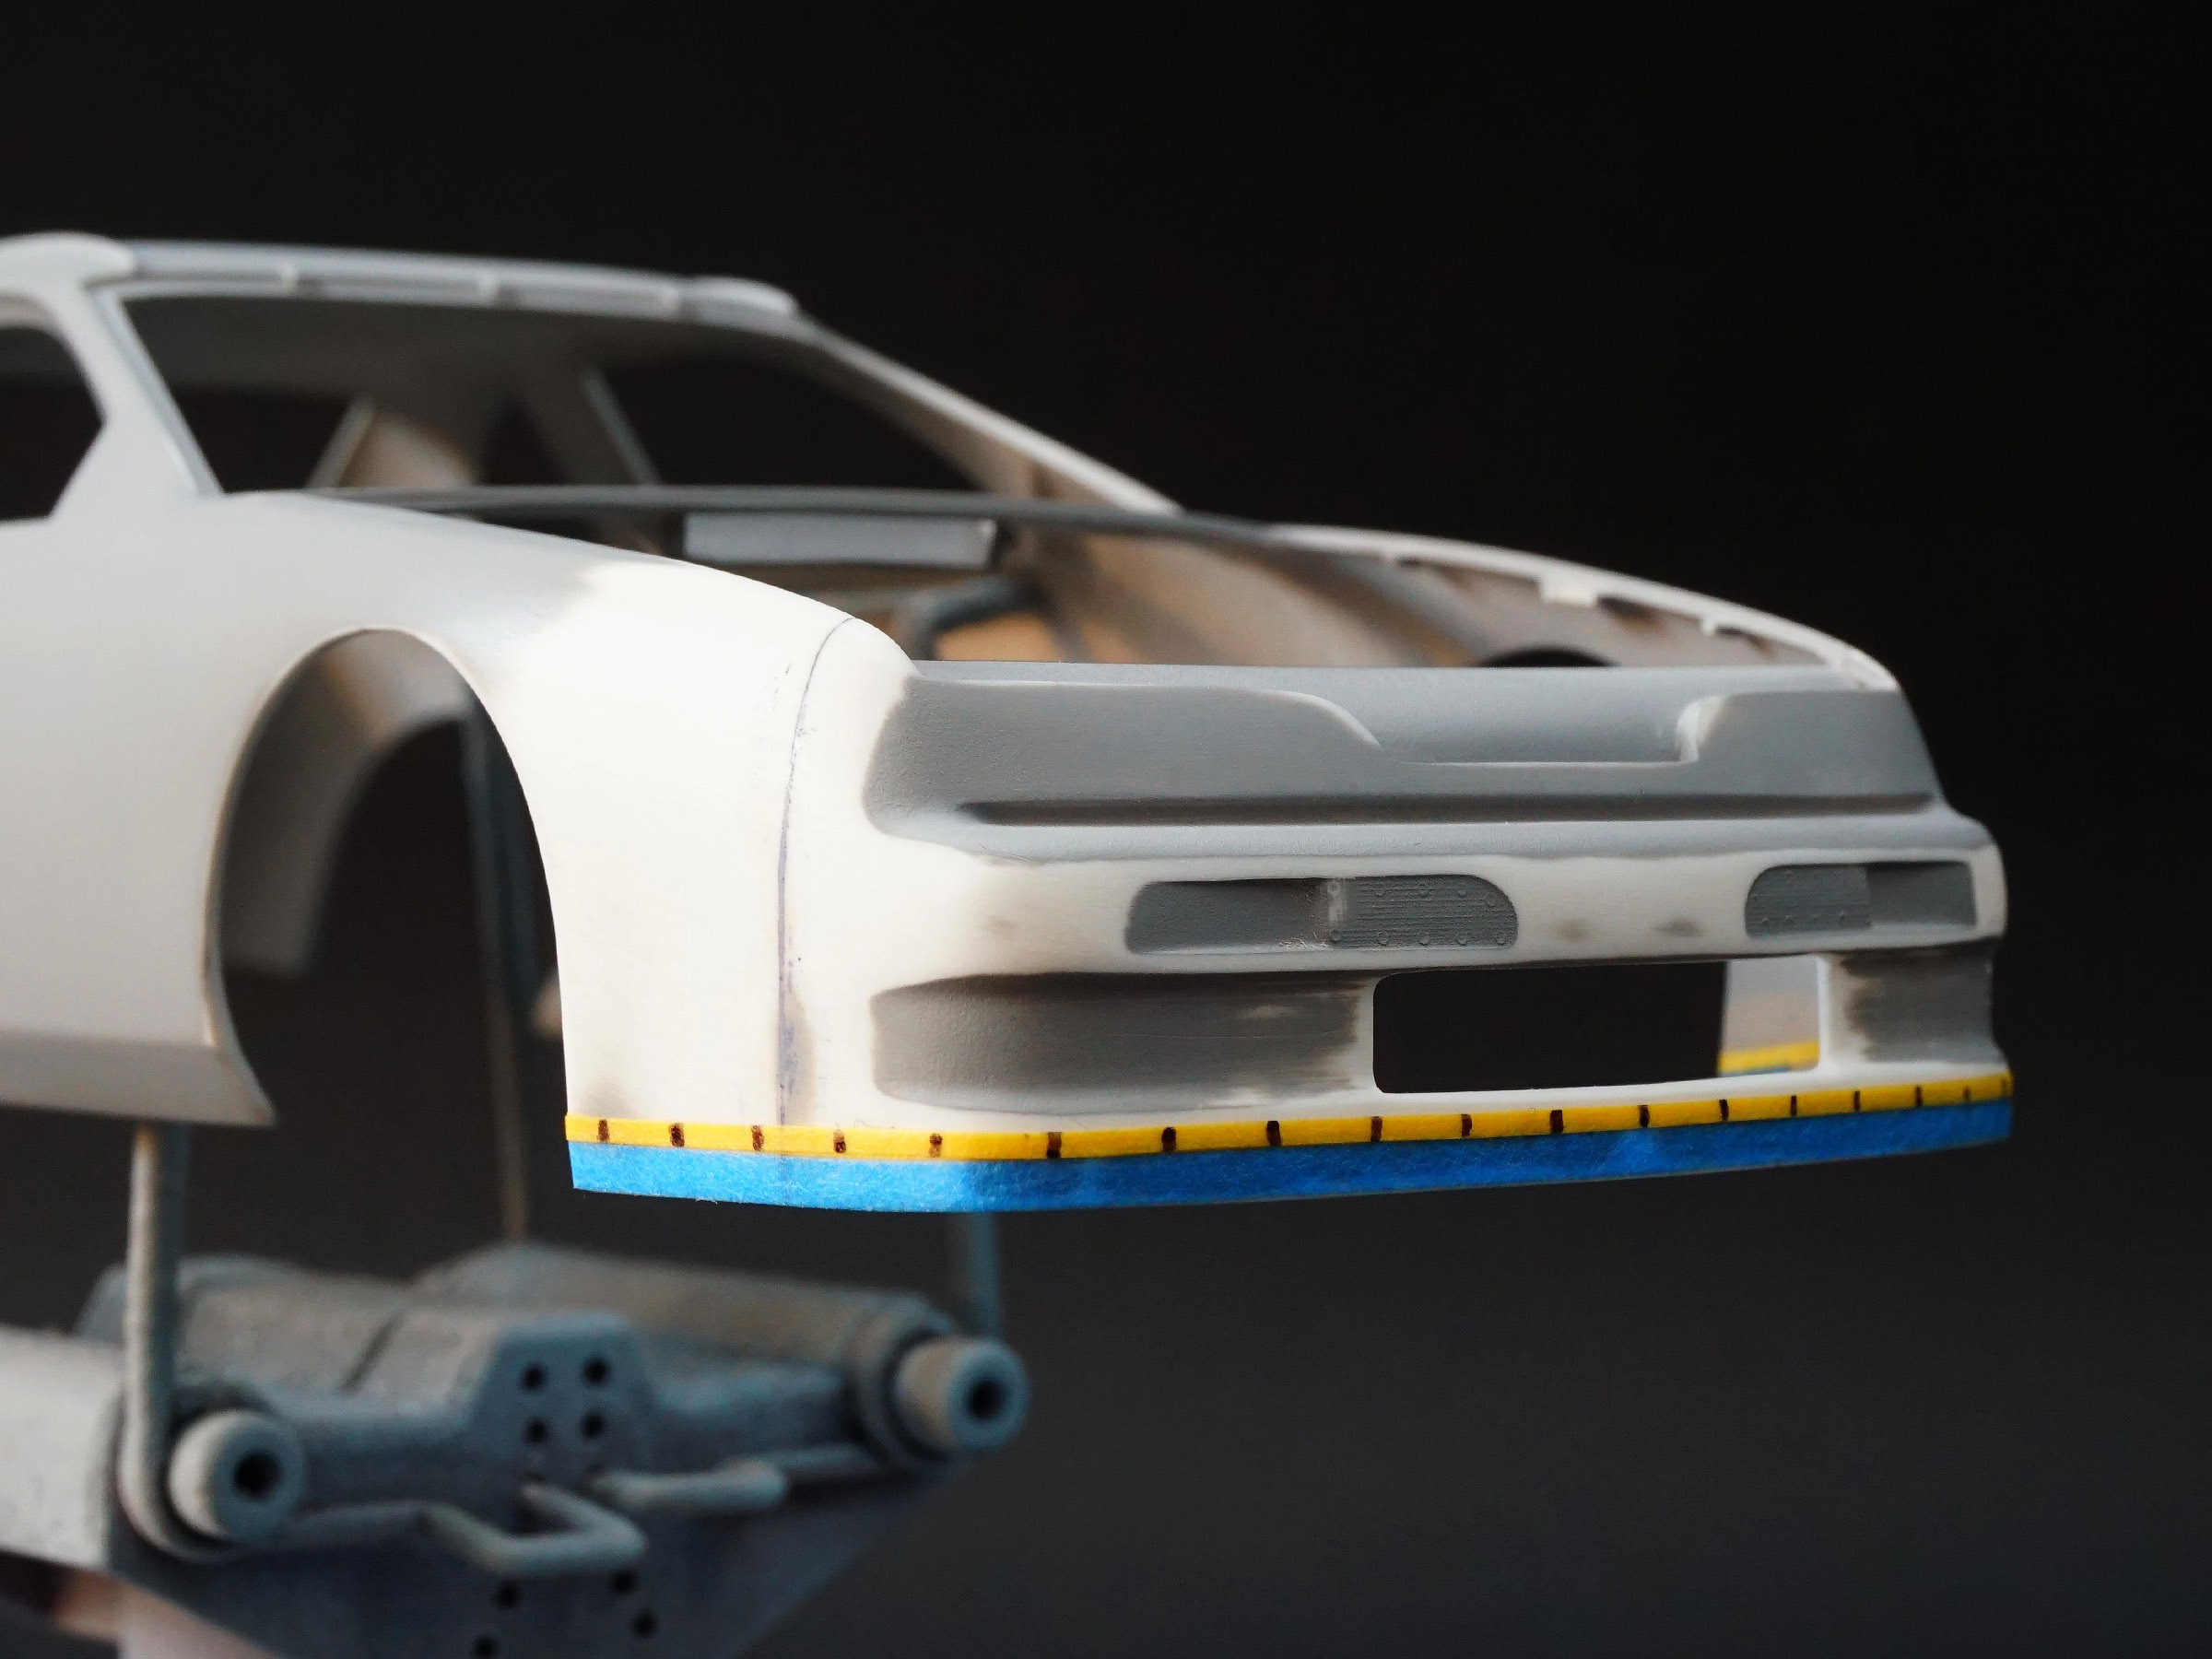
Front bumper work.
I decided to spice up the front of the model by inserting PE parts from The Model Car Garage - Stock Car Grill and Duct Works.
In my opinion the meshes are too big, so I had to modify and rework them. The bumper too, so that everything fits together. In the end I used Tamiya mesh for the radiator air intake anyway, because I ran out of patience...
The next step was to measure and drill the bumper for the mounting screws. For this purpose, I used 0,8 mm cone rivets (SCO-R062).
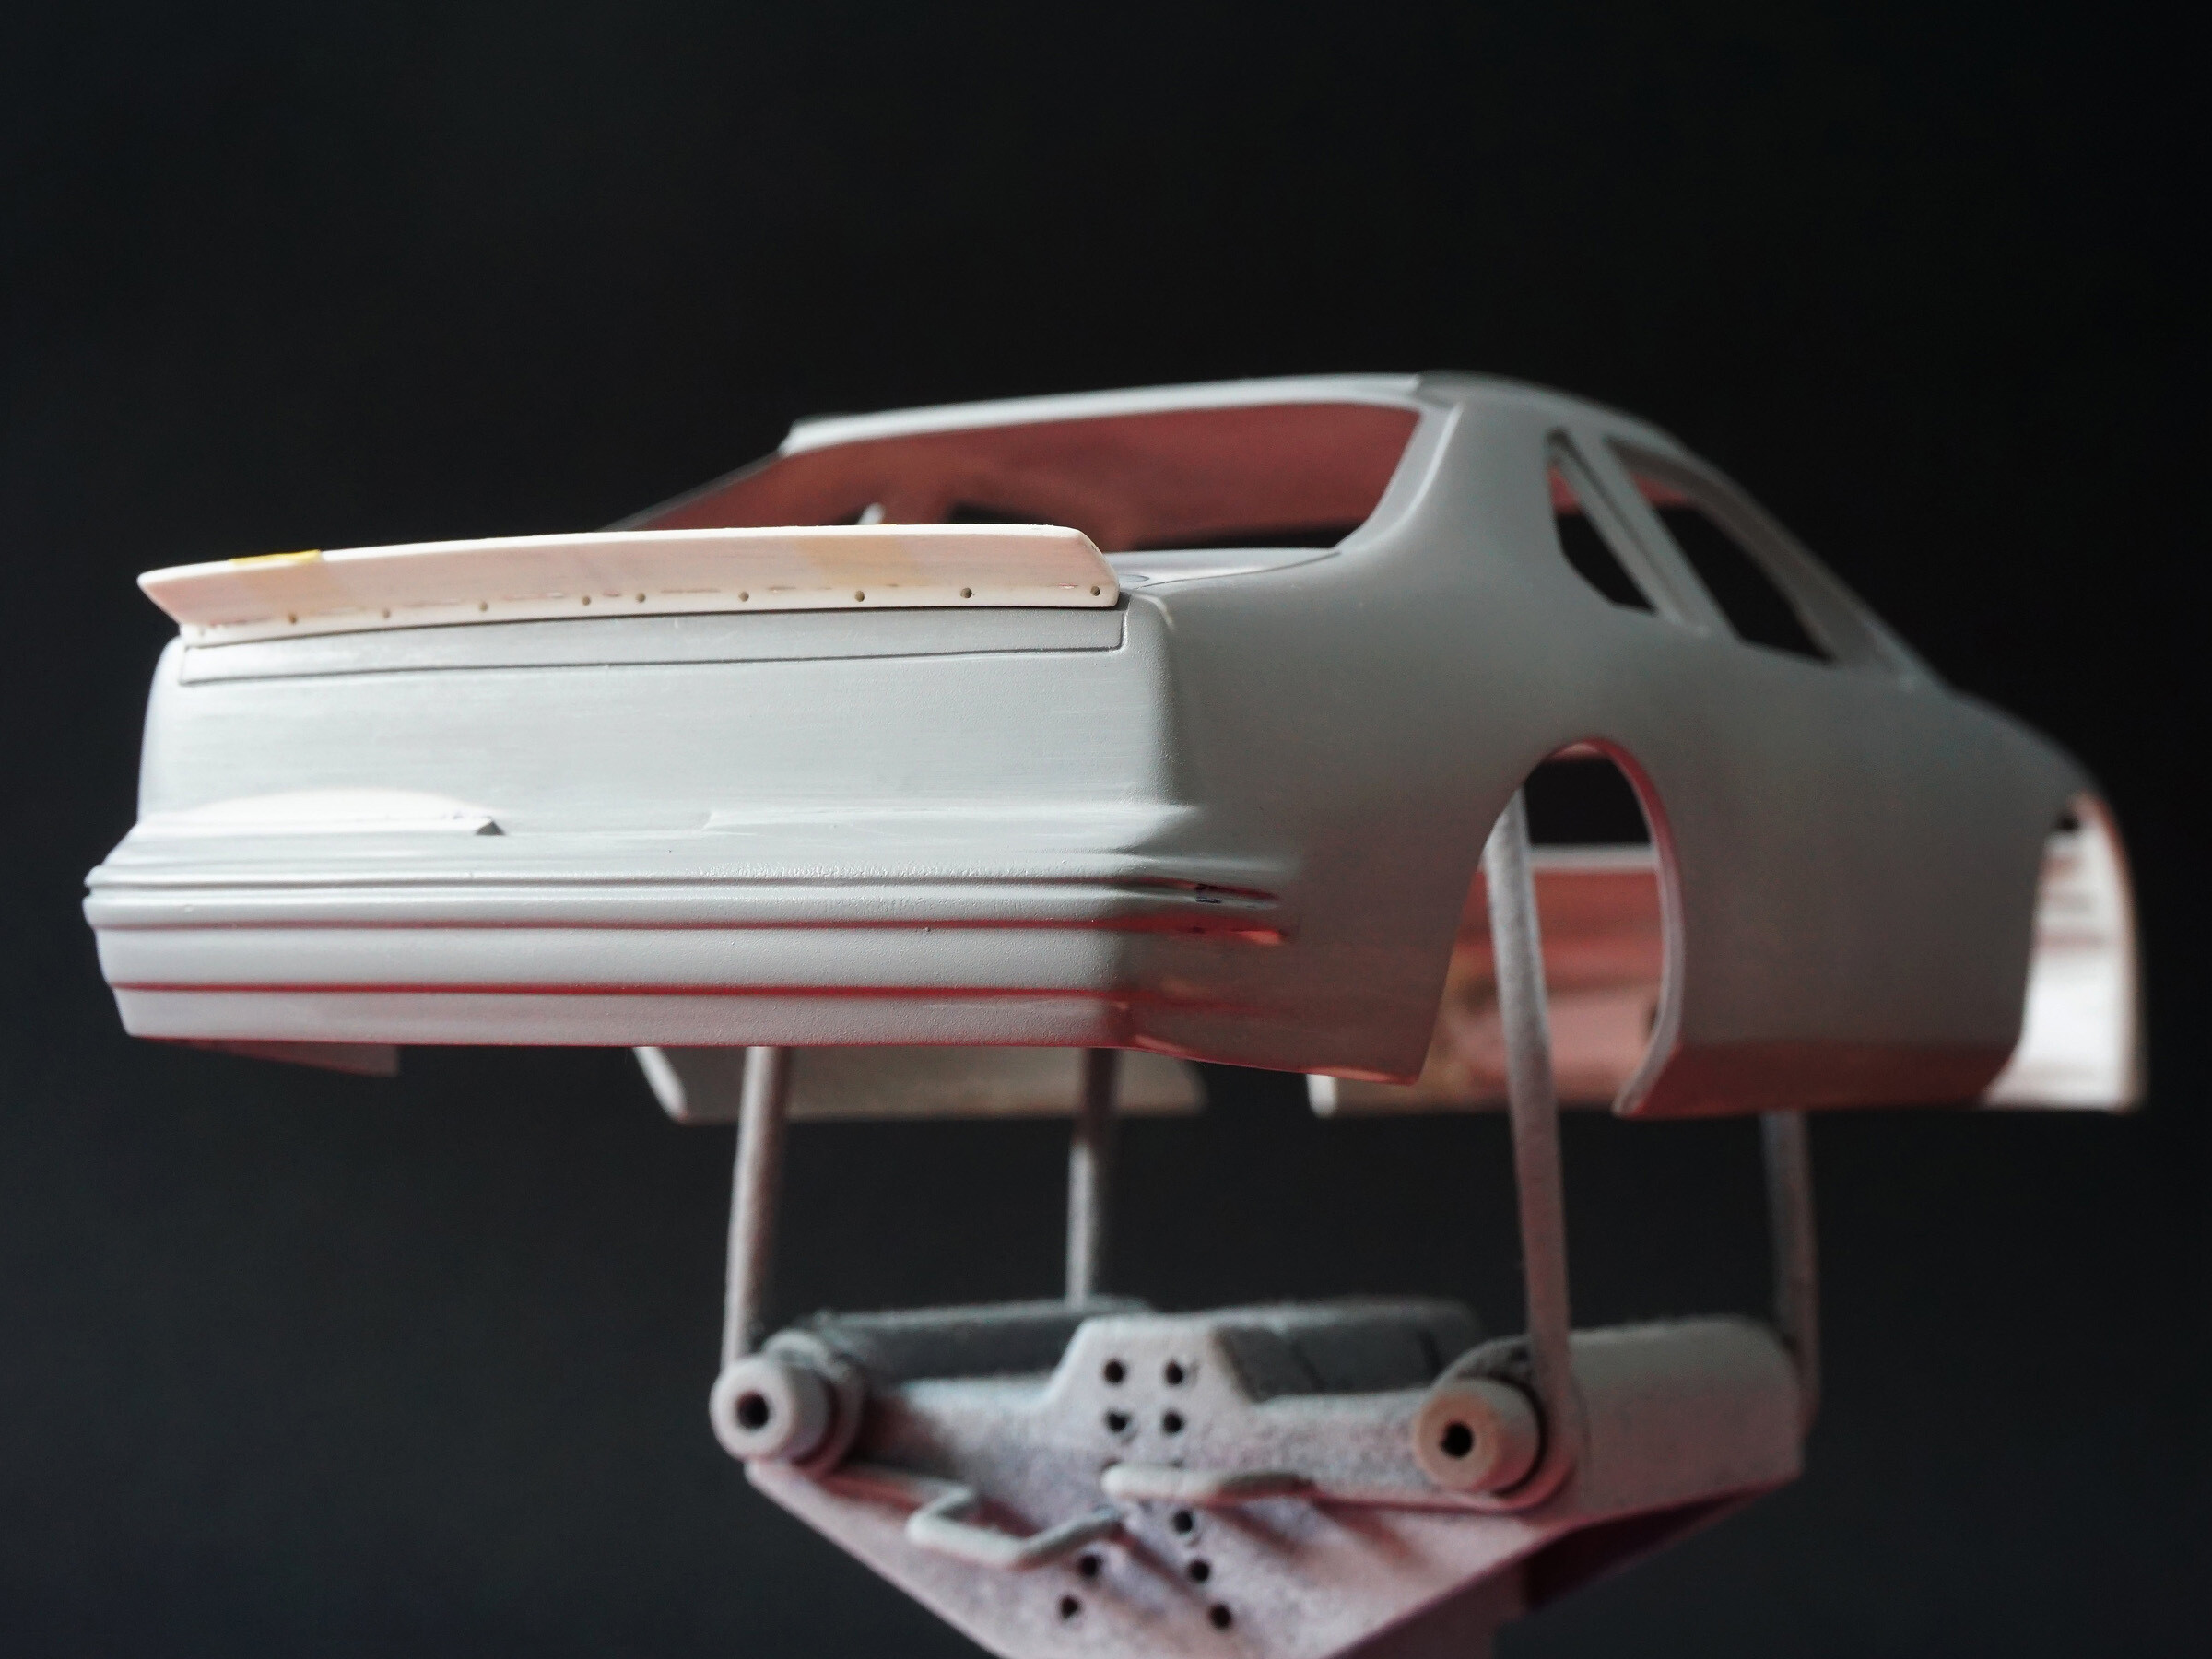
Work on the trunk lid and rear spoiler.
I removed the original rear spoiler mounting bolts, which looked more like plastic sprues, and replaced them with 0,8 mm rivets - round head + washer - (SCO-R072), made by SCO. I also made a panel lines for the trunk lid, which the model did not have.
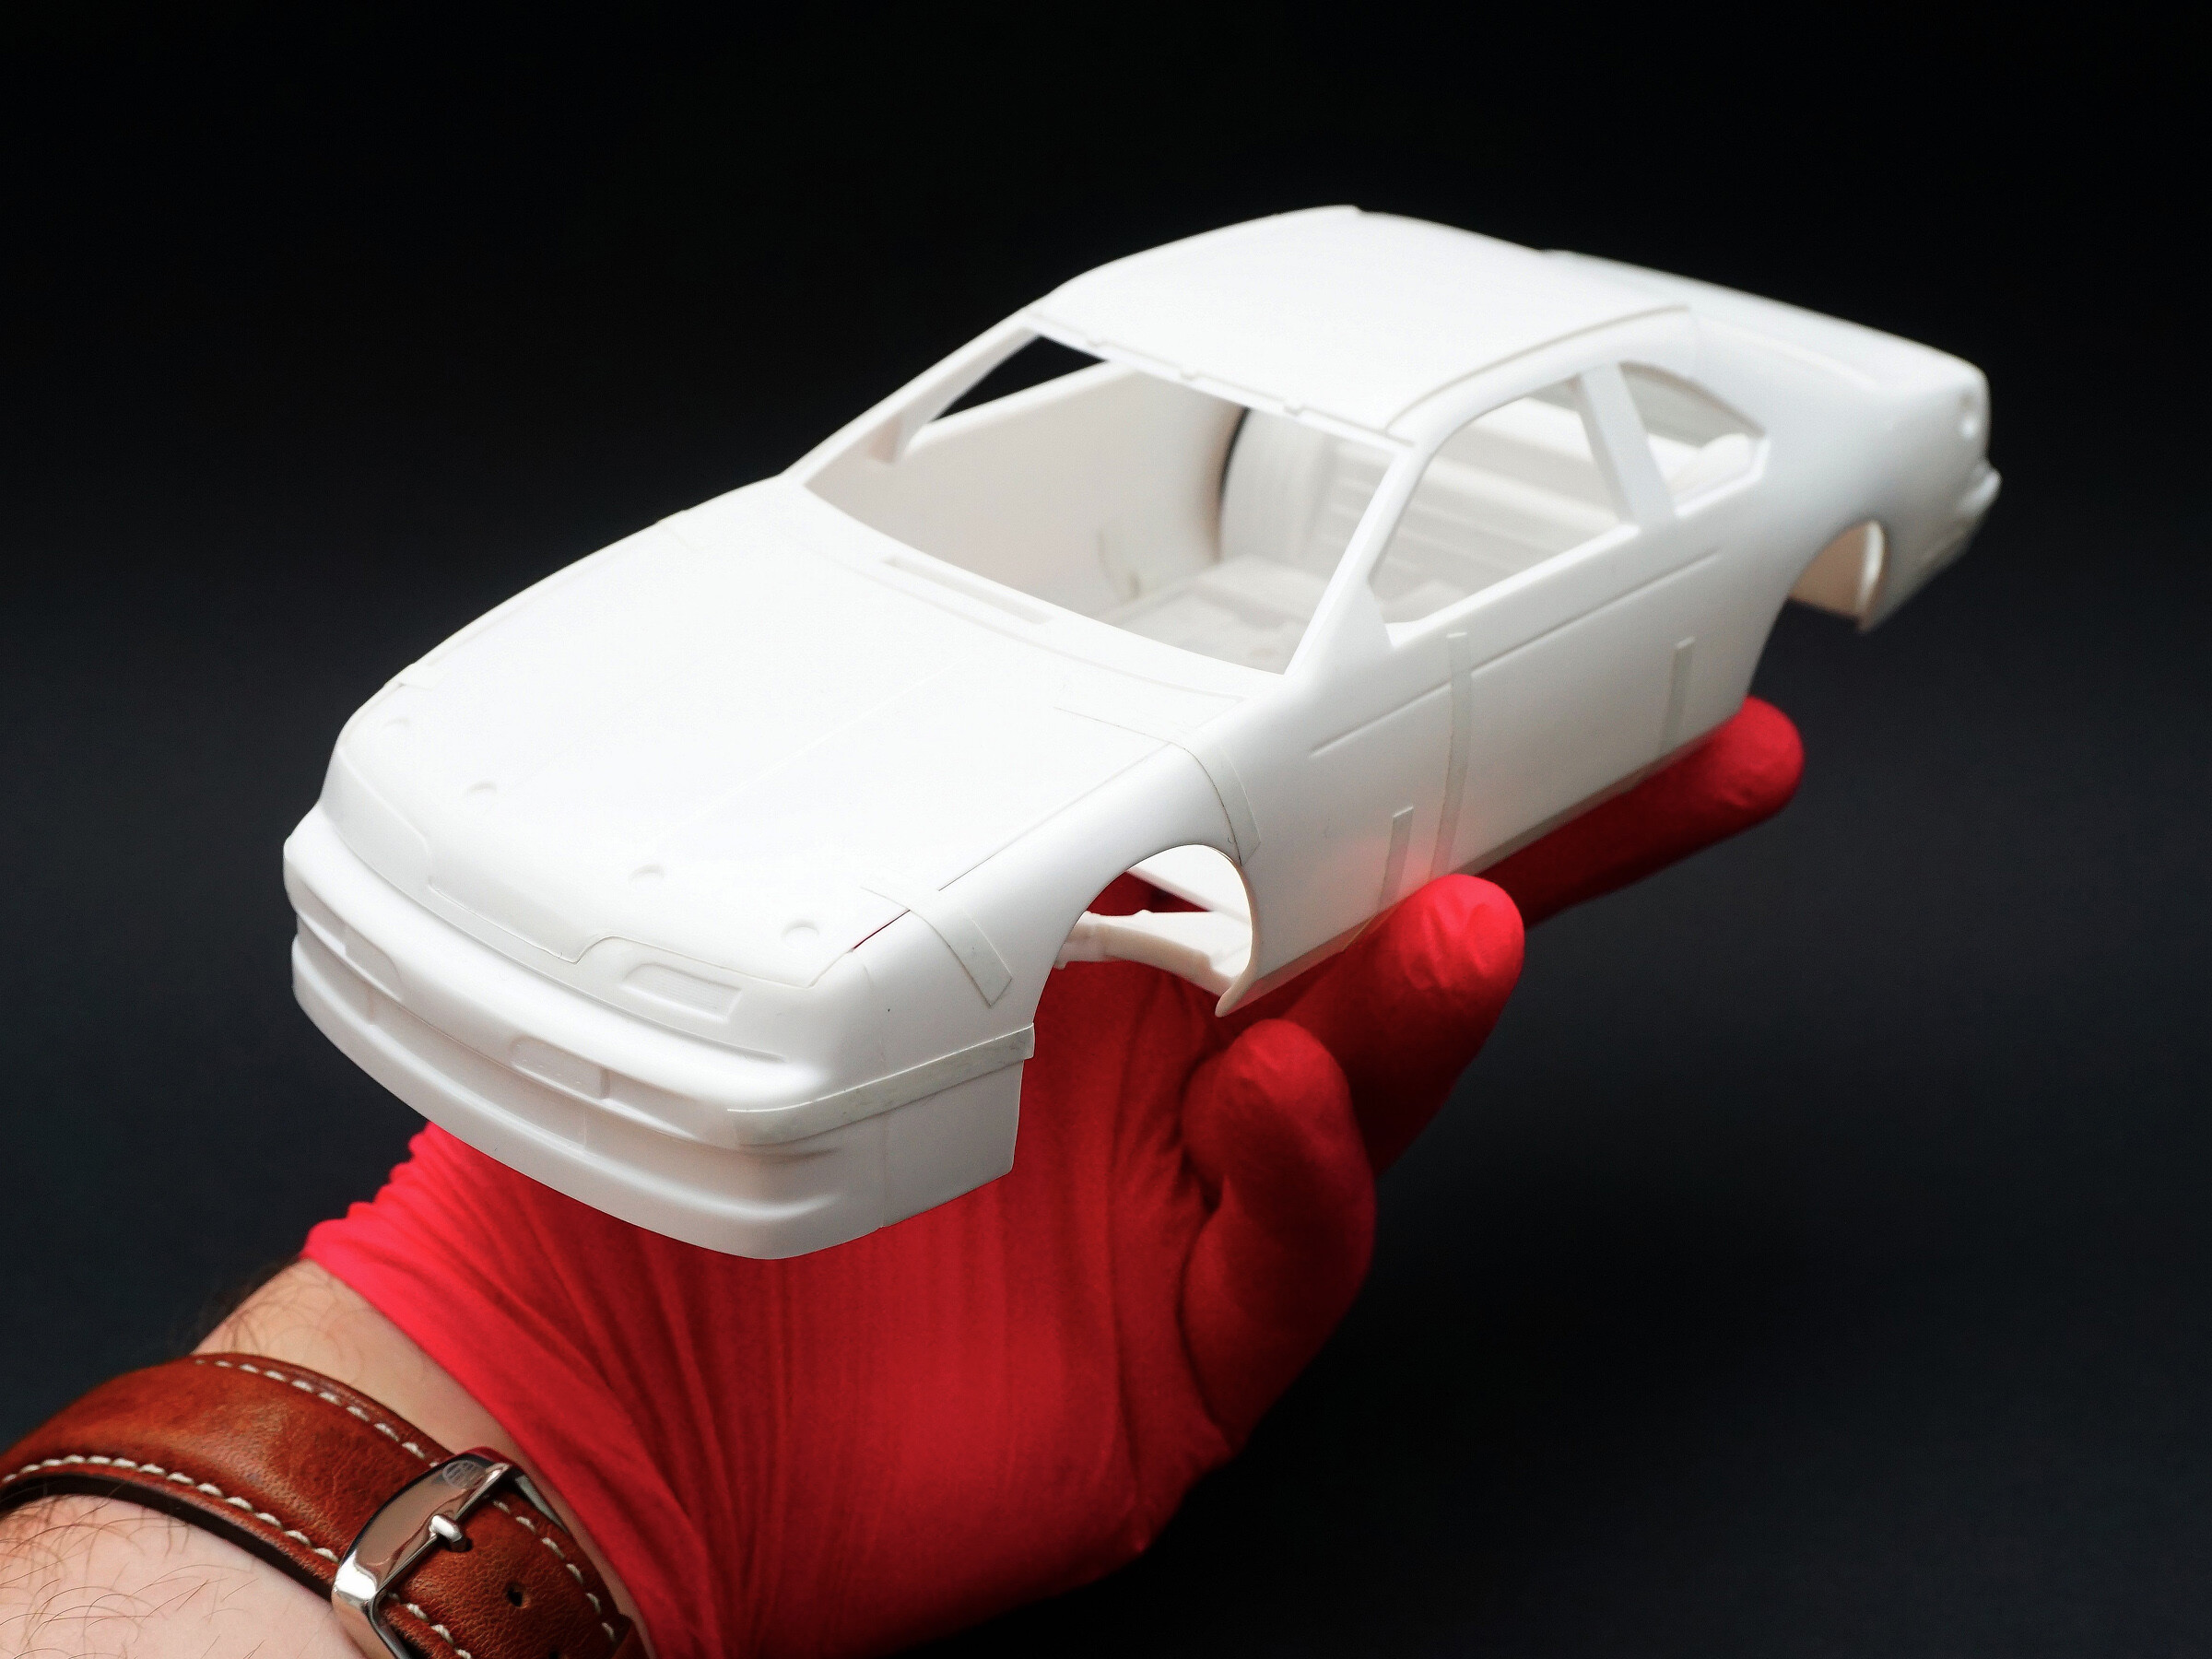
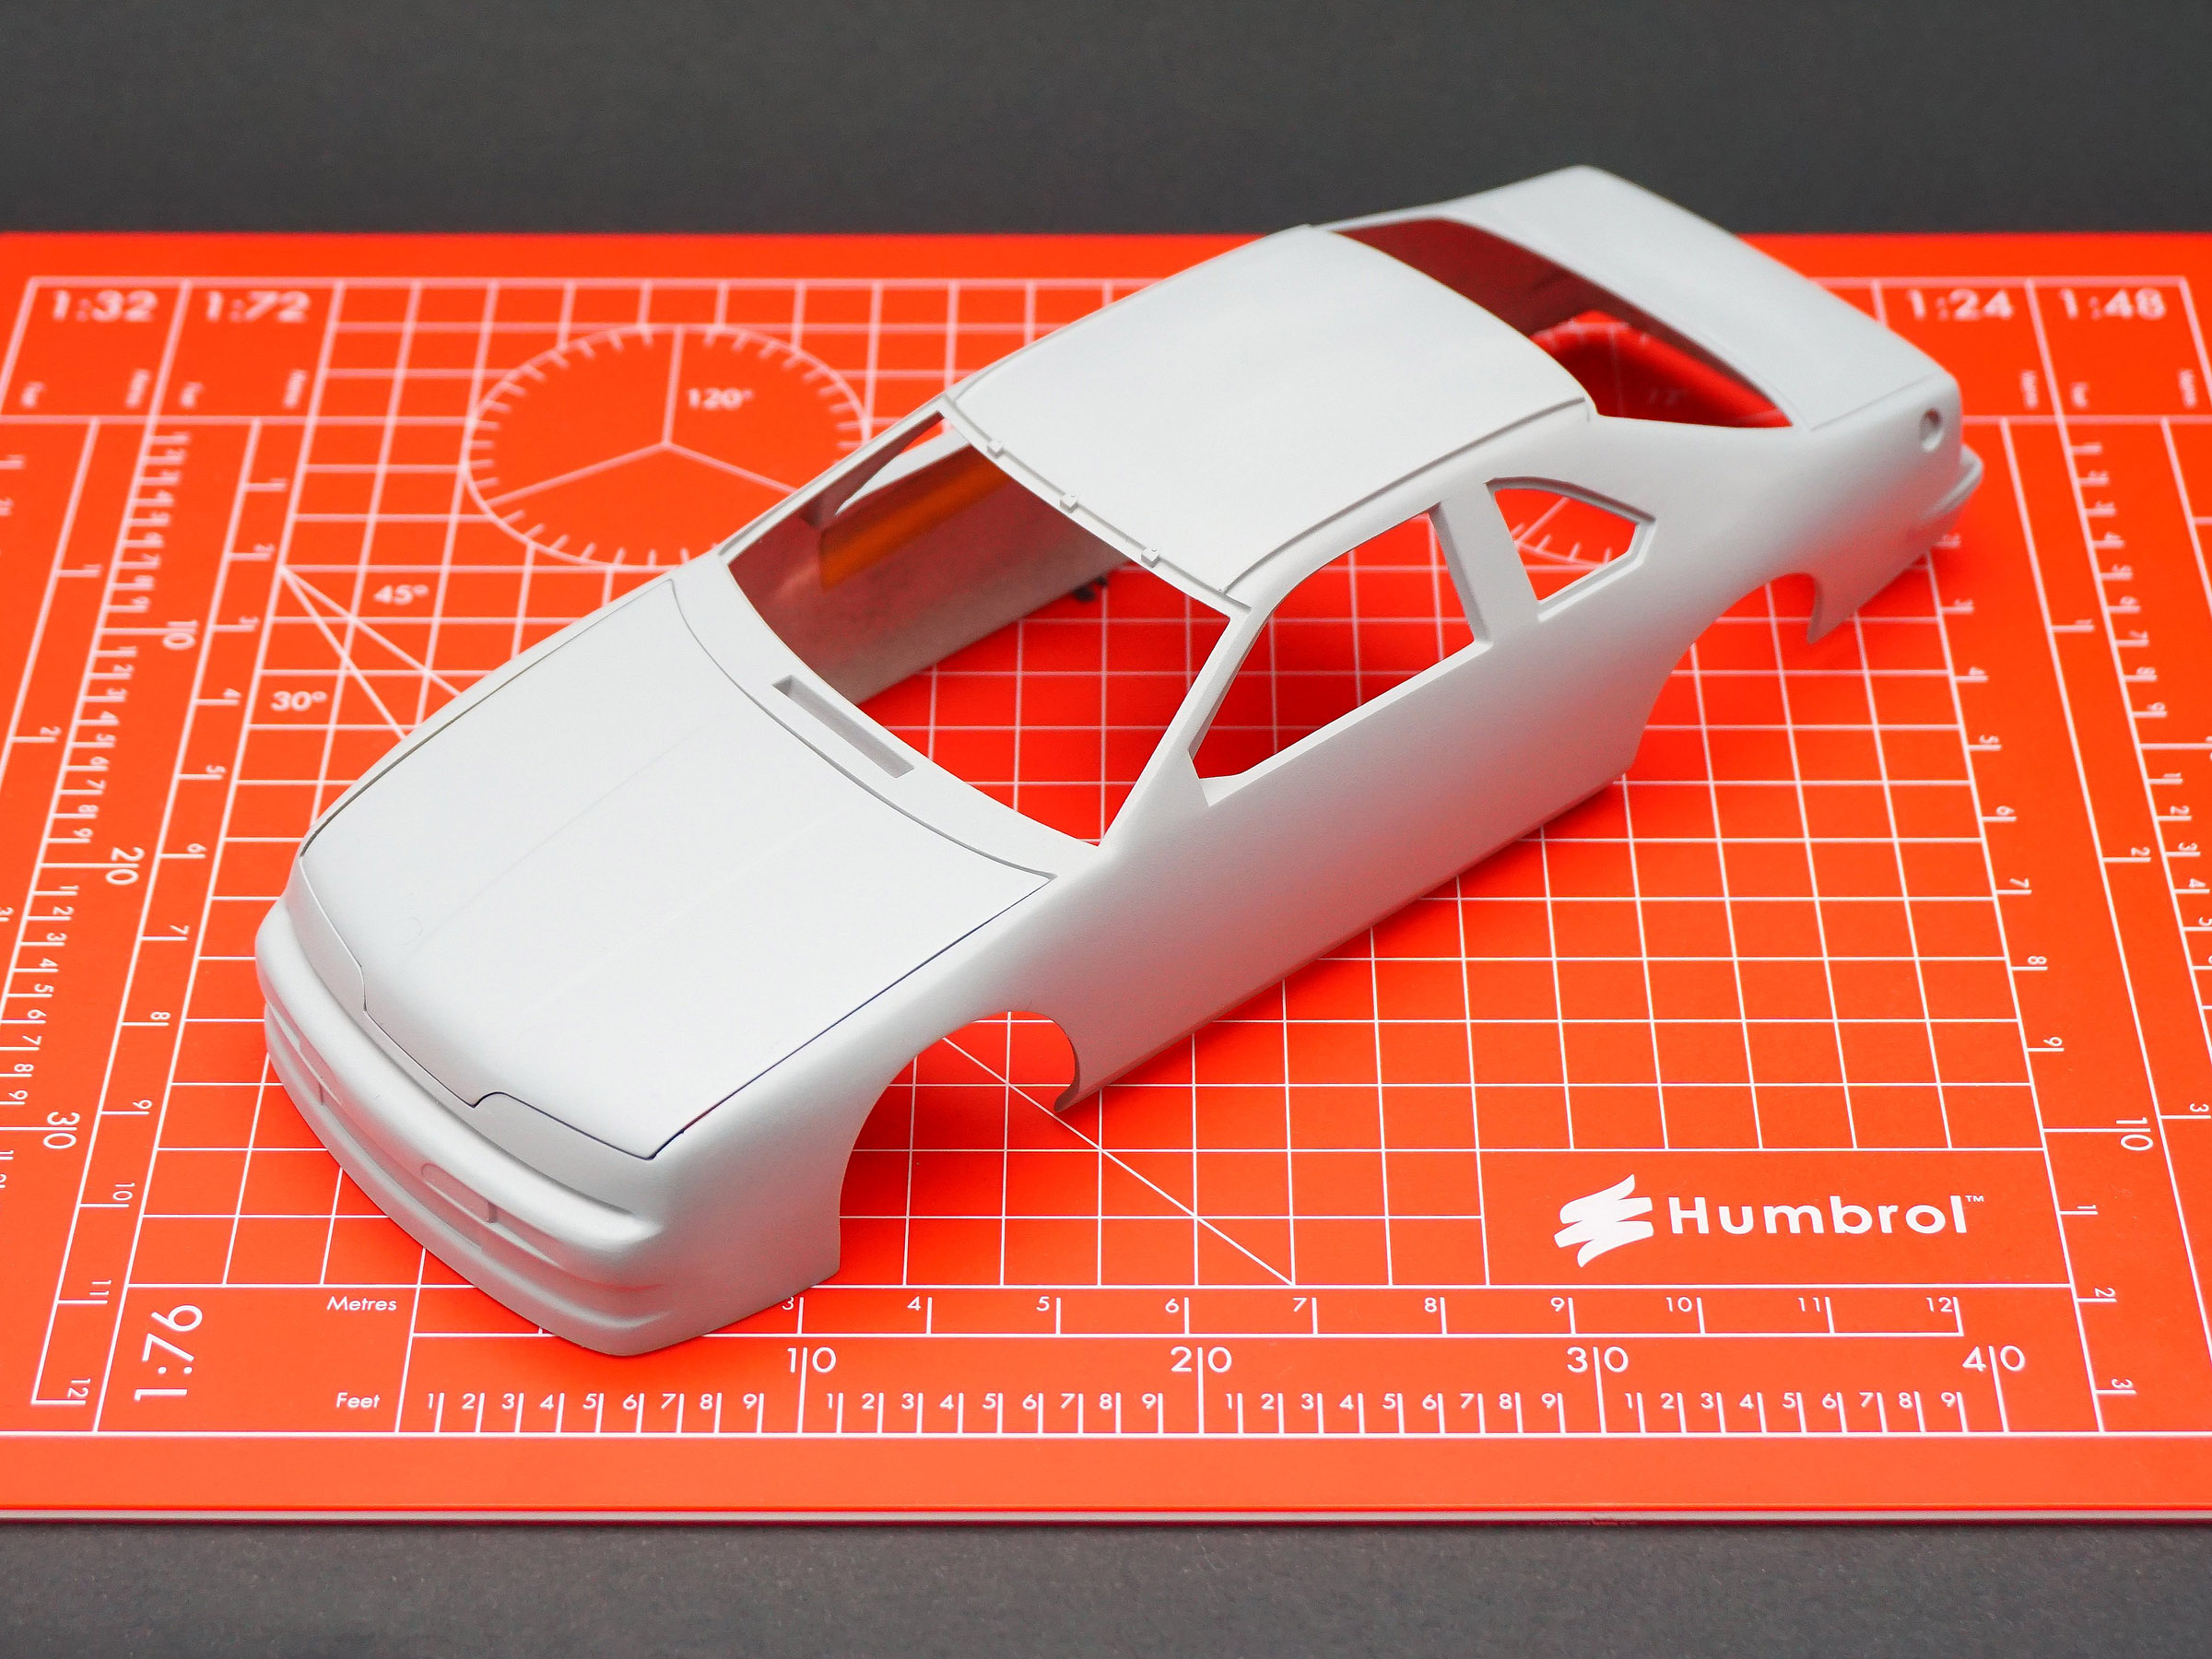
The next stage of work was masking the body and painting the interior.
Once the Ford's interior was the right color, I needed to mask it off so I could paint the body with black primer.
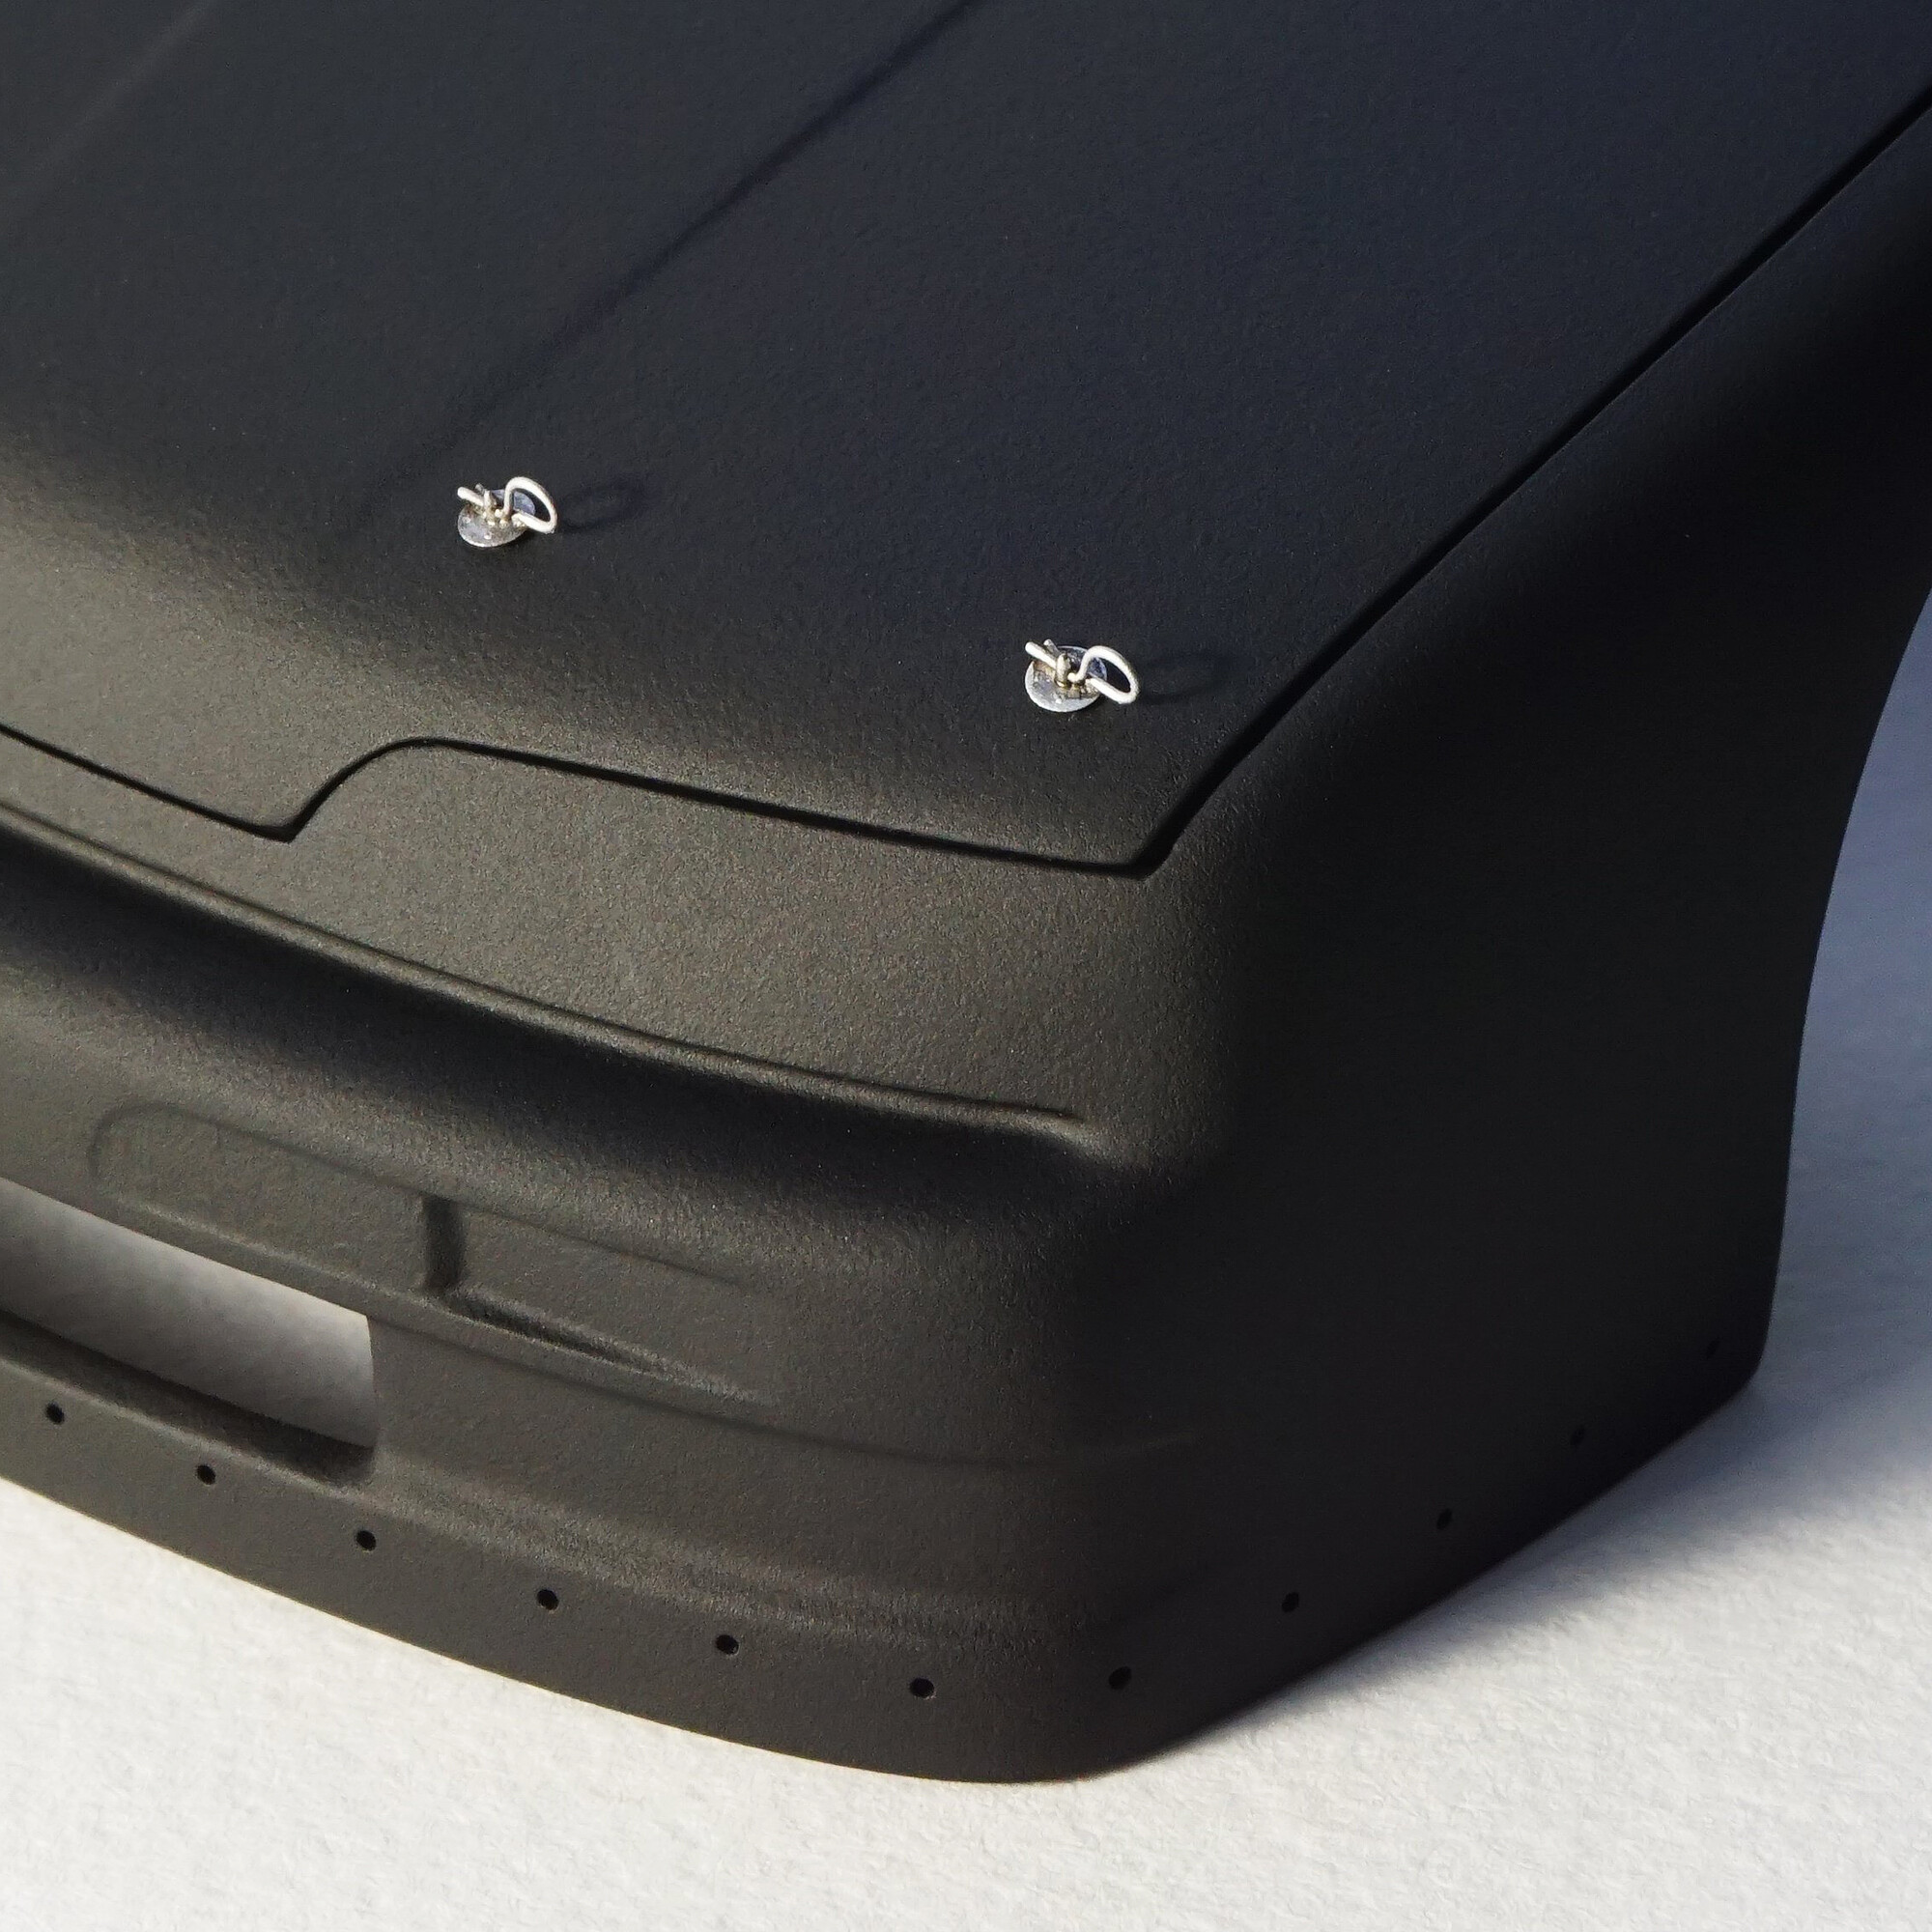
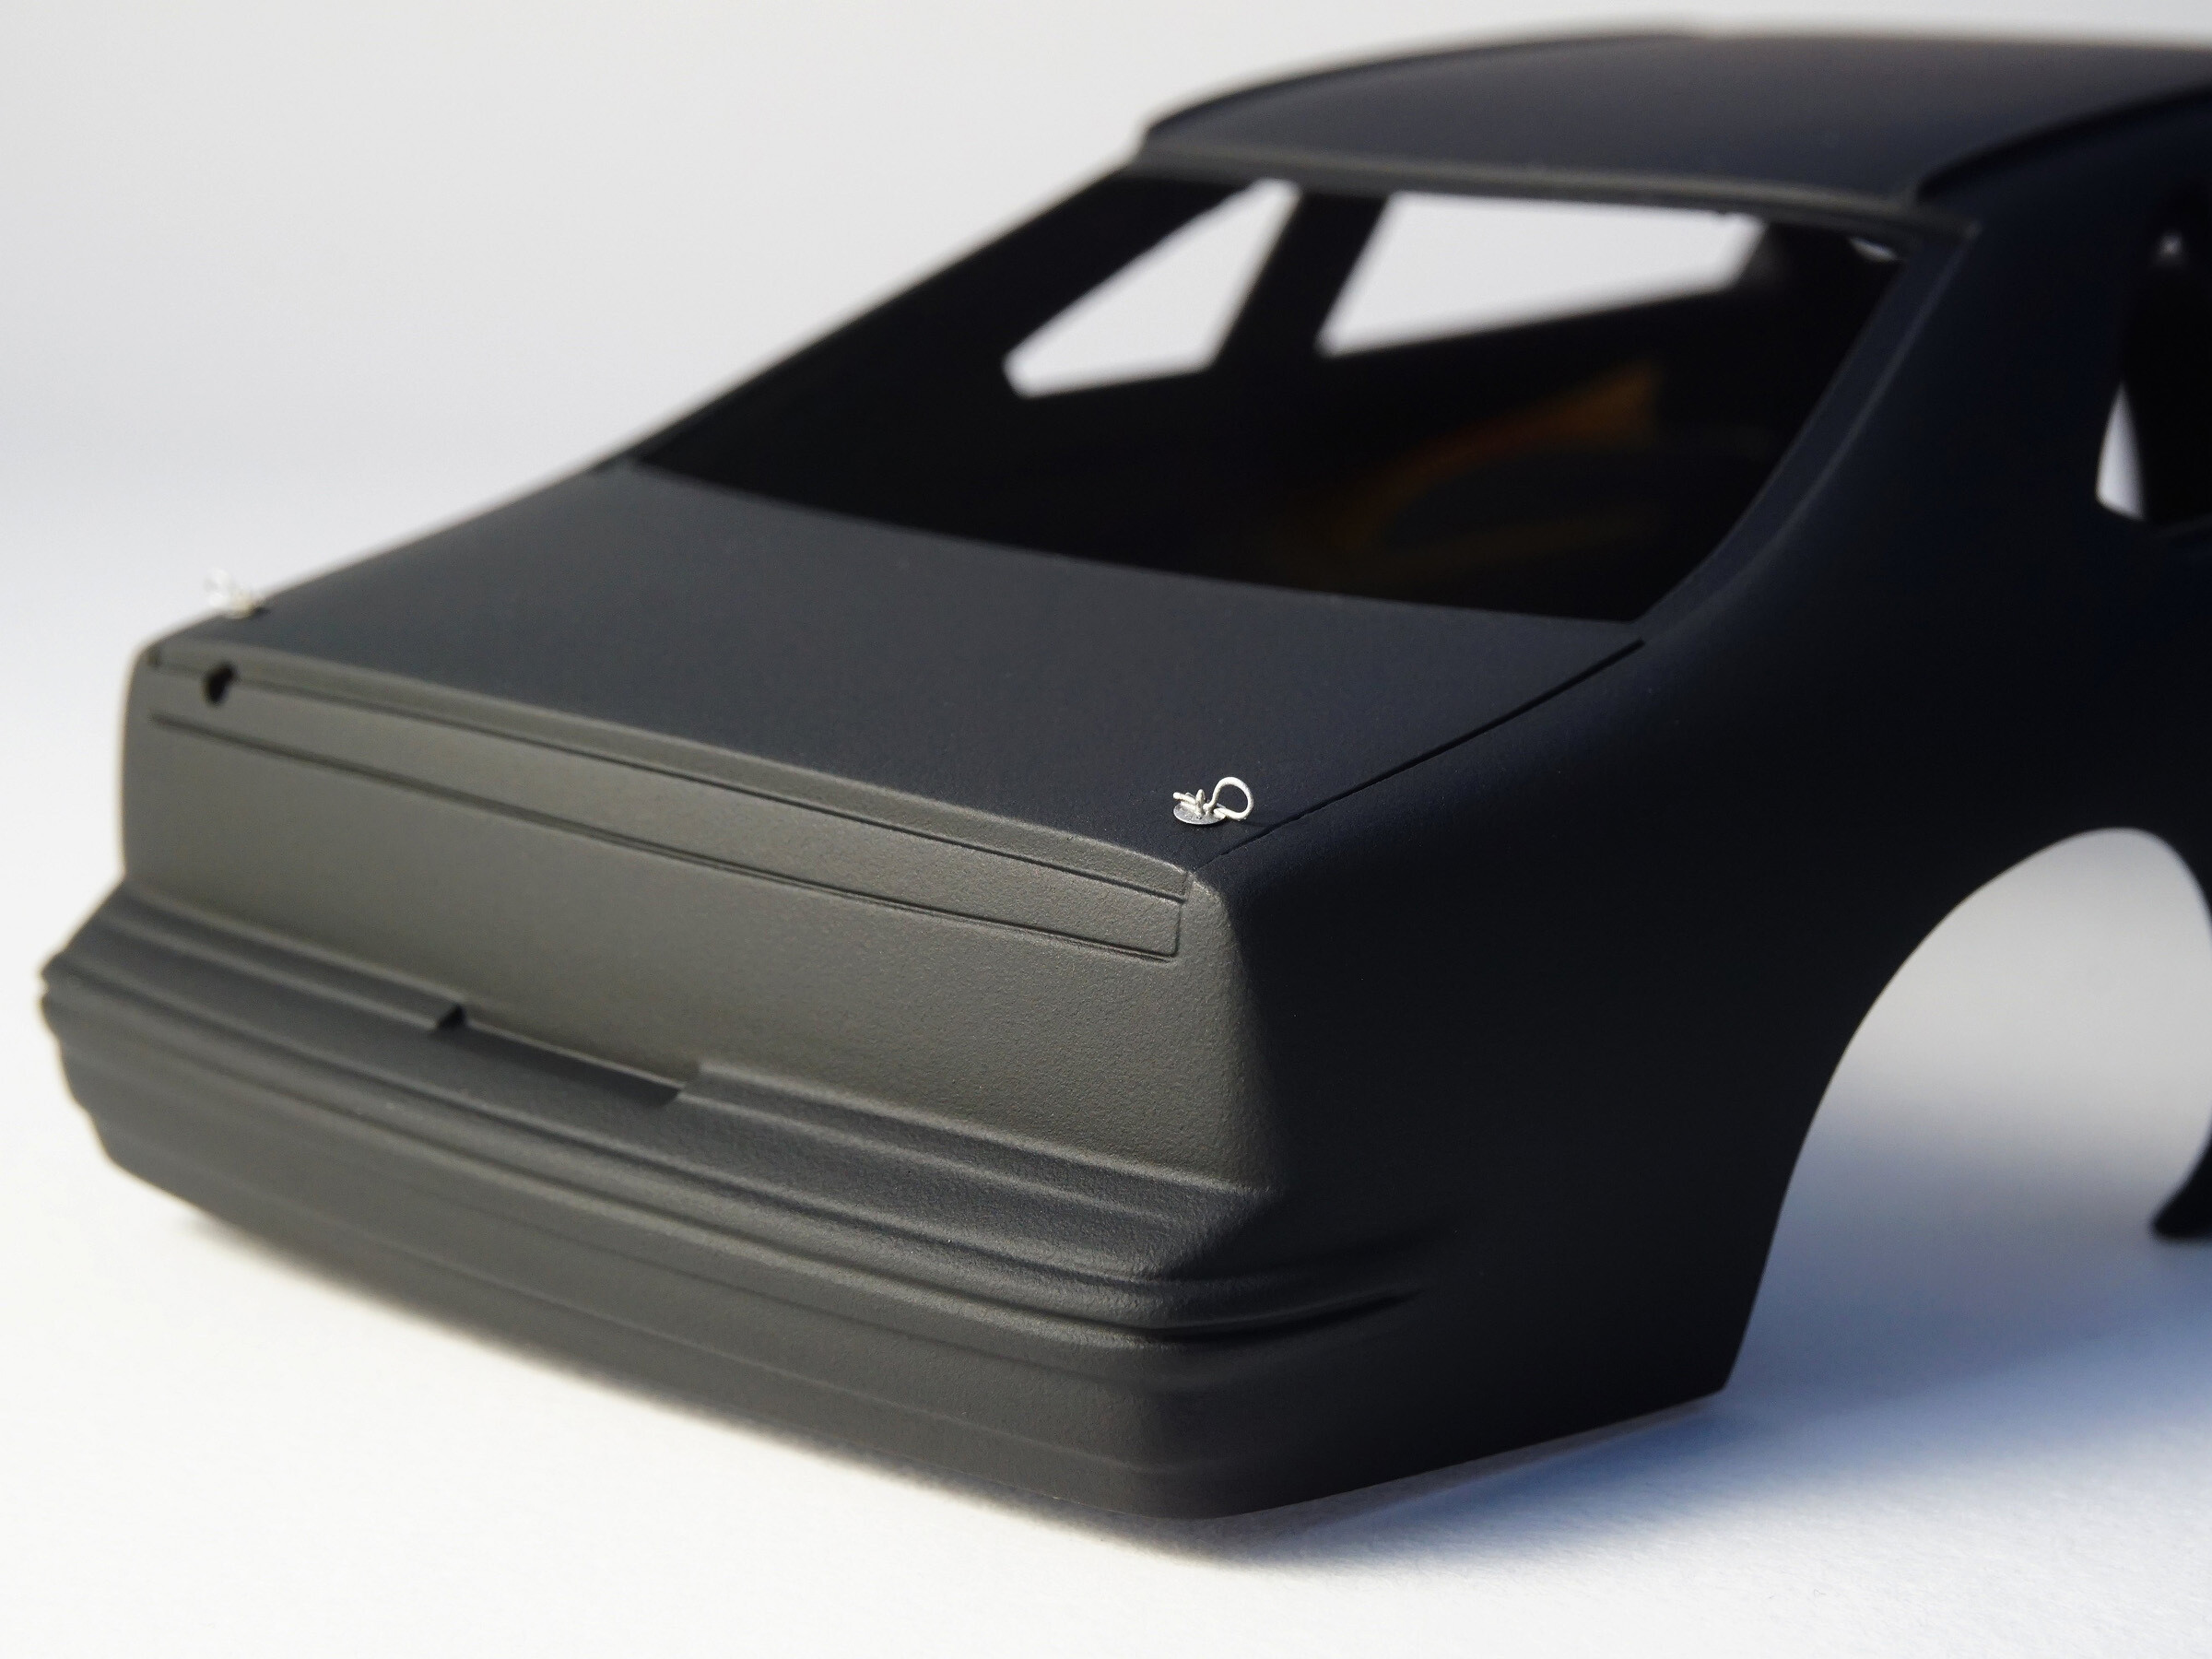
Another modification and valorization of the model - hood and tailgate.
The original hood pins will be replaced with new ones from SCO (SCO-R076).
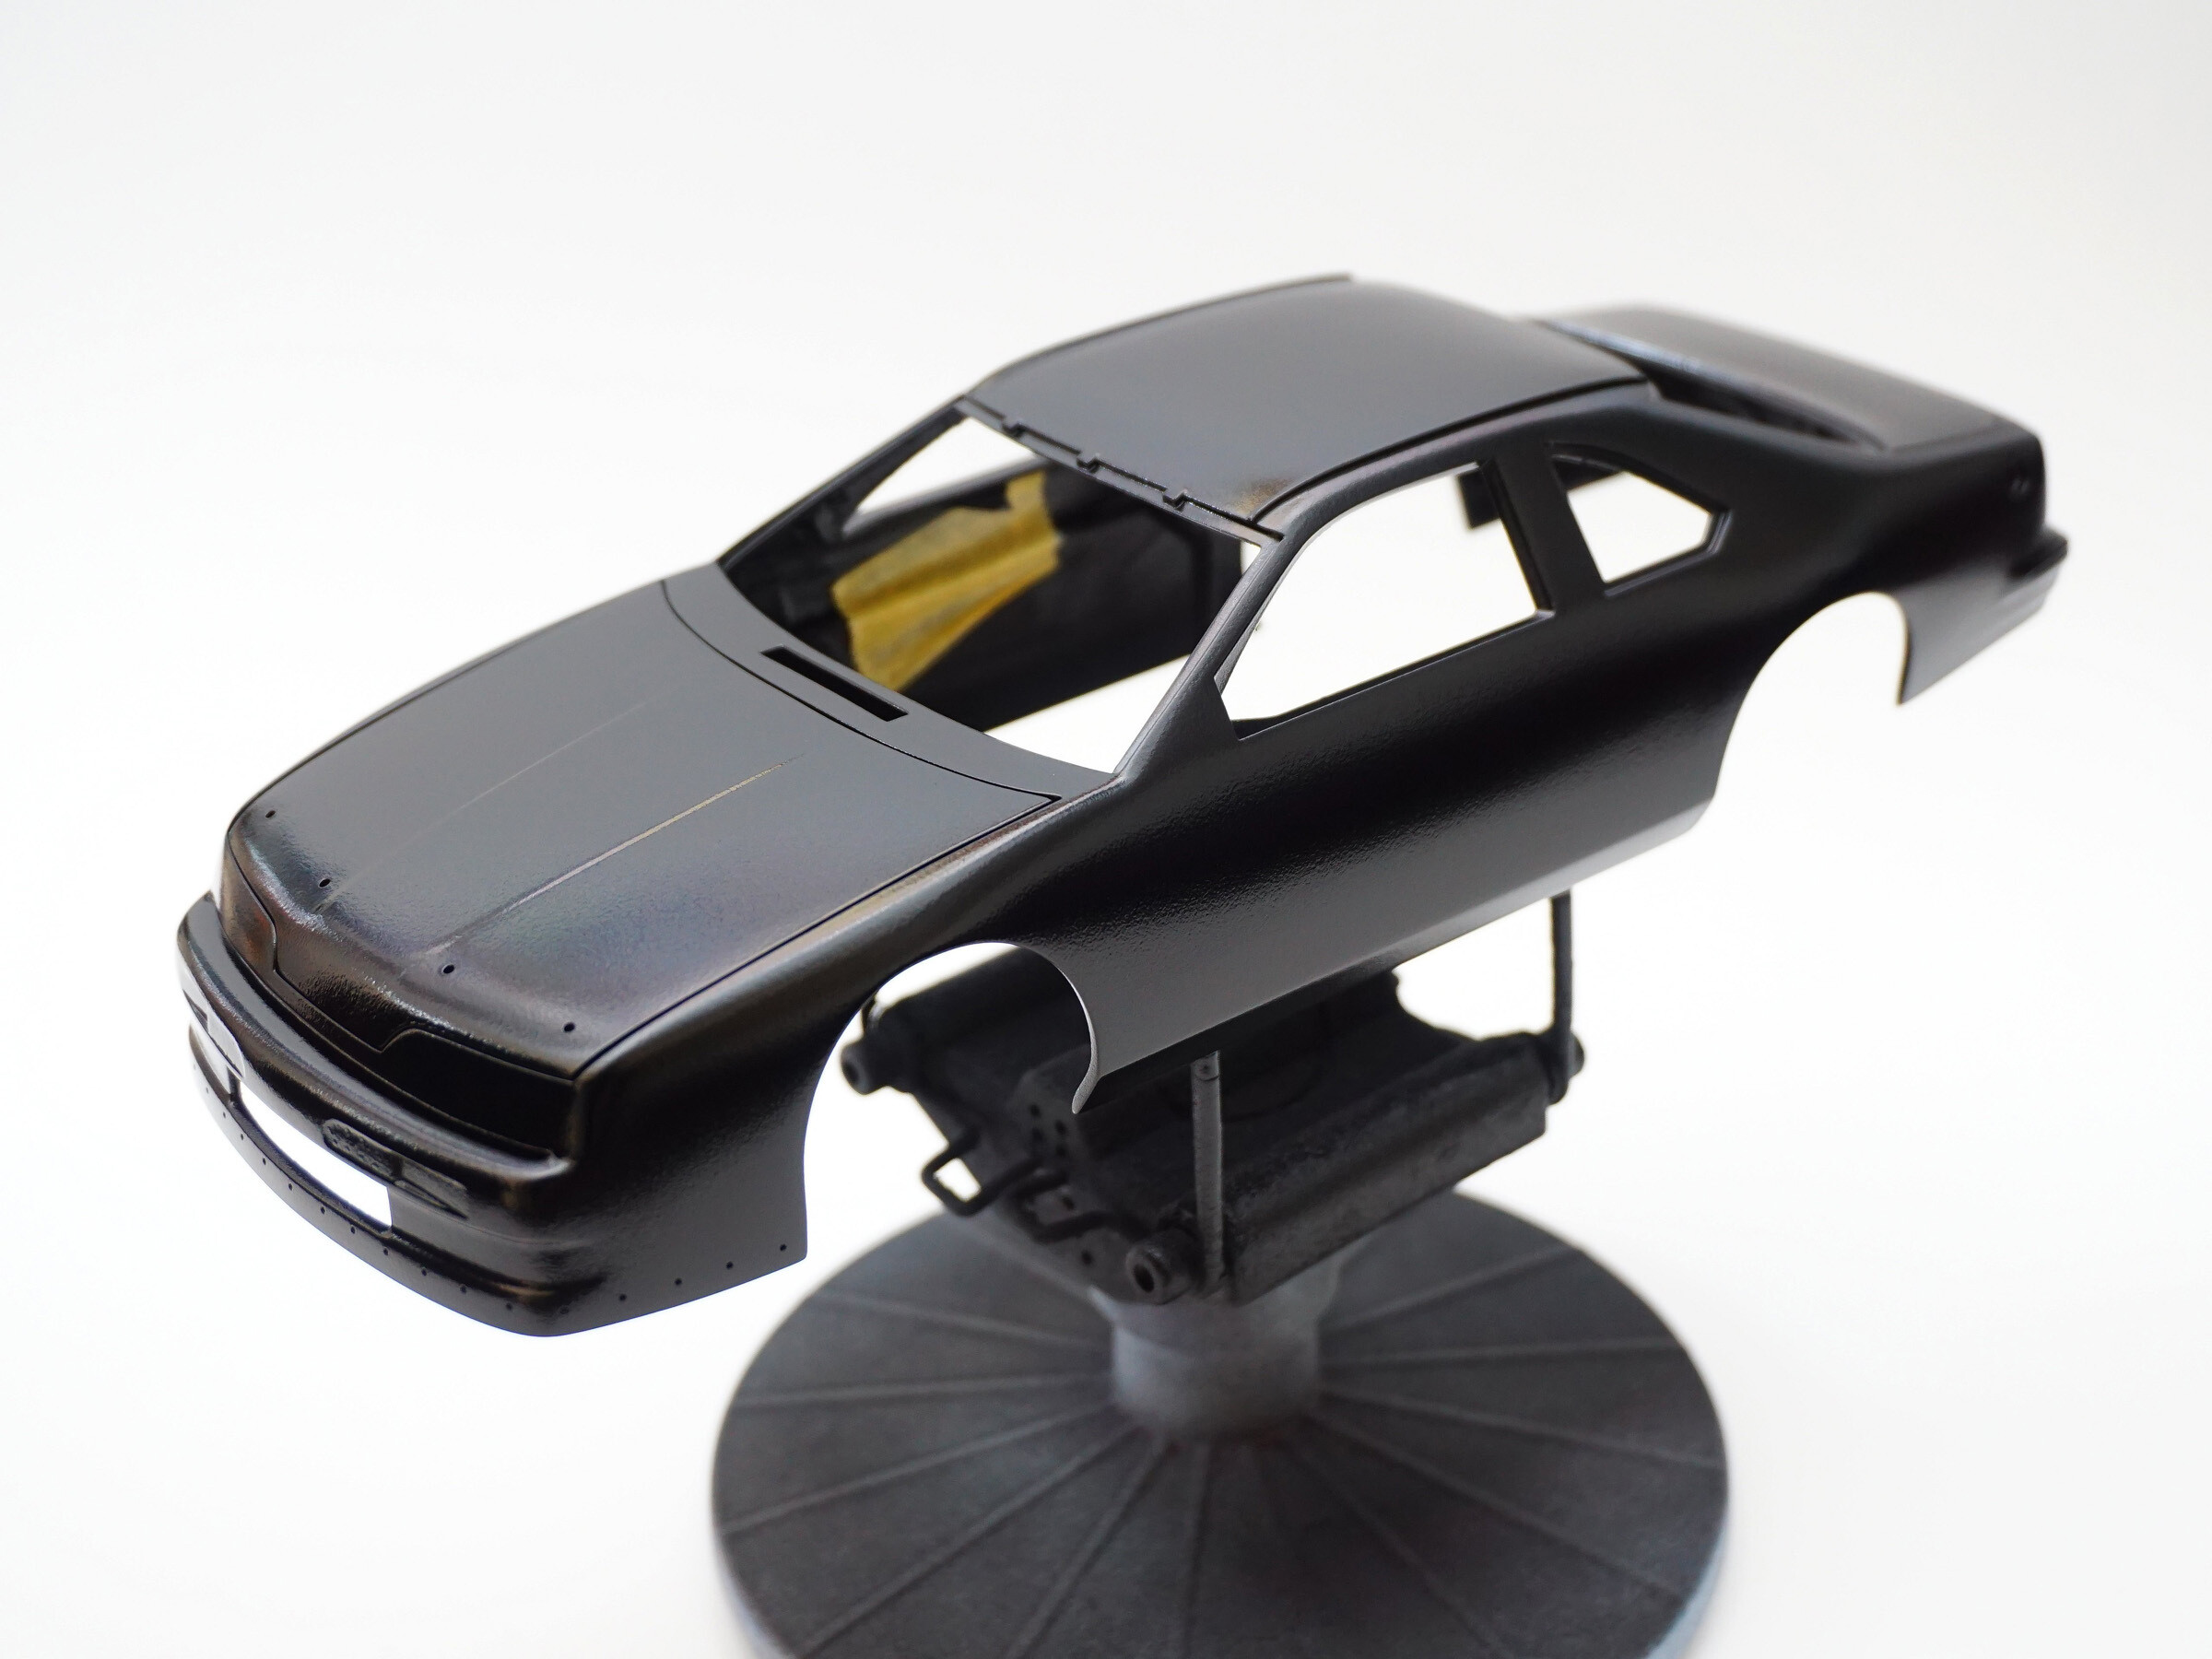
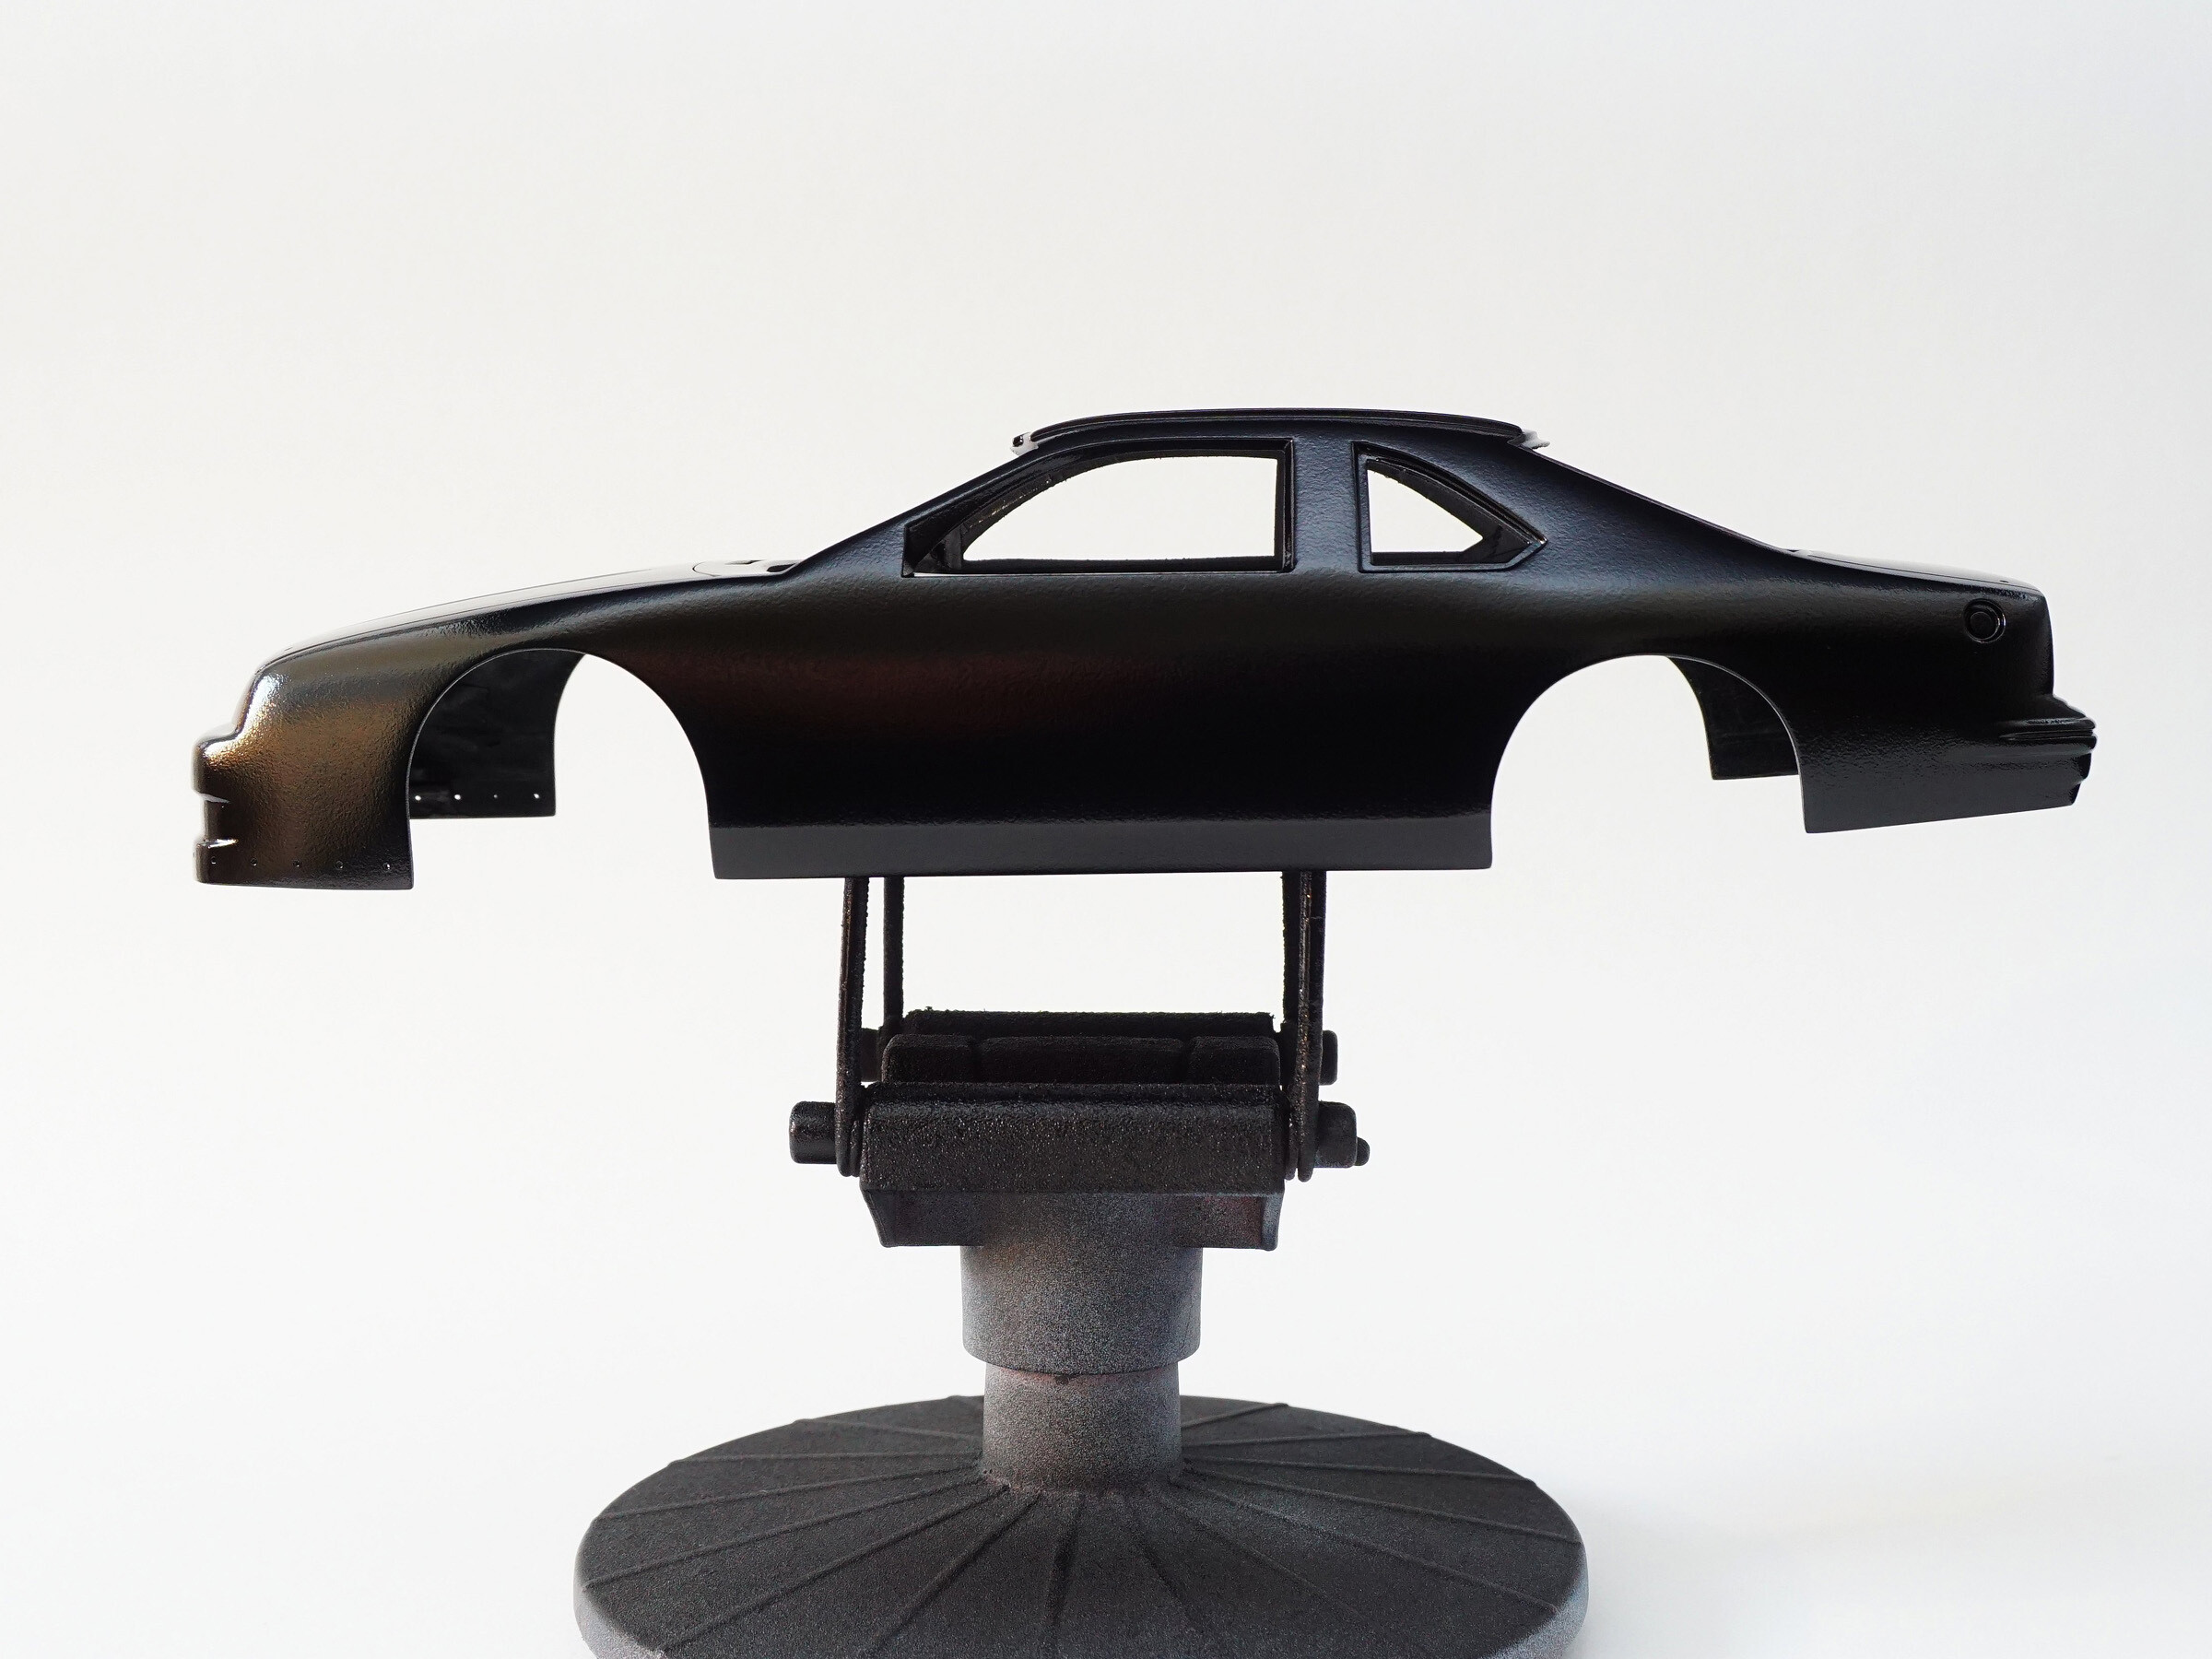
Once all additional items had been checked, the model was painted in the base colour - Tamiya TS-14 Black.
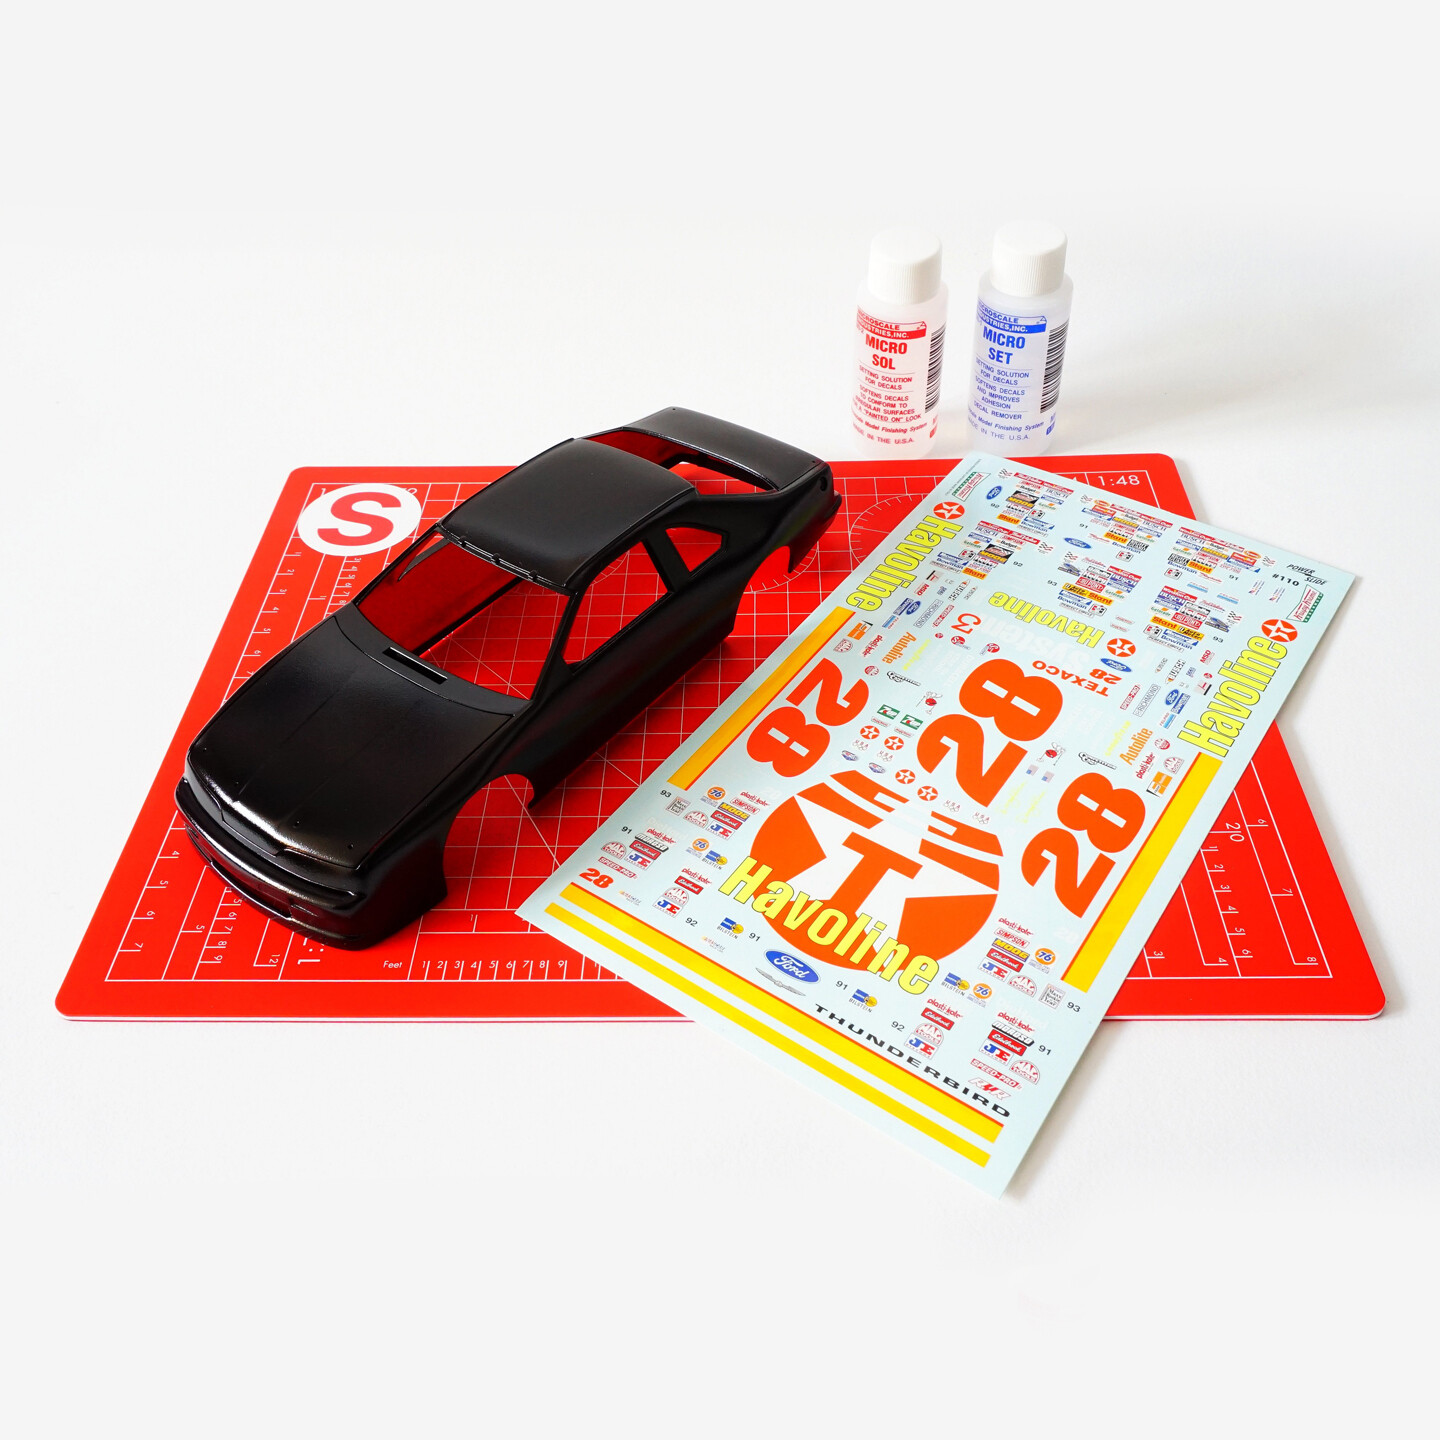
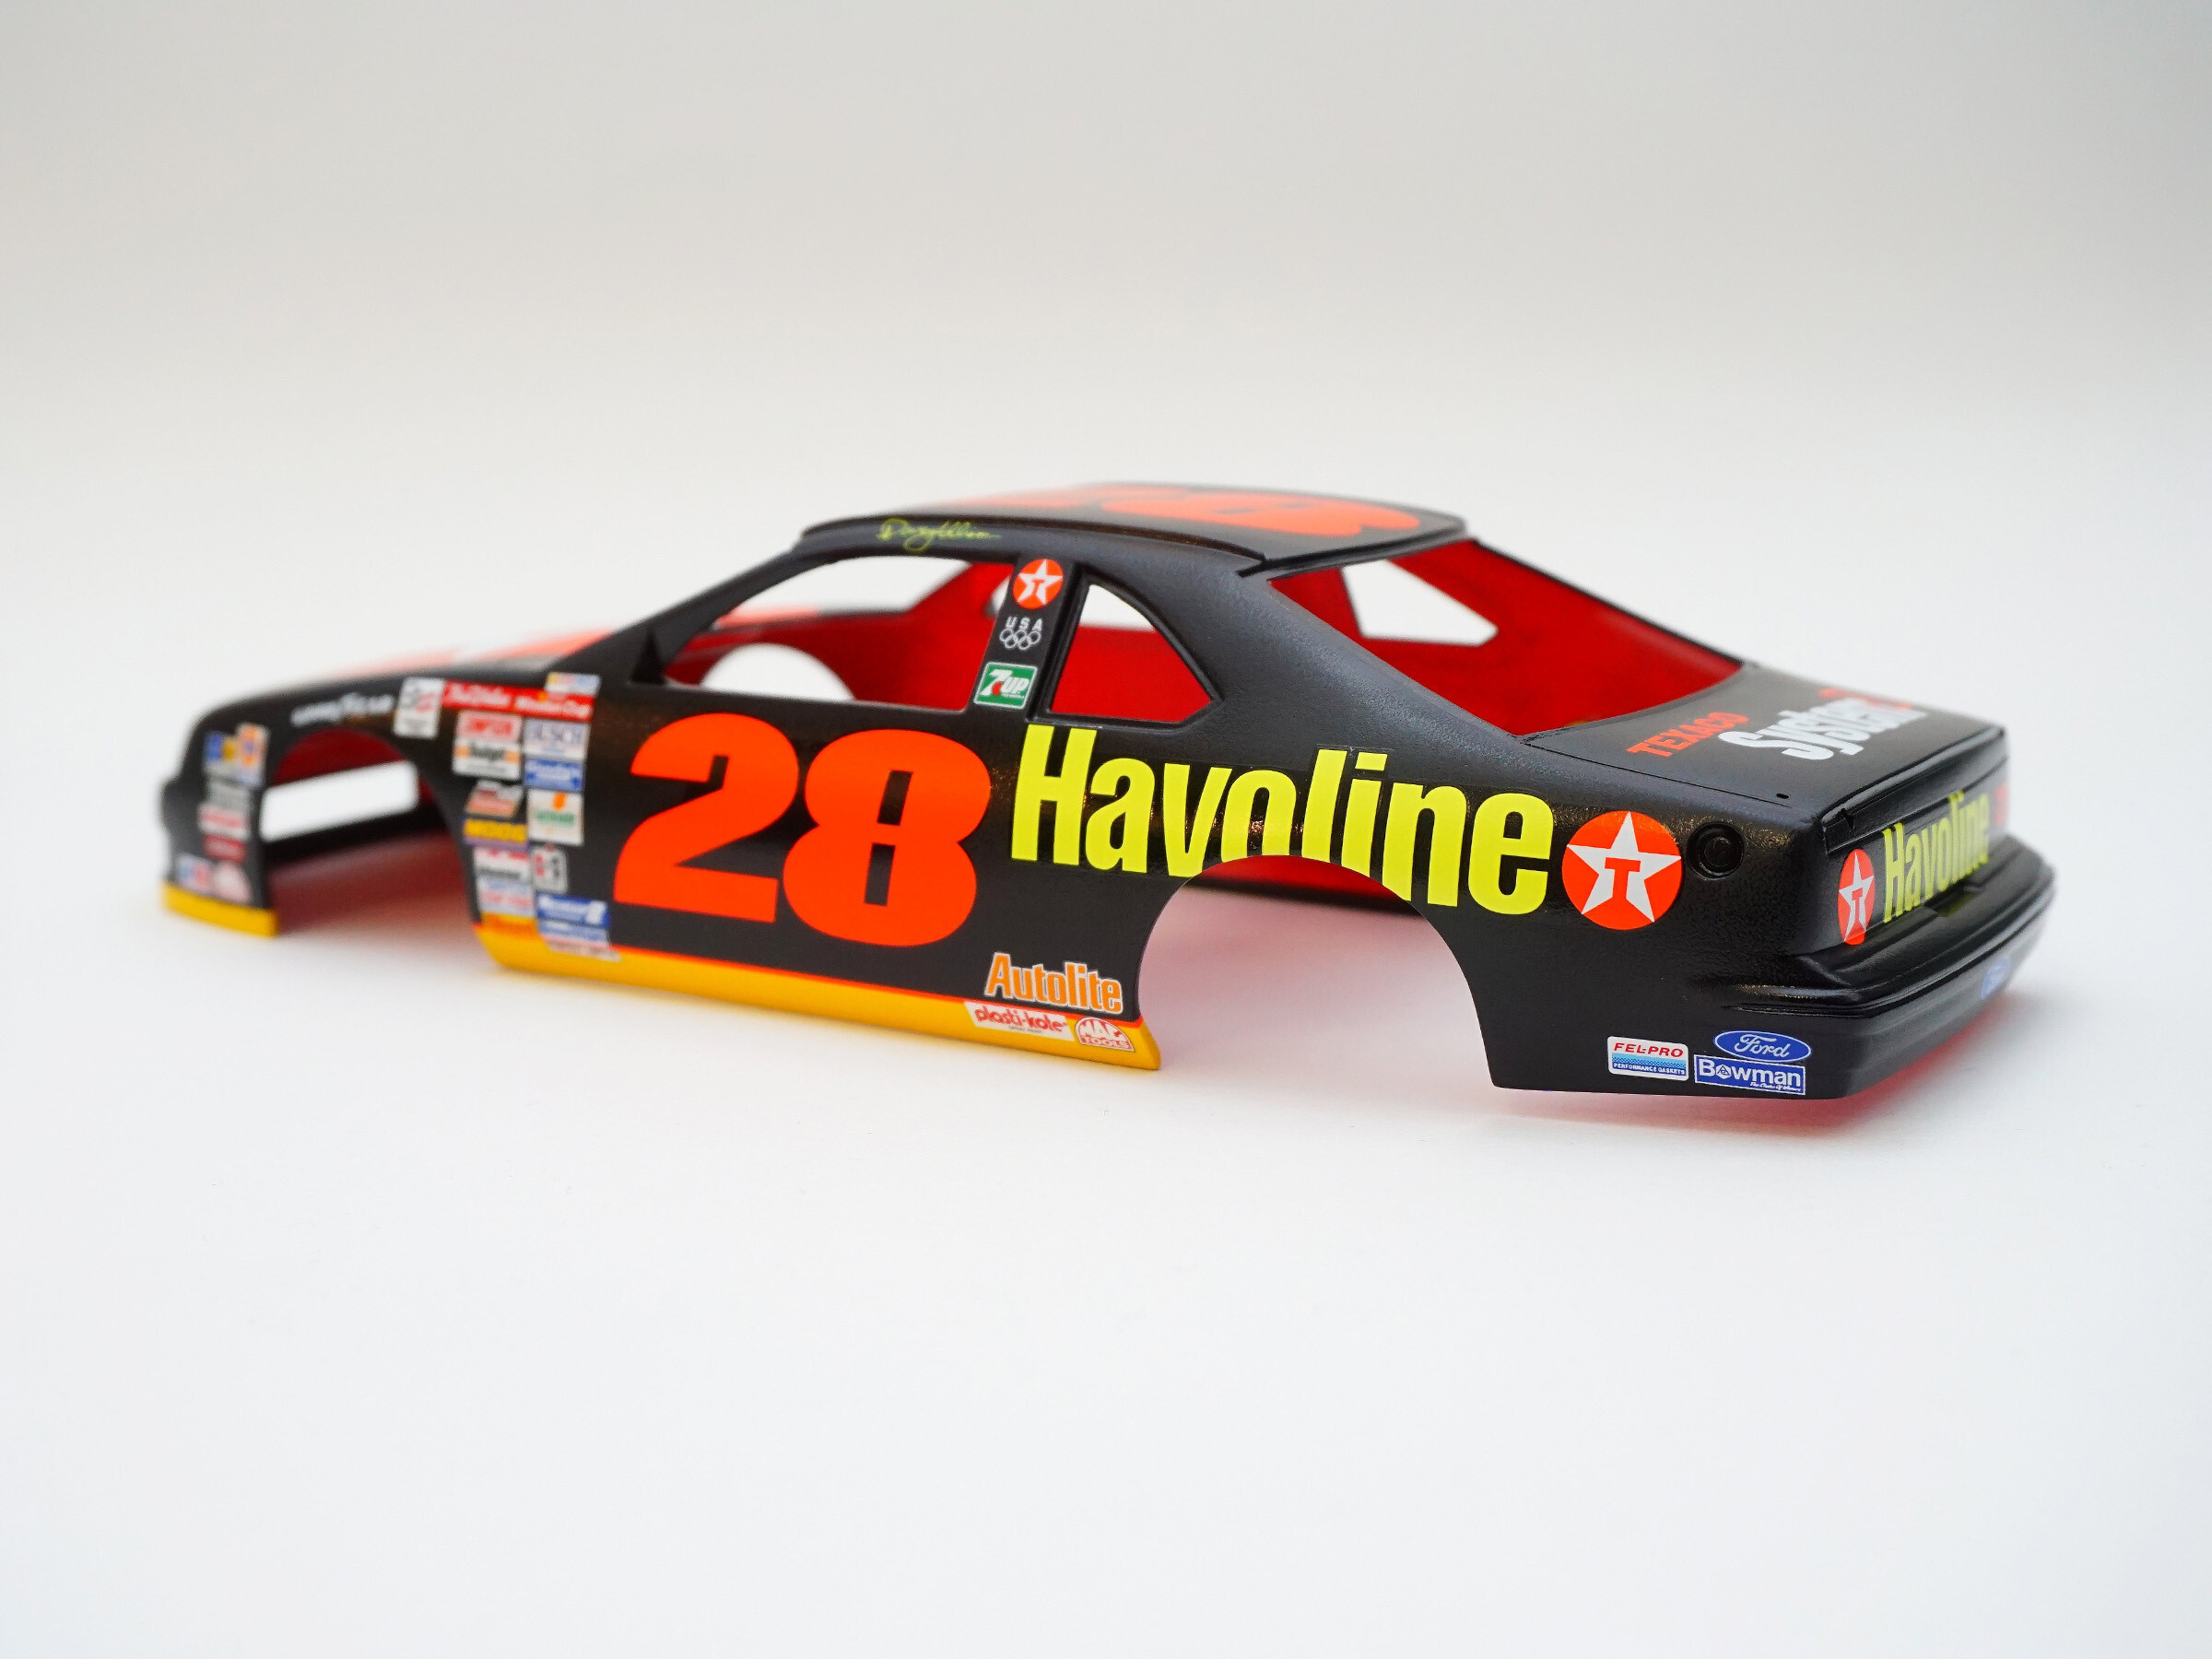
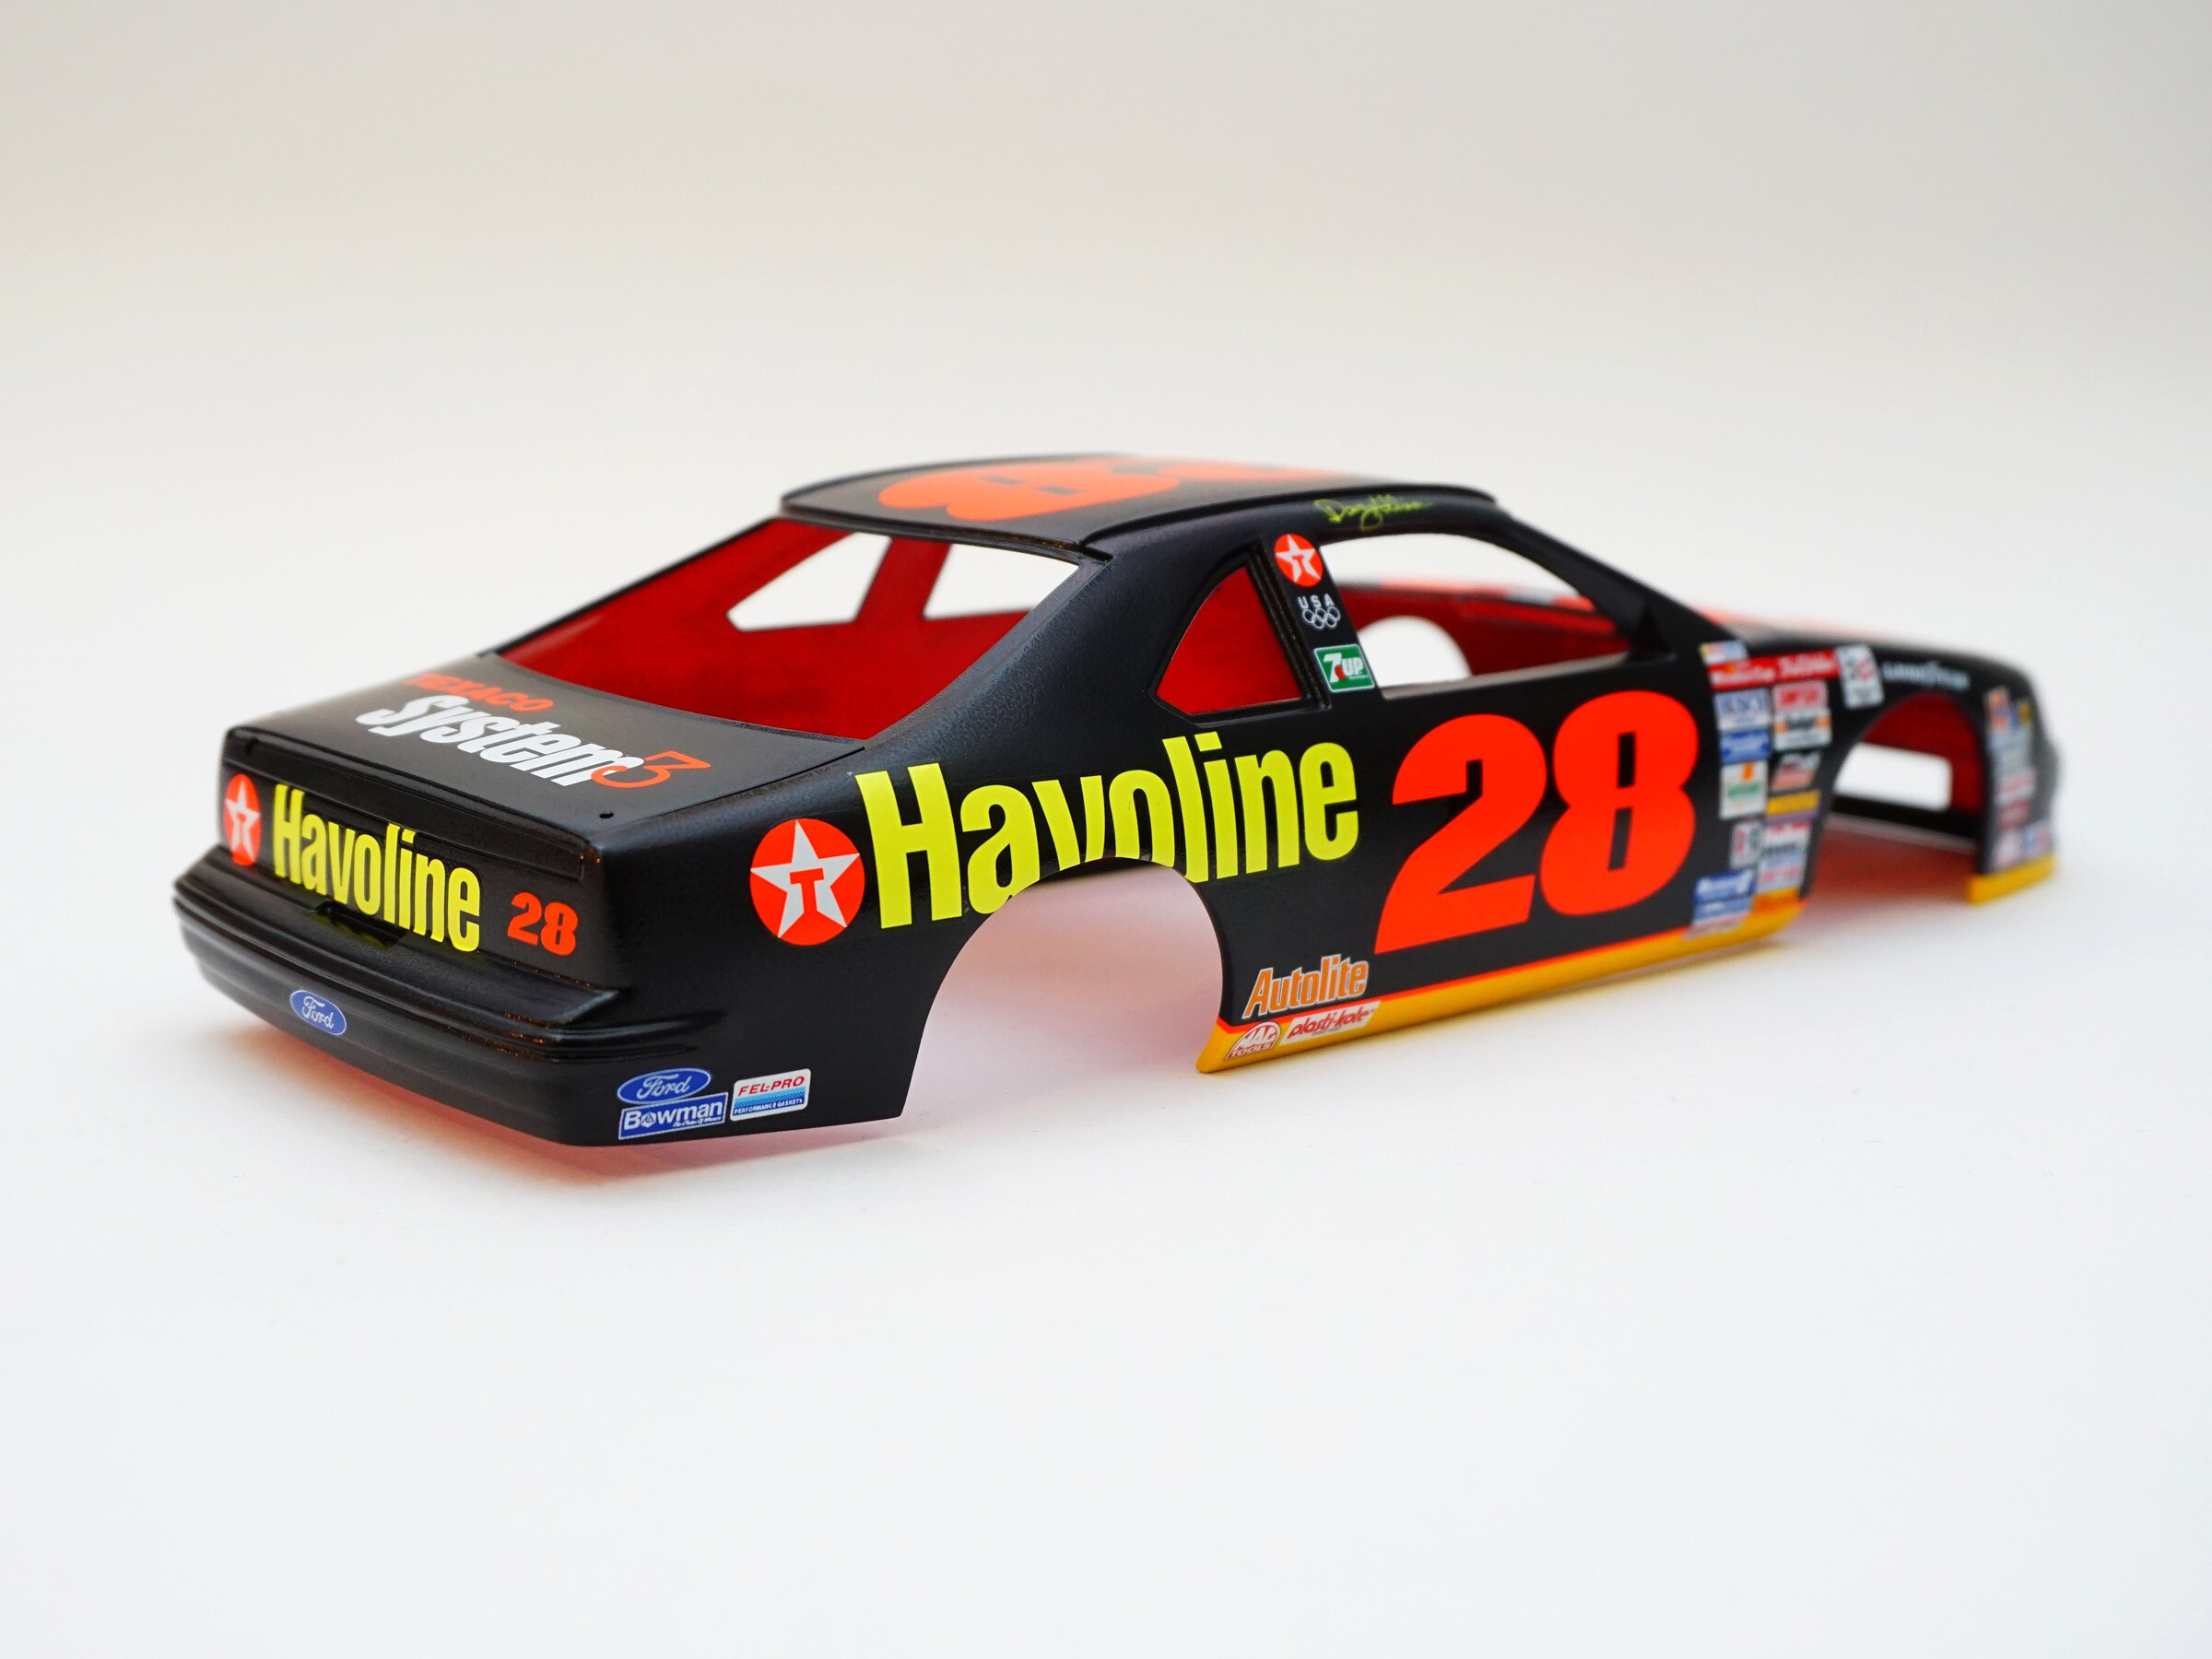
Decals, this is where the fun begins!
Update 5 | 02.02.2025
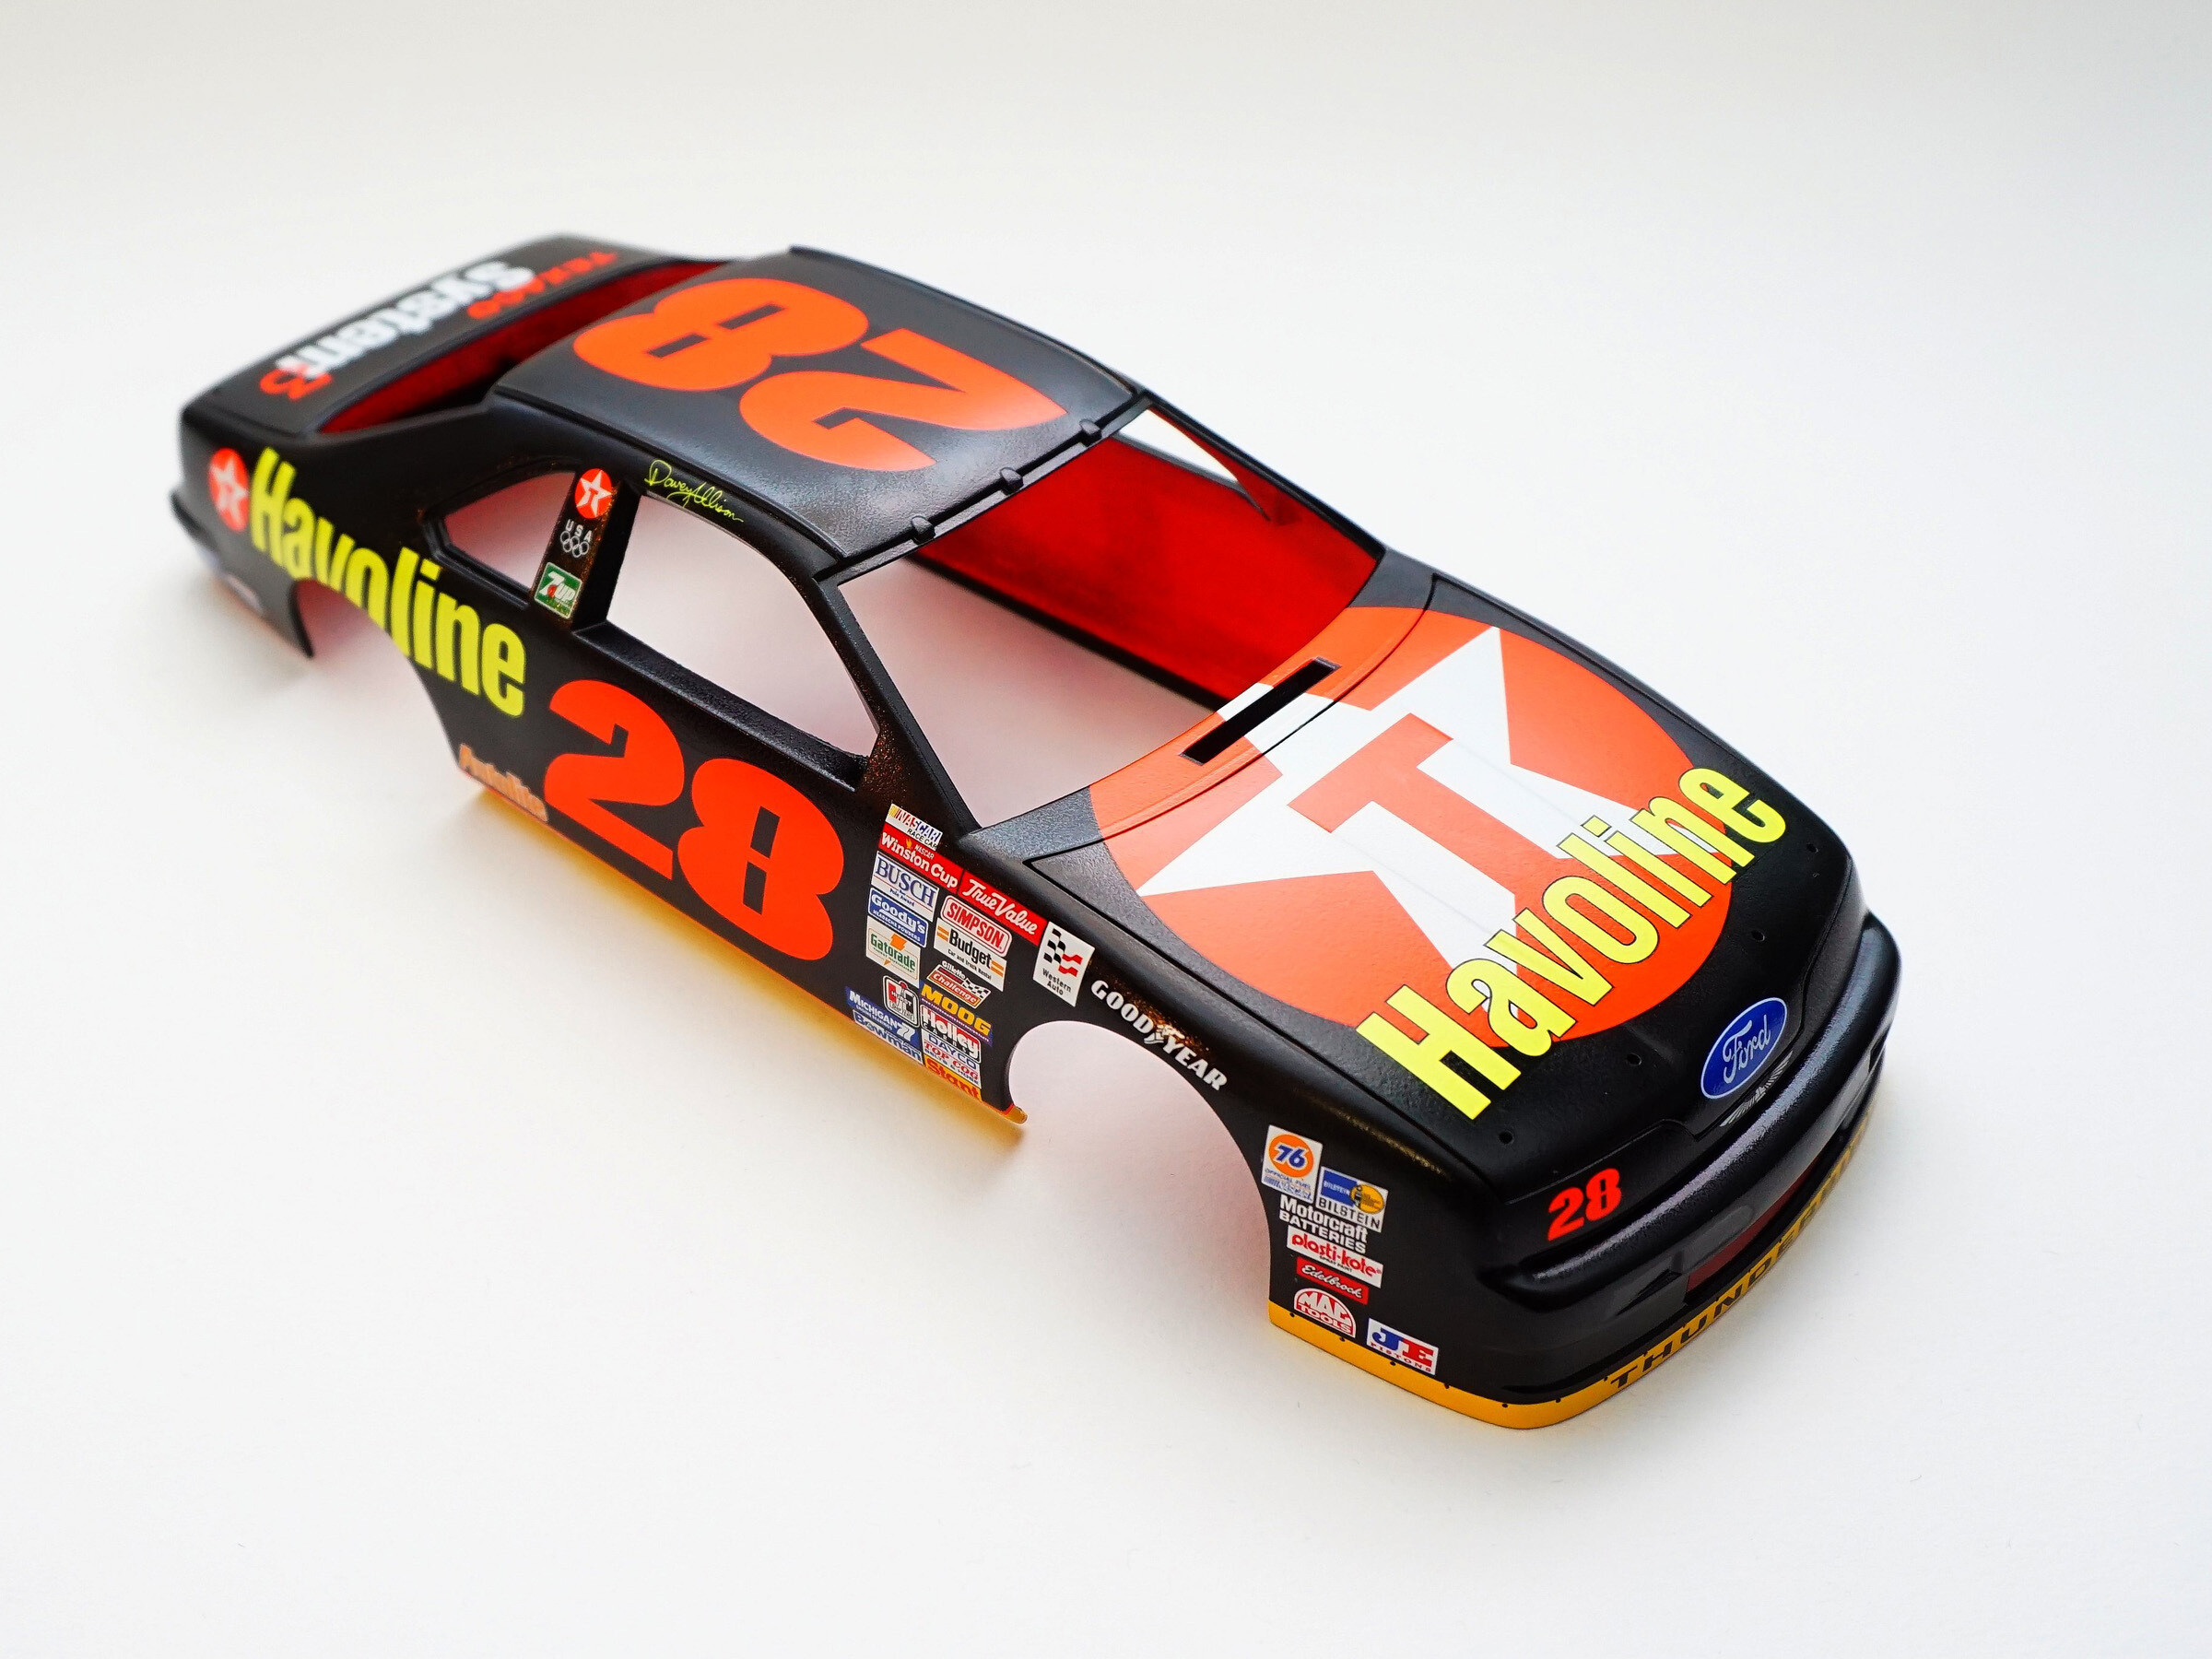
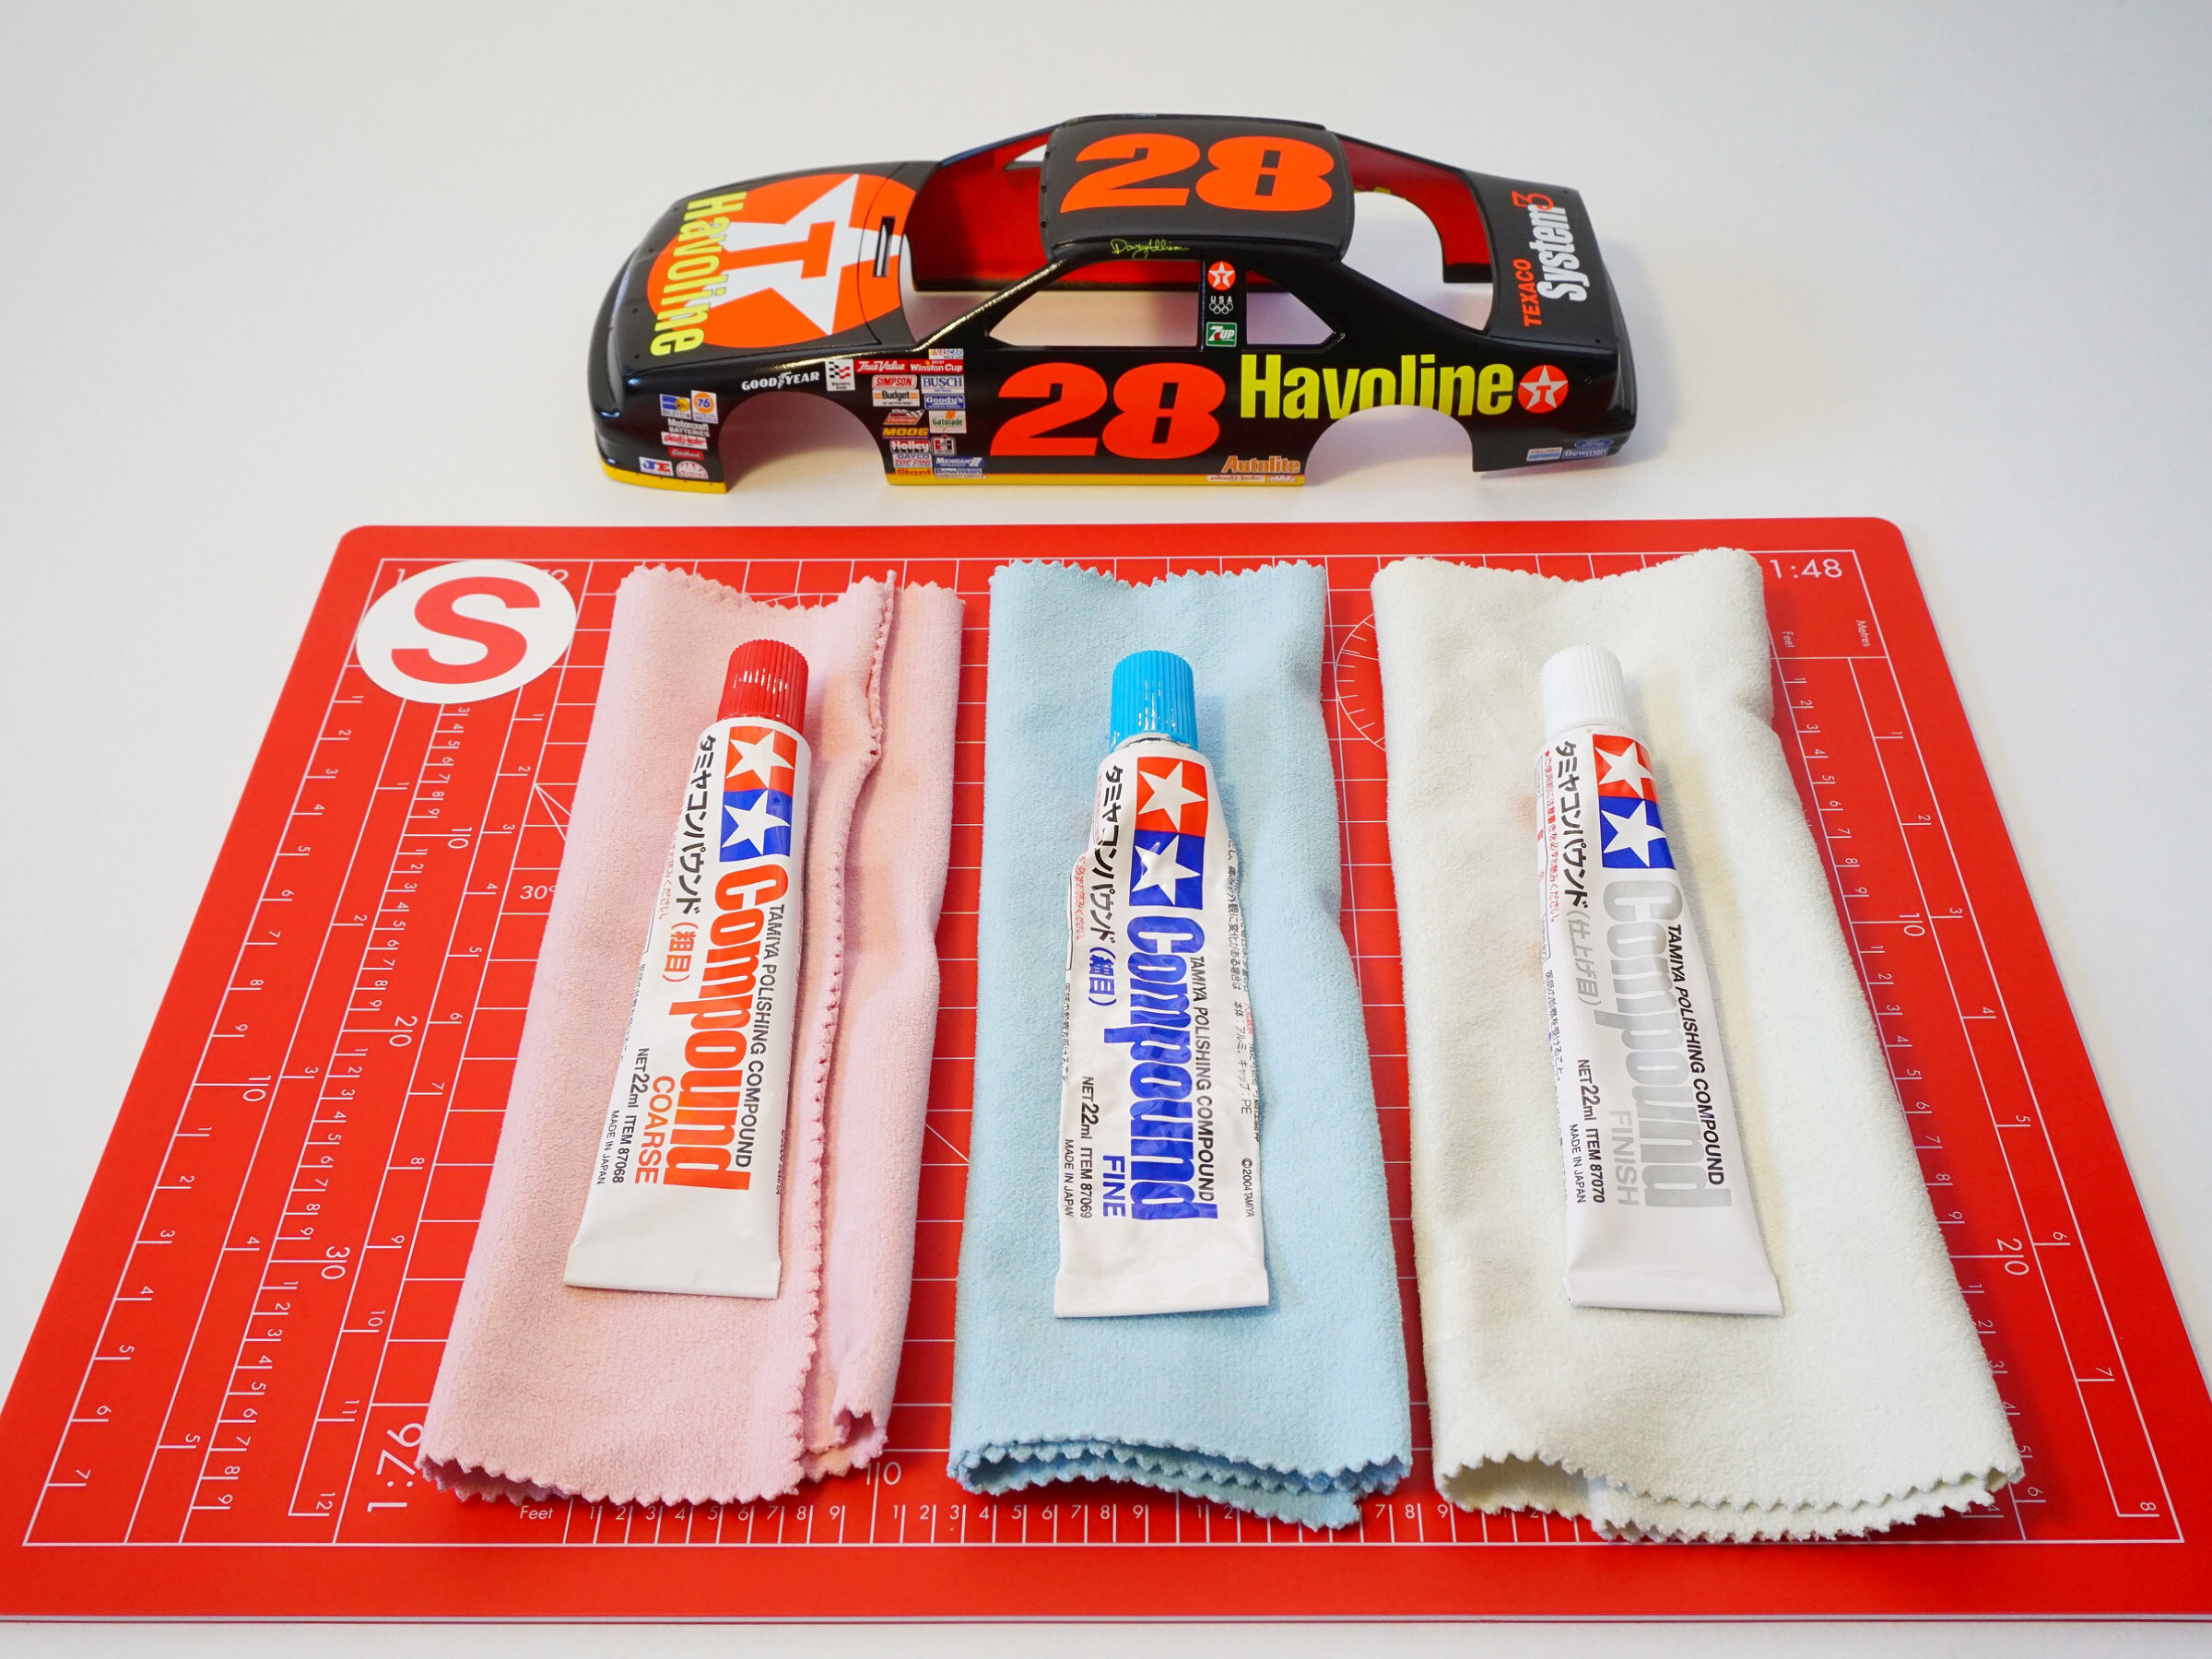
It took a while (four sessions, eight hours each), but here it is! Ford Thunderbird after body polishing.
Here is the entire painting and polishing process, which I divide into four stages:
Stage 1 - Preparation
After applying decals, it is important to give them time to dry properly. I leave the model in peace for 4-5 days. Then the body should be cleaned to get rid of any residues of glue decals and softeners decals. For this purpose, I use LCD monitor cleaner. The most important thing is that the model is degreased and dust-free.
Before painting, I use the Tamiya antistatic brush. Negligence at this stage causes huge problems, so preparation is as important as the painting itself.
Stage 2 - Painting
For the final painting of the body, I used the Tamiya TS-13 Clear. After the standard mixing of the paint, i.e. shaking the can like a madman, I additionally keep the paint in warm water to increase the pressure inside the can.
I apply the first layers of paint very thinly (dry layers) to make sure they don't react badly with the decalas. 5-6 thin layers at 10 minute intervals each coat. The next 6-8 layers of paint are a little thicker, but applied with caution so as not to "flood" the details of the body.
After painting, I will leave the model for about a week so that it can dry well. Of course, you could work on it faster, but I prefer to be sure that everything is dry properly.
Stage 3 - Polishing
The varnish on the painted body should be leveled - for this purpose I use Tamiya Soft Sanding Sponges 2000 and 3000 grades. In addition, I use 5000 and 7000 grades sandpaper. The next step is to use Tamiya Compound (Coarse/Fine/Finish) polishing pastes.
However, this time I was not satisfied with the polishing effect because scratches appeared on the body of the model. I managed to get rid of them using the Turbo polishing paste by K2.
Stage 4 - Shiny finish
After washing the model in warm water to get rid of the remains of polishing pastes, the model is ready for the final stage - applying wax. For this purpose, I use Meguiars Ultimate Quik Wax and Tamiya Modeling Wax.
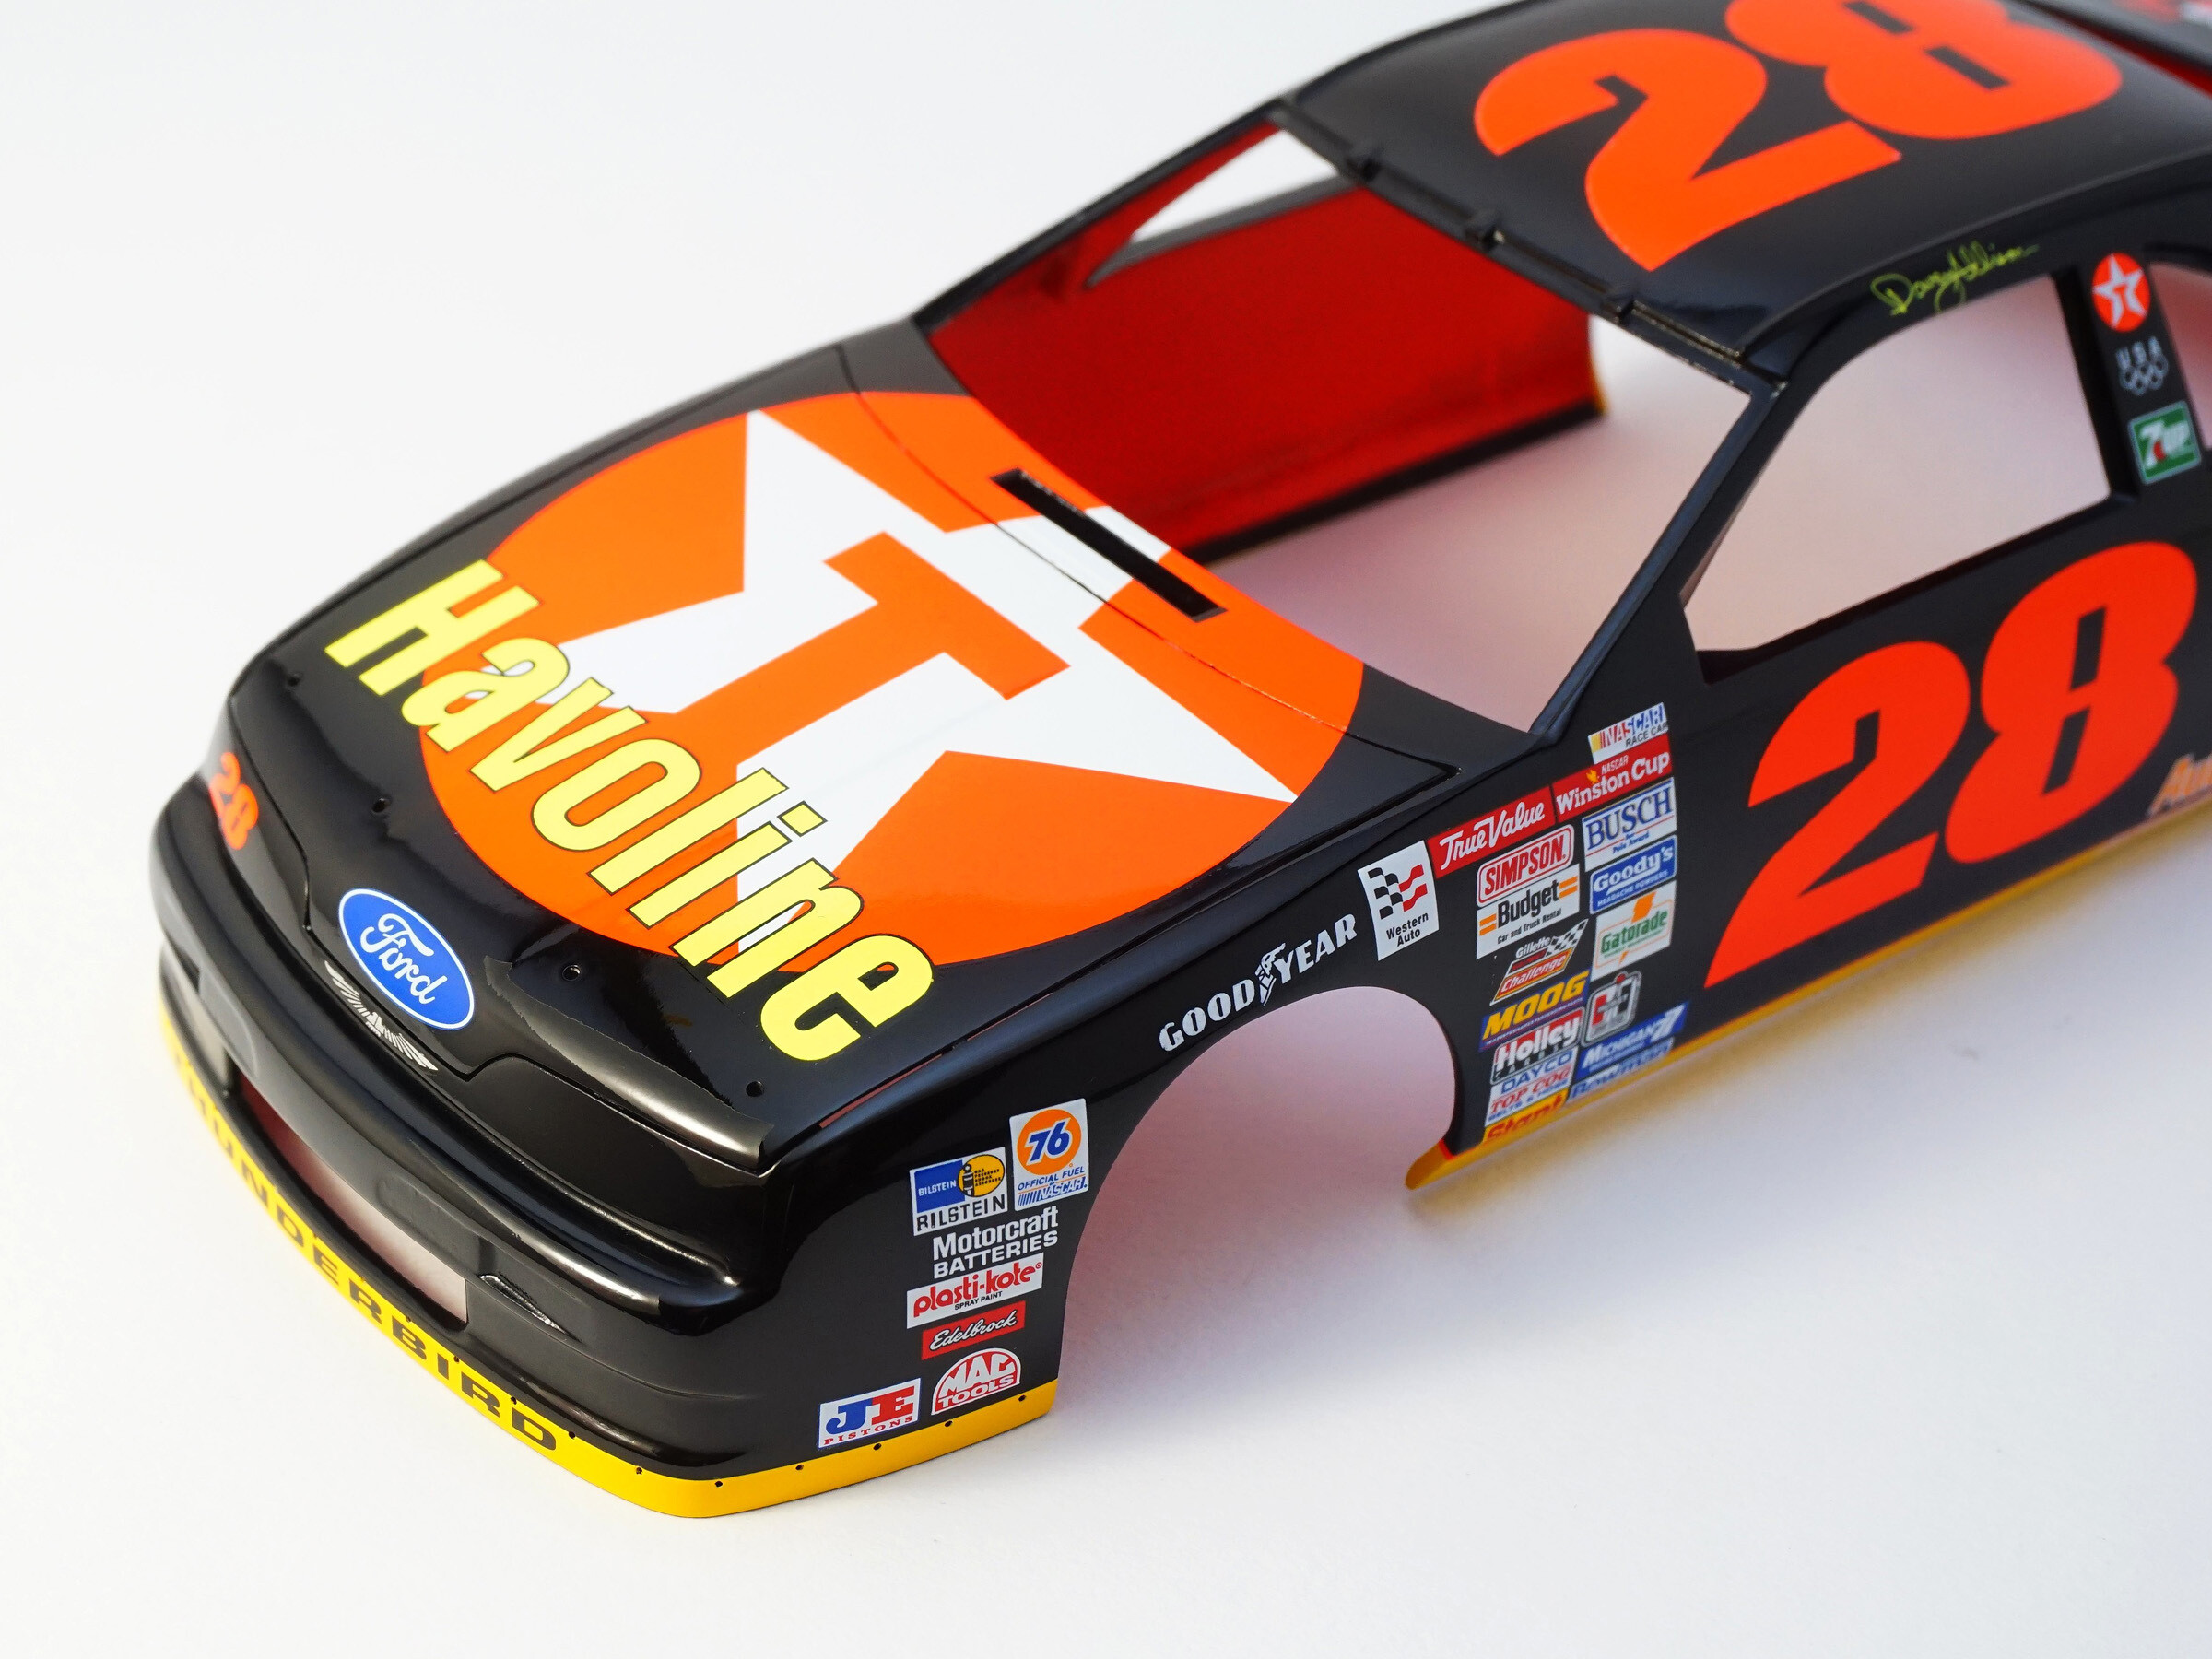
The final effect:
I started working on the Ford body details. First up is the rear spoiler, which, as I've shown before, has new mounting screws, in the form of rivets with a 0,8 mm round head + washer from
SCO -
SCO-R072. Another detail you might want to pay attention to is the fuel tank vent.
Front bumper mounting bolts - for this purpose I used 0,8 mm
SCO-R062 cone rivets from
SCO. The excellent hood clips are
SCO-R076.
Next extra detail is mesh from Tamiya for the radiator air intake. PE parts from The Model Car Garage - Stock Car Grill and Duct Works. It wasn't easy because in my opinion the PE parts were overscaled and I had to put a lot of effort to fit them to my ford, although I'm happy with the result.
Update 6 | 11.05.2025
The next stage of work will focus on the model's chassis and all its components. The floor plate is constantly being folded and disassembled in order to fit the parts properly and determine the assembly order of the individual elements.
All elements of the interior, engine and drive system require changes or overwork. The first thing I focused my attention on was the seat.
The whole process took three days of work - reshaping, drilling, painting, wash and putting on safety belts with buckles.
I used the following paints:
- Rear of the seat - Silver 11 Humbrol + TS-13 Clear Tamiya
- Front of the seat - TS-46 light sand Tamiya, Crimson 20 Humbrol for side straps, Black Matt 33 Humbrol for side parts of the seat.
- Seatbelt buckles - Silver 11 Humbrol
Wasch was made using the Tamiya Weathering Master Set A, to get the depth of texture of the material with which the real seat was covered. I made the necessary corrections with acrylic black matt from Revell. To get a uniform matte surface of the material on the seat, I painted the whole thing with Humbrol 49 Clear Matt Spray Varnish.
Racing seatbelt buckles -
SCO-R020
The material for the belts comes from Belkits and Beemax.
The next task was to modify the fuel tank.
The fuel tank, which was once a monolithic element, now consists of 23 parts.
Here is a list of materials and accessories:
- Rivets 0,8 mm
SCO-R072 from SCO
- Hose joints
SCO-R059 from SCO
- Stock Car Fuel Inlet and Overflow Louver Plates from The Model Car Garage
- Fuel filler hose made of pen refill
- Fuel tank vent hose fitted from silicone tube
- 0,6 mm fuel hose from Top Studio
Work on the V8 began with a standard check of the fit of engine parts.
Painting of engine block and gearbox.
I drilled cylinder head to lead wires to spark plugs. I reworked the ignition dome and now it has spark plug wires. In addition, I modified the carburetor by adding hose joints V.1 -
SCO-R006 from SCO. I also put in a new fuel pump because the original one was too small to connect fuel lines to it.
I did everything I could to pull out some reasonable look from this V8. I had to modify the oil pump to make everything fit together. Additional parts come from SCO and Top Studio, e.g. 0,6 mm wires -
SCO-A001
The V8 is almost complete. Exhaust manifolds in place. I painted them with TS-42 and then washed them using Tamiya Weathering Master Set B/C to get the burnt metal effect.
Because in the original model the exhausts were directed to both sides of the car, I had to modify them and point them only in one direction (driver's side). So I removed most of the original exhaust and made my own using 3,0 mm diameter aluminum tubes.
I painted the exhaust pipes using Humbrol Aluminium Metallic 56 and also treated them with Tamiya Weathering Master Set B and C and then I painted the whole thing with Humbrol 49 Matt Varnish Spray Paint.
The next step is to paint the chassis to red.
Due to the fact that the chassis is already painted, I could focus on the details of the Ford interior.
In addition to the parts from the box, i.e. the gear stick and pedals, I also made a footrest and a box with switches.
I made the footstool from ABS plastic sheets cut to size. Mounting bolts are SCO rivets 0,8 mm -
SCO-R023.
Box with switches I made it from some useless element from another model.
Work on ignition boxes. The materials used are ABS plastic sheet as a panel to which I attached the parts from SCO:
I removed the original suspension mounting bolts and replaced them with SCO bolts - Hexagonal bolts V.1 -
SCO-R004.
I also did a few works on the car suspension and painting details in the engine compartment.
Work on oil tank cover. I realize this isn't the perfect lid shape, but it's what I managed to do. I also converted the floor pan from 80s spec to 90s spec. I made the cover from a Porsche 911 GT2 battery. I put mounting boltss on the lid of the cover, for this purpose I used rivets 0,7 mm
SCO-R067 by SCO. Hose joints is also a SCO product -
SCO-R059.
I made the imitation of the air supply pipe from a 1,7 mm tube wrapped with 0,4 mm wire.
Rear section of the Ford interior almost completed. Fuel tank in place. In addition, I made a fuel filter from an aluminum tube, ABS plastic sheet and SCO hose joints V.1 and V.2.
Fragmented trunk floors blinded with ABS plastic sheets cut to size. In the middle section of the interior, I have installed a fire extinguisher with a hose. Fuel line also in place.
Dry sump oil tank.
I do realize that this is not how the oil tank in this car should look like... In fact, the tank should be completely exposed. Additionally, I did a few tests of mounting the rear suspension and exhaust system.
Differential, drive shaft and diff radiator.
Additional parts:
Top Studio 0,6 mm wires
Radiator made of ABS plastic sheets cut to size and PE parts from Subaru Impreza WRC 2001.
Rear suspension, differential and brakes ready to assemble!
Rear suspension, differential and brakes in place. Another game changer is to wash the chassis. For this purpose I used Revell Weathering Set with 6 Pigments set.
V8 engine, drive shaft and exhaust in place!
Update 8 | 22.08.2025
Both radiators have been heavily modified, otherwise I would not be able to connect the hose to them. In addition, the oil cooler has a new front made of PE parts.
Additional parts:
SCO 0,6 mm wires (SCO-A001)
SCO Hose joints V.2 (SCO-R059)
0,6 mm wires from Top Studio
The engine is almost finished. All wires and cables are already in place and connected. I made a coolant expansion tank (with wires) using an aluminum tube and parts from SCO. Another addition is an oil filter (with wires) also made of a tube and SCO parts. I also made additional piping for the engine compartment. In general, there is no part that I have not changed or modified in some way.
Preparations for the front suspension upgrade. After painting individual parts and installing SCO bolts, I have the impression that the suspension has come to 'life'. Small details make a huge difference.
The additional parts from
SCO:
Brakes (NASCAR type V.2) (SCO-R054)
Hexagonal bolts V.4 (SCO-R057)
Hexagonal bolts V.6 (SCO-R058)
Front suspension and brakes in place. Aditional air scoops for brake cooling done!
I made them using 1,3 mm wire wrapped with 0,6 mm SCO red wire. Bumper intake connectors made from 3,20 mm tubes.
Another addition is the radiator air intake cover that directs the airflow directly to the radiator. I made the parts from ABS plastic.
Additionally, I tests the wheel.
Return to work on the interior of the Ford. Dashboard, steering column and steering wheel done. The steering column has been changed and replaced with an aluminum tube. I placed a button on the steering wheel for turning on the radio made from 0,6 mm rivets (low flat head) from SCO. Wire from the radio switch made of 0,18 mm wire.
I made another vacuum cleaner pipe - that's how I jokingly call it - the pipe that directs air to cool the differential cooler under the car.
I made it using 1,3 mm wire wrapped with 0,6 mm SCO black wire. I made the base from ABS plastic sheet, additionally adding 0,7 mm rivets (round head + washer) also by SCO.
First element of the roll cage done. Besides painting, I made the additional missing elements for the cage, protective sponges, and electrical cables running to the battery.
I added the missing bars to make the model correct to the 1992 specification. More sponges and a T-handle that starts the fire extinguisher in case of fire.
Interior and engine done! Air filter in its place, rear shelf installed and I also did the last air duct hose. I have to admit that it cost me more effort and time than I initially thought. But at the end of the day I think it was worth it!
Now that the chassis is almost finished, I could focus on the missing elements such as the window net. I made using 1,0 mm thick masking tape that I painted black. Additionally, I used a piece of metal and a seat belt buckle from the Hasegawa model.
The last detail of the chassis was to make the jacking points. Now the model was ready to connect the bodywork to the chassis.
The modeling process is complete!
I am currently focusing on the final gallery, which will be fully available soon.
Author | Krzysztof Szpakowski